Video Games Development

Unity – Physics 3D – Basics

Unity – Physics 3D – Basics

Videogames Development – Unity – How to add Physics 3D

ADD PHYSICS

Setup the Physics 3D engine

MAIN TOP MENU> Edit> Project Settings> Physics> Inspector> Gravity (default: T=-9.81 ms2)

Create a Sphere over a Box, the Sphere will fall and will collide overe the box

1. Hierarchy> select Sphere
2. MAIN TOP MENU> Component> Physics> Rigidbody
3. Hierarchy> select Sphere> Inspector> Rigidbody> setup parameters
4. Hierarchy> select Sphere> Inspector> ‘Add Component Button’> Physics> Mesh Collider
5. Hierarchy> select Sphere> Inspector> Mesh Collider> setup parameters

6. TOP CENTER> click over ‘Play’ button, the Sphere will fall
7. TOP CENTER> click over ‘Play’ button, to stop simulation

8. Hierarchy> select Box
9. MAIN TOP MENU> Component> Physics> Box Collider
10. Hierarchy> select Box> Inspector> Box Collider> setup parameters

11. MAIN TOP MENu> Assets> Create> Physics Material
12. ‘Assets’ window> select New Physics Material> Inspector> setup Friction / Bounciness

13. Hierarchy> select Sphere> Mesh Collider> Material> New Physics Material, assign material
14. Hierarchy> select Box> Box Collider> Material> New Physics Material, assign material

15. TOP CENTER> click over ‘Play’ button, now there is collision
16. TOP CENTER> click over ‘Play’ button, to stop simulation

Colliders

Inspector> ‘Add Component’> Physics

– Box Collider
– Sphere Collider
– Capsule Collider

– Mesh Collider

– Whell Collider

– Terrain Collider

COMPLEX MESH

To simulate Physic with complex mesh you can:

– use a group of simple colliders to simulate the shape (Create a group using parent-child features inside Hierarchy)
– use a low resolution mesh + Mesh Collider

MESH COLLIDER DOES NOT WORK!

The collide engine uses the polygon face normals to simulate collisions. To revert normal try:

Hierarchy> Select mesh> Mesh Collider> check ‘Convex’, re-simulate

Rigid Bodies Properties

Inspector> Rigidbody

Mass: maggiore massa, minore reazione alla collisione

Drag: resistenza al movimento, maggiore resistenza, più velocemente arriva allo stato di quiete

Angular Drag: resistenza angolare al movimento, maggiore resistenza, più velocemente arriva allo stato di quiete

Use Gravity: you can setup gravity MAIN TOP MENU> Edit> Project Settings> Physics> Gravity
– default: Y= -9.81 ms2
– platform: low gravity it is great!
– special effects: add agravity in X or Z

Is Kinematic: se è selezionato, l’oggetto può essere manipolato con muovi-ruota-scala, influenza la fisica degli altri oggetti ma la fisica non lo influenza. Un esempio di oggetto ‘Is Kinematic’ è la racchetta del gioco PONG o di BREAKOUT. Questo oggetto NON forza il ricalcolo della fisica ad ogni frame.

Interpolate:
– None (default)
– Interpolate: smussa il movimento in base al frame precedente
– Extrapolate: smussa il movimento in base al frame previsto successivo

Collision Detection:
– Discrete (default)
– Continuos: it is for fast moving objects that are interacting with static geometry
– Continuos Dynamic: it is for fast moving objects that are interacting with other dynamic objects

Constraints:
Blocca la rotazione o la posizione di un oggetto durante una reazione alla fisica. Ad esempio per un TETRIS i tasselli possono cadere, impilarsi ma non ruotare.
– Position XYZ
– Rotation XYZ

By |Unity3D|Commenti disabilitati su Unity – Physics 3D – Basics

UNITY – Cameras

UNITY – Cameras

Create a Camera

1. MAIN TOP MENU> GameObjects> Create Other> Camera

2. Hierarchy> Main Camera> Inspector

– Projection: Perspective (3D Games) / Orthographic (2D Games and Isometric)

– Clipping Planes: Near / Far (to optimize rendering performance)

– Field of View (zoom)

– Background: BG color / Skybox (MAIN TOP MENU> Edit> Rendering> Skybox)

– Culling Mask: (to render only some layers)

Multiple Camera – Picture in Picture

1. Create the second Camera with different point of view

2. Select the Main Game Camera> Inspector> Camera> Clear Flags> Depth only

3. Select the secondary Camera> Inspector> Camera> Clear Flags> Depth only

By |Unity3D|Commenti disabilitati su UNITY – Cameras

UNITY – Add 3D Lights

UNITY – Add 3D Lights

Ambient Light

MAIN tOP MENU> Edit> Render Settings> Ambient Light

Dynamic Light – Realtime

MAIN TOp MENU> GameObject> Create Others>

– Directional light -> sun

– Point Light -> bulb lamp

– Spot Light -> spot light

Hierarchy> Select the light> Inspector:

– Color

– Intensity

– Cookie: you can create a pattern of shadow with the alpha channel of a Texture

– Shadows: No / Hard / Soft

– Halo
-> può essere sostituito da ‘Add Component’> Effects> Halo, poi deselezionare il vecchio “Draw Halo” assegnato di default

– Flare: click over the small icon on the right> Assets> select a Flare
-> può essere sostituito da ‘Add Component’> Effects> Flare> click over the small icon on the right> Assets> select a Flare, poi svuotare lo slot del vecchio “Flare” assegnato di default
To render Flare Component you need Hierarchy> select Camera> ‘Add Component’> Rendering> Flare Layer

Backed Light – Pre Render and Baked over textures

ONLY BACKED LIGHT:

– MAIN TOP MENU> GameObject> Create Others> Area Light

– Shaders> Self Illumination

Render Mode

– Vertex Lighting
-> fastest
-> it interpolare lighting over the surface of the mesh
-> it NOT allow Normal mapping / Light Cookies / Real Time Shadows

– Per pixel Lighting
-> best quality
-> it calculate lighting in every screen pixel
-> it allow Normal mapping / Light Cookies / Real Time Shadows

Setup:

MAIN TOP MENU> Edit> Project Settings> Quality> Pixel Light Count, maggiore valore, maggiore qualità, minore velocità di rendering

Hierarchy> select Light> Inspector> Render Mode> Important (Per pixel Lighting) / Not important (Vertex Lighting)

By |Unity3D|Commenti disabilitati su UNITY – Add 3D Lights

Unity – Import 3D Meshes

Unity – Import 3D Meshes

Import Static Mesh

1. File> New Project> Create New Project> 3D

2. ON THE TOP RIGHT ‘Layout’> 4 Split (it is best for 3D Object manipulation)

3a. Assets> Import New Asset> select the 3D Mesh
The assets has the same name of the loaded file

3b. Assets> Import New Asset> select the bitmap Texture

4. Project window> Assets> DRAG AND DROP the 3D Mesh over Scene window

AT THE MOMENT, YOU MUST NOT RESIZE, EVEN IT APPEARS SMALL IN THE WINDOW

THE MOST IMPORTANT 3D FORMAT SUPPORTED:

– OBJ
– FBX

THE MOST IMPORTANT TEXTURE FORMAT SUPPORTED:

– PSD (single or multi layered)
– PNG (with transparency)
– JPG (JPG format does not support transparency)

Setup

5. Select the 3D Mesh> Inspector> ‘Add Component’> Mesh Filter

6. Select the 3D Mesh> Inspector> ‘Add Component’> Mesh Renderer

NOTICE: Mesh Filter sends data to Mesh Renderer

7. Select the Mesh inside Hierarchy> Inspector> Mesh Filter> Assign Mesh> select the Mesh, it has the SAME NAME of 3DS MAX object name

8. Select the Mesh inside Hierarchy -> Inspector> Mesh Renderer> Materials> Select a Material
it has the SAME NAME of 3DS MAX bitmap texture map

9. Assets> Materials> select Material> Texture> select the Texture

10. First you must resize the Preview window to work better

11. Assets> select Texture> Inspector> Texture Type:

– Texture
– Normal Map
– GUI
– Sprite
– Cursor
– Reflection
– Cookie
– LightMap
– Advanced

Quality:

– Filter Mode
– Aniso Level

Optimization:

optimization for pc / mobile etc…

NOTICE:

the optimization setup does not change original file
– Unity can load Photoshop Layered Files, every change inside Unity does not change yhe original file. You can work with Photoshop and in the same time see texture changes inside Unity!

By |Unity3D|Commenti disabilitati su Unity – Import 3D Meshes

Unity – Input.GetAxis – Movement Behaviour

Unity – Input.GetAxis – Movement Behaviour

MOVEMENT BEHAVIOUR

NOTICE:
-> Input.GetKey e Input.GetButton -> return a BOOLEAN VALUE true or false
-> Input.GetAxis of keyboard and joystik -> return a VALUE from 1 to -1

The value will be in the range -1…1 for keyboard and joystick input. If the axis is setup to be delta mouse movement, the mouse delta is multiplied by the axis sensitivity and the range is not -1…1.

1. Create virtual Axes and buttons can be created in: MAIN TOP MENU> Edit> Project Settings> Input.

2. Setup Virtual Axis from right column.

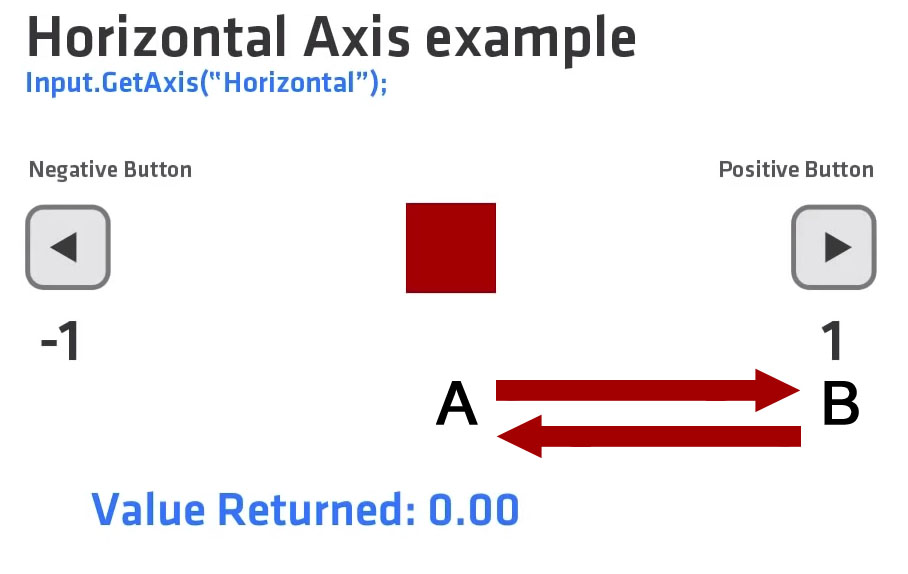
unity-geyaxis

How does it works:
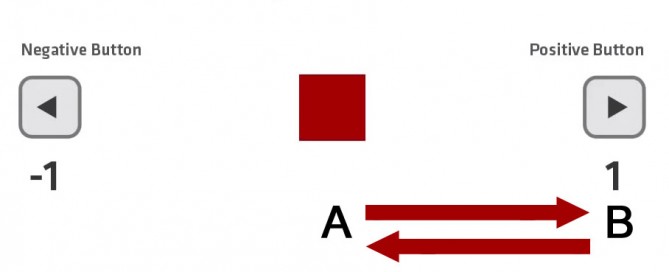
1. A position, the joy is not being pressed -> value returned 0.00
2. When we first press the key, in the first frame -> value returned is 0.01
3. We progress througth frames holding down the button (mantengo premuto) -> value returned increase
4. Holding down the button at the end -> value returned is 1
5. We release the button, in the first frame -> value returned is 0.99
6. We progress througth frames (button is released) -> value returned decrease
7. At the end -> value returned 0.00

Parameters of MAIN TOP MENU> Edit> Project Settings> Input> Horizon:

– Setup Axis
Positive Button: right ()

– Assign buttons:
Alt Positive Button: d
End users can configure Keyboard input in a nice screen configuration dialog

– Gravity, how fast the scale return to 0 after the button has been released (B -> A)
> gravity > fast return
< gravity < fast return 0.1: slow 3 : default 100: fast - Sensitivity, how fast the scale reaches 1 (A -> B) – unity x seconds
> sensitivity > responsive > fast
< sensitivity < resposnsive < fast 0.1: slow 3 : default 100: fast - Dead (to prevent unwanted little joystick movement) > dead zone < joystick sensibility < dead zone > joystick sensibility

– Snap
If enabled, the axis value will be immediately reset to zero after it receives opposite inputs. Only used when the Type is key / mouse button.

3. DRAG AND DROP the script over an object in the Hierarchy
Example: move an object using GetAxis – Horizontal

#pragma strict

function Start () {

}

function Update () {

 var horiz : float = Input.GetAxis("Horizontal");
 Debug.Log(horiz);
 transform.Translate(Vector3(horiz,0,0));
}

Statement: static function GetAxis(axisName: string): float;
axisName -> Virtual Axes names

Horizontal and Vertical Control – Complete Example

#pragma strict

function Start () {

}

var speed : float = 10.0; // to change speed

function Update () {

 var horiz : float = Input.GetAxis("Horizontal");
 var vert : float = Input.GetAxis("Vertical");

 // Make it move 10 meters per second instead of 10 meters per frame...
 horiz *= Time.deltaTime;
 vert *= Time.deltaTime;
 
 transform.Translate(Vector3(horiz*speed,vert*speed,0));
}
By |Unity3D|Commenti disabilitati su Unity – Input.GetAxis – Movement Behaviour