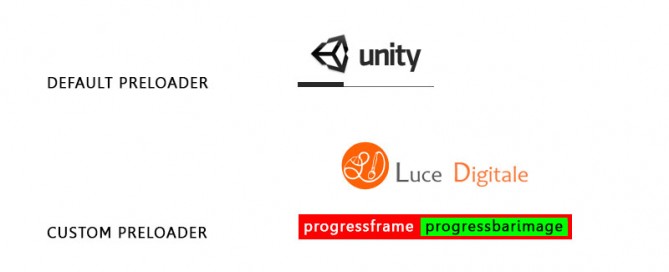
Unity 3D Game Engine 4.x – Custom Web Player Preload
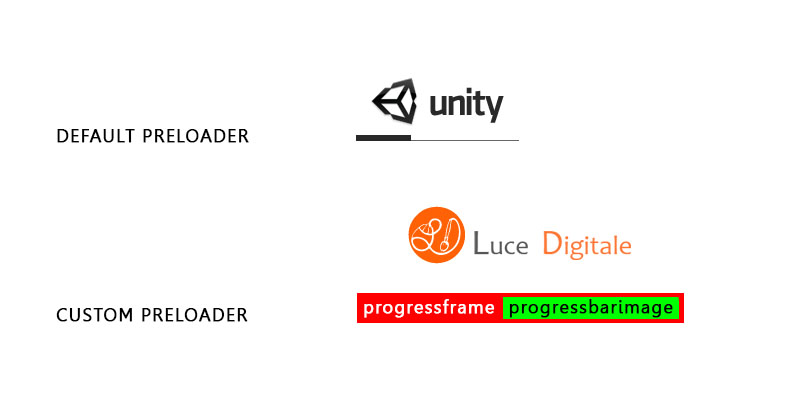
Unity 3D Game Engine 4.x – Custom Web Player Preload

unity3d-custom-preloader

Inside your Build folder you have:

– space_shooter.html
– space_shooter.unity3d

Copy here:

– MyLogo.png
– MyProgressBar.png
– MyProgressFrame.png

MyLogo
MyProgressBar
MyProgressFrame

Open space_shooter.html and add:

// Customizing the Unity Web Player START
// Copy png images in the same folder of this html and .unity3d file
var params = {
        backgroundcolor: "A0A0A0",
        bordercolor: "000000",
	textcolor: "FFFFFF",
	logoimage: "MyLogo.png",
	progressbarimage: "MyProgressBar.png",
	progressframeimage: "MyProgressFrame.png"
	};
// Customizing the Unity Web Player END

Remove…

var u = new UnityObject2(config);

… and replace with:

var u = new UnityObject2({ params: params });			

How does it work?
Easy! It create an array of parameters – var params = … – and pass them to UnityObject2 constructor.

Complete Code sample:

DEFAULT PLAYER:


<!DOCTYPE html PUBLIC "-//W3C//DTD XHTML 1.0 Strict//EN" "http://www.w3.org/TR/xhtml1/DTD/xhtml1-strict.dtd">
<html xmlns="http://www.w3.org/1999/xhtml">
	<head>
		<meta http-equiv="Content-Type" content="text/html; charset=utf-8">
		<title>Luce Digitale | Space Shooter</title>
		<script type='text/javascript' src='https://ssl-webplayer.unity3d.com/download_webplayer-3.x/3.0/uo/jquery.min.js'></script>
		<script type="text/javascript">
		<!--
		var unityObjectUrl = "http://webplayer.unity3d.com/download_webplayer-3.x/3.0/uo/UnityObject2.js";
		if (document.location.protocol == 'https:')
			unityObjectUrl = unityObjectUrl.replace("http://", "https://ssl-");
		document.write('<script type="text\/javascript" src="' + unityObjectUrl + '"><\/script>');
		-->
		</script>
		<script type="text/javascript">
		<!--
			var config = {
				width: 600, 
				height: 900,
				params: { enableDebugging:"0" }
				
			};
			var u = new UnityObject2(config);

			jQuery(function() {

				var $missingScreen = jQuery("#unityPlayer").find(".missing");
				var $brokenScreen = jQuery("#unityPlayer").find(".broken");
				$missingScreen.hide();
				$brokenScreen.hide();
				
				u.observeProgress(function (progress) {
					switch(progress.pluginStatus) {
						case "broken":
							$brokenScreen.find("a").click(function (e) {
								e.stopPropagation();
								e.preventDefault();
								u.installPlugin();
								return false;
							});
							$brokenScreen.show();
						break;
						case "missing":
							$missingScreen.find("a").click(function (e) {
								e.stopPropagation();
								e.preventDefault();
								u.installPlugin();
								return false;
							});
							$missingScreen.show();
						break;
						case "installed":
							$missingScreen.remove();
						break;
						case "first":
						break;
					}
				});
				u.initPlugin(jQuery("#unityPlayer")[0], "space_shooter.unity3d");
			});
		-->
		</script>
		<style type="text/css">
		<!--
		body {
			font-family: Helvetica, Verdana, Arial, sans-serif;
			background-color: white;
			color: black;
			text-align: center;
		}
		a:link, a:visited {
			color: #000;
		}
		a:active, a:hover {
			color: #666;
		}
		p.header {
			font-size: small;
		}
		p.header span {
			font-weight: bold;
		}
		p.footer {
			font-size: x-small;
		}
		div.content {
			margin: auto;
			width: 600px;
		}
		div.broken,
		div.missing {
			margin: auto;
			position: relative;
			top: 50%;
			width: 193px;
		}
		div.broken a,
		div.missing a {
			height: 63px;
			position: relative;
			top: -31px;
		}
		div.broken img,
		div.missing img {
			border-width: 0px;
		}
		div.broken {
			display: none;
		}
		div#unityPlayer {
			cursor: default;
			height: 900px;
			width: 600px;
		}
		-->
		</style>
	</head>
	<body>
		<p class="header"><span>Se è la prima volta che si gioca | </span>Installare il plugin richiesto, chiudere e riavviare il browser</p>
		<div class="content">
			<div id="unityPlayer">
				<div class="missing">
					<a href="http://unity3d.com/webplayer/" title="Unity Web Player. Install now!">
						<img alt="Unity Web Player. Install now!" src="http://webplayer.unity3d.com/installation/getunity.png" width="193" height="63" />
					</a>
				</div>
				<div class="broken">
					<a href="http://unity3d.com/webplayer/" title="Unity Web Player. Install now! Restart your browser after install.">
						<img alt="Unity Web Player. Install now! Restart your browser after install." src="http://webplayer.unity3d.com/installation/getunityrestart.png" width="193" height="63" />
					</a>
				</div>
			</div>
		</div>
		<p class="footer">&laquo; avaiable on <a href="http://www.lucedigitale.com" title="Luce Digitale">www.lucedigitale.com</a> &raquo;</p>
		</body>
</html>

CUSTOM PLAYER:


<!DOCTYPE html PUBLIC "-//W3C//DTD XHTML 1.0 Strict//EN" "http://www.w3.org/TR/xhtml1/DTD/xhtml1-strict.dtd">
<html xmlns="http://www.w3.org/1999/xhtml">
	<head>
		<meta http-equiv="Content-Type" content="text/html; charset=utf-8">
		<title>Luce Digitale | Space Shooter</title>
		<script type='text/javascript' src='https://ssl-webplayer.unity3d.com/download_webplayer-3.x/3.0/uo/jquery.min.js'></script>
		<script type="text/javascript">
		<!--
		var unityObjectUrl = "http://webplayer.unity3d.com/download_webplayer-3.x/3.0/uo/UnityObject2.js";
		if (document.location.protocol == 'https:')
			unityObjectUrl = unityObjectUrl.replace("http://", "https://ssl-");
		document.write('<script type="text\/javascript" src="' + unityObjectUrl + '"><\/script>');
		-->
		</script>
		<script type="text/javascript">
		// Customizing the Unity Web Player START
		// Copy png images in the same folder of this html and .unity3d file
		var params = {
			backgroundcolor: "A0A0A0",
			bordercolor: "000000",
			textcolor: "FFFFFF",
			logoimage: "MyLogo.png",
			progressbarimage: "MyProgressBar.png",
			progressframeimage: "MyProgressFrame.png"
		};
		// Customizing the Unity Web Player END
		<!--
			var config = {
				width: 600, 
				height: 900,
				params: { enableDebugging:"0" }
				
			};
			// Remove default settings -> var u = new UnityObject2(config);
			// Replace with custom settings START
			var u = new UnityObject2({ params: params });
			// Replace with custom settings END

			jQuery(function() {

				var $missingScreen = jQuery("#unityPlayer").find(".missing");
				var $brokenScreen = jQuery("#unityPlayer").find(".broken");
				$missingScreen.hide();
				$brokenScreen.hide();
				
				u.observeProgress(function (progress) {
					switch(progress.pluginStatus) {
						case "broken":
							$brokenScreen.find("a").click(function (e) {
								e.stopPropagation();
								e.preventDefault();
								u.installPlugin();
								return false;
							});
							$brokenScreen.show();
						break;
						case "missing":
							$missingScreen.find("a").click(function (e) {
								e.stopPropagation();
								e.preventDefault();
								u.installPlugin();
								return false;
							});
							$missingScreen.show();
						break;
						case "installed":
							$missingScreen.remove();
						break;
						case "first":
						break;
					}
				});
				u.initPlugin(jQuery("#unityPlayer")[0], "space_shooter.unity3d");
			});
		-->
		</script>
		<style type="text/css">
		<!--
		body {
			font-family: Helvetica, Verdana, Arial, sans-serif;
			background-color: white;
			color: black;
			text-align: center;
		}
		a:link, a:visited {
			color: #000;
		}
		a:active, a:hover {
			color: #666;
		}
		p.header {
			font-size: small;
		}
		p.header span {
			font-weight: bold;
		}
		p.footer {
			font-size: x-small;
		}
		div.content {
			margin: auto;
			width: 600px;
		}
		div.broken,
		div.missing {
			margin: auto;
			position: relative;
			top: 50%;
			width: 193px;
		}
		div.broken a,
		div.missing a {
			height: 63px;
			position: relative;
			top: -31px;
		}
		div.broken img,
		div.missing img {
			border-width: 0px;
		}
		div.broken {
			display: none;
		}
		div#unityPlayer {
			cursor: default;
			height: 900px;
			width: 600px;
		}
		-->
		</style>
	</head>
	<body>
		<p class="header"><span>Se è la prima volta che si gioca | </span>Installare il plugin richiesto, chiudere e riavviare il browser</p>
		<div class="content">
			<div id="unityPlayer">
				<div class="missing">
					<a href="http://unity3d.com/webplayer/" title="Unity Web Player. Install now!">
						<img alt="Unity Web Player. Install now!" src="http://webplayer.unity3d.com/installation/getunity.png" width="193" height="63" />
					</a>
				</div>
				<div class="broken">
					<a href="http://unity3d.com/webplayer/" title="Unity Web Player. Install now! Restart your browser after install.">
						<img alt="Unity Web Player. Install now! Restart your browser after install." src="http://webplayer.unity3d.com/installation/getunityrestart.png" width="193" height="63" />
					</a>
				</div>
			</div>
		</div>
		<p class="footer">&laquo; avaiable on <a href="http://www.lucedigitale.com" title="Luce Digitale">www.lucedigitale.com</a> &raquo;</p>
		</body>
</html>

By |Unity3D, Video Games Development|Commenti disabilitati su Unity 3D Game Engine 4.x – Custom Web Player Preload

Unity 3D – Game Engine – Responsive and Adaptive Apps

Unity 3D – Game Engine – Responsive and Adaptive Apps

Responsive Web Design (RWD) is a Apps design approach aimed at crafting sites to provide an optimal viewing experience—easy reading and navigation with a minimum of resizing, panning, and scrolling—across a wide range of devices (from mobile phones to desktop computer monitors)

Basics Screen.width and Screen.height

Inside Hierarchy create:

– Main Camera
– GUI Text
– GUI Texture> Inspector> W=200(width pix) H=200(height pix), attach ‘Adaptive.js’

Adaptive.js


#pragma strict

// Hierarchy DRAG E DROP over var GUI Text in Inspector
var scoreTextX : GUIText;
private var screenres  : String;

function Update () {   
        // it will check resolution every frame 
        screenres = Screen.width + " " + Screen.height;                            
        scoreTextX.text = "Screen width & height (pix) "+ screenres;
        }

Hierarchy> GUI Texture> Adaptive.js DRAG AND DROP over public var ‘scoreTextX’ the ‘GUI Text’ game object.

The result on my Samsung SmartPhone (Landscape) is: Screen width & height (pix) 800 480

GUI Texture – Full Screen

Adaptive.js


#pragma strict

// Hierarchy DRAG E DROP over var GUI Text in Inspector
var scoreTextX : GUIText;
private var screenres  : String;

function Update () {   
        // it will check resolution every frame 
        screenres = Screen.width + " " + Screen.height;                            
        scoreTextX.text = "Screen width & height (pix) "+ screenres;
        // Move the object to (0, 0, 0)
	transform.position = Vector3(0, 0, 0); // equal than Inspector> Position X=0 Y=0 Z=0
        guiTexture.pixelInset = new Rect(0f, 0f, Screen.width, Screen.height); // equal than Inspector> W=800 H=480
        }

Notice:
Position X=0 Y=0 Z=0
Inspector> W=800 H=480

GUI Texture – Half Left Screen

Adaptive.js


#pragma strict

// Hierarchy DRAG E DROP over var GUI Text in Inspector
var scoreTextX : GUIText;
private var screenres  : String;

function Update () {   
        // it will check resolution every frame 
        screenres = Screen.width + " " + Screen.height;                            
        scoreTextX.text = "Screen width & height (pix) "+ screenres;
        // Move the object to (0, 0, 0)
	transform.position = Vector3(0, 0, 0);
        guiTexture.pixelInset = new Rect(0f, 0f, Screen.width*0.5, Screen.height);
        }


GUI Texture – Half Right Screen

Adaptive.js


#pragma strict

// Hierarchy DRAG E DROP over var GUI Text in Inspector
var scoreTextX : GUIText;
private var screenres  : String;

function Update () {   
        // it will check resolution every frame 
        screenres = Screen.width + " " + Screen.height;                            
        scoreTextX.text = "Screen width & height (pix) "+ screenres;
        // Move the object 
	transform.position = Vector3(0.5, 0, 0);
        guiTexture.pixelInset = new Rect(0f, 0f, Screen.width*0.5, Screen.height);
        }


GUI Texture – Square – bottom left


#pragma strict

// Hierarchy DRAG E DROP over var GUI Text in Inspector
var scoreTextX : GUIText;
private var screenres  : String;

function Update () {   
        // it will check resolution every frame 
        screenres = Screen.width + " " + Screen.height;                            
        scoreTextX.text = "Screen width & height (pix) "+ screenres;
        // Move the object, these values are fronm 0 to 1 
	transform.position = Vector3(0, 0, 0);
	// Create a square based on Screen.height*0.5 (half of screen height)
        guiTexture.pixelInset = new Rect(0f, 0f, Screen.height*0.5, Screen.height*0.5);
        }

GUI Texture – Square – top left


#pragma strict

// Hierarchy DRAG E DROP over var GUI Text in Inspector
var scoreTextX : GUIText;
private var screenres  : String;

function Update () {   
        // it will check resolution every frame 
        screenres = Screen.width + " " + Screen.height;                            
        scoreTextX.text = "Screen width & height (pix) "+ screenres;
        // Move the object, these values are fronm 0 to 1 
	transform.position = Vector3(0, 0.5, 0);
	// Create a square based on Screen.height*0.5 (half of screen height)
        guiTexture.pixelInset = new Rect(0f, 0f, Screen.height*0.5, Screen.height*0.5);
        }


GUI Texture – Square – center


#pragma strict

// Hierarchy DRAG E DROP over var GUI Text in Inspector
var scoreTextX : GUIText;
private var screenres  : String;

private var btnWidth : int;
private var btnHeight : int;
private var insetX : int;
private var insetY : int;

function Update () {   
        // debug code - it will check resolution every frame 
        screenres = Screen.width + " " + Screen.height;                            
        scoreTextX.text = "Screen width & height(pix) "+ screenres;
        
        // texture size is based on display resolution (pixel)
        btnWidth  = Screen.height*0.5;
        btnHeight = Screen.height*0.5; // if you want change aspect ratio here
        
        // calcolate inset (pixel)
        insetX = -1*(btnWidth/2); // we need negative value (pixel)
        insetY = -1*(btnHeight/2);
        
        // center position X Y (Z is used to create layers of textures (values from 0 to 1)
	transform.position = Vector3(0.5, 0.5, 0);
	// GUI Texture responsive size and position
        guiTexture.pixelInset = new Rect(insetX, insetY, btnWidth, btnHeight);
        }

By |Unity3D, Video Games Development|Commenti disabilitati su Unity 3D – Game Engine – Responsive and Adaptive Apps

Unity 3D Game Engine – Get OS Language

Unity 3D Game Engine – Get OS Language

Inside Hierarchy create a scene with:

1. Main Camera

2. GUI Text, attach the script ‘GetLanguage.js’

GetLanguage.js


#pragma strict

function Start () {
	// Prints to a guiText the actual language that the system is using.
	guiText.text = Application.systemLanguage.ToString();
}

function Update () {

}

NOTICE ToString(); function that converts value to string.

The final result is: Italian

By |Unity3D, Video Games Development|Commenti disabilitati su Unity 3D Game Engine – Get OS Language

Unity 3D Game Engine – Get Screenshot – Desktop

Unity 3D Game Engine – Get Screenshot – Desktop

How to get a in-game Screenshot with Unity 3D

Method 1

Application.CaptureScreenshot

NOTICE: CaptureScreenshot is asynchronous. This is because capturing and saving the screen can take awhile.

Inside Hierarchy create a structure with:

1. Some Objects

2. Main Camera, attach the script ‘GetScreenShot.js’

GetScreenShot.js


#pragma strict

function Start() {
}

function OnGUI()
{
  if (GUI.Button(Rect(10,10,200,50),"Capture Screenshot"))
  { 
    print (Application. persistentDataPath);
    //static function CaptureScreenshot(filename: string, superSize: int = 0): void;
    Application.CaptureScreenshot("Pictures/Screenshot.png");
  }
}


To test it, inside your Project folder create the subfolder /Pictures

Play it, you will find yourProjectFolder/Pictures/Screenshot.png

The console will print: ‘C:/Users/yourusername/AppData/LocalLow/DefaultCompany/Touch_Move’ on Win 7

You can Use persistentDataPath.
The Application.persistentDataPath is different for various platforms (iOS vs Android), and is the /Documents directory, a read-write path where you can put your downloaded stuff

Use the code:


#pragma strict

function Start() {
}

function OnGUI()
{
  if (GUI.Button(Rect(10,10,200,50),"Capture Screenshot"))
  { 
    print (Application. persistentDataPath);
    //static function CaptureScreenshot(filename: string, superSize: int = 0): void;
    Application.CaptureScreenshot(Application.persistentDataPath+"/Frame.png");
  }
}

It will save the image into:
C:/Users/yourusername/AppData/LocalLow/DefaultCompany/Touch_Move/Frame.png

See also:

Method 2

Texture2D.EncodeToPNG

Reference: http://docs.unity3d.com/Documentation/ScriptReference/Texture2D.EncodeToPNG.html

Encodes this texture into PNG format.


        // Saves screenshot as PNG file.
	import System.IO;
	// Take a shot immediately
	function Start () {
		UploadPNG ();
	}
	function UploadPNG () {
		// We should only read the screen buffer after rendering is complete
		yield WaitForEndOfFrame();
		// Create a texture the size of the screen, RGB24 format
		var width = Screen.width;
		var height = Screen.height;
		var tex = new Texture2D (width, height, TextureFormat.RGB24, false);
		// Read screen contents into the texture
		tex.ReadPixels (Rect(0, 0, width, height), 0, 0);
		tex.Apply ();
		// Encode texture into PNG
		var bytes = tex.EncodeToPNG();
		Destroy (tex);
		// For testing purposes, also write to a file in the project folder
		// File.WriteAllBytes(Application.dataPath + "/../SavedScreen.png", bytes);

		// Create a Web Form
		var form = new WWWForm();
		form.AddField("frameCount", Time.frameCount.ToString());
		form.AddBinaryData("fileUpload",bytes);
		// Upload to a cgi script
		var w = WWW("http:/localhostcgi-bin/env.cgi?post", form);
		yield w;
		if (w.error != null) {
			print(w.error);
		} else {
			print("Finished Uploading Screenshot");
		}
	}

By |Unity3D, Video Games Development|Commenti disabilitati su Unity 3D Game Engine – Get Screenshot – Desktop

Unity 3D Game Engine – JavaScript – Point and Click Movement – No NavMesh

Unity 3D Game Engine – JavaScript – Point and Click Movement – No NavMesh

– UNTESTED –

Create a Sphere (the player) and assign:

PropertiesAndCoroutines.js


#pragma strict

public var smoothing : float = 7f;
private var target : Vector3;

function  SetTarget(value : Vector3)
{
    target = value;
        
    StopCoroutine("Movement");
    StartCoroutine("Movement", target);
}

function Movement (target : Vector3)
{
    while(Vector3.Distance(transform.position, target) > 0.05f)
    {
        transform.position = Vector3.Lerp(transform.position, target, smoothing * Time.deltaTime);
        
        yield;
    }
}

Create a Plane (the ground) and assign:

ClickSetPosition.js


#pragma strict

public var coroutineScript : PropertiesAndCoroutines; // richiama lo script sopra
    

function OnMouseDown ()
{
    var ray : Ray = Camera.main.ScreenPointToRay(Input.mousePosition);
    var hit : RaycastHit;
    
    Physics.Raycast(ray, hit);
    
    if(hit.collider.gameObject == gameObject)
    {
        var newTarget : Vector3 = hit.point;
        // invia il parametro target allo script PropertiesAndCoroutines        
        coroutineScript.SetTarget(newTarget); 
    }
}

Come funziona?

1. ClickSetPosition.js
– al click il RayCast, calcolato da Camera.main definisce un valore Vector3 XYZ di posizione
– il valore viene mandato alla Coroutine con coroutineScript.SetTarget(newTarget)

2. PropertiesAndCoroutines.js
– riceve il valore XYZ
– ferma la Couroutine, se l’oggetto si sta muovendo viene arrestato
– avvia di nuovo la Courotine, l’oggetto si sposterà verso la nuova destinazione.

By |Unity3D, Video Games Development|Commenti disabilitati su Unity 3D Game Engine – JavaScript – Point and Click Movement – No NavMesh