3DS MAX – Biped to Unity Game Engine

3DS MAX – Biped to Unity Game Engine

Rigging a character using Biped and Skin in 3DS Max, animate and export it to Unity Game Engine.

Scene Setup

1. Setup the units using the parameters in the link below:

http://www.lucedigitale.com/blog/3ds-max-micro-reference-manual-unit-setup-interiors/

2. Create and animate a mesh with Biped + Skin Modifier.
You have not to use ‘Physique Modifier’ because ‘Skin Modifier’ has best support in FBX format.

3. Select the mesh and give it a name, this name will be the name of ‘Mesh’ component inside Unity

FBX Export

4. Select the mesh> MAIN TOP LEFT BUTTON> File> Export> Export Selected> FBX> give it a name, it will be the name of the Asset inside Unity.

FBX Export setup:

>Geometry
check TurboSmooth
check Convert Deforming Dummies to Bones
check Preserve edge orientation

>Animation
check Animation

>Deformations
check Deformations
check Skins
check Morphs

>Unroll Rotations
check Follow Y-Up

>Scale Factor
check Automatic (1 unity = 1 3DSMax meter)

>Axis Conversion
Up Axis = Y-up

>FBX File Format
Type: Binary
Version: FBX 2013

Unity – Import

1. Open Unity> MAIN TOP MENU> Assets> Import New Asset…> select the .FBX file

2. Project> the new Asset (the blue box icon) with the .FBX file name> DRAG AND DROP into Viewport the blue box icon

You will see:

Viewport>

1 unity = 1 3DSMax meter

Project>

Asset blue box icon (file name)
-> Inspector> Rig> Animation Type: Generic> ‘Apply’ button
-> Model> Scale Factor: 0.01 (the original 3DSMax scene was in centimeters), resize if you need> ‘Apply’ button
-> Animations> + or – to cut Takes, Loop Time
– Mesh
– Take 001 (the animation)
– Avatar
– Bip001
– Material

Hierarchy>

Asset (file name) -> Transform + Animator
– Bip001
— Bip001 Pelvis
— Bip001 Spine -> Transform, you can re-animate bones with the transform tools!
— …
– Mesh -> Transform + Skinned Mesh Renderer + Material

Unity – Apply Animation

1. Projects> RMB> Create> Animator Controller> name it ‘PlayerAnimator’

2. MAIN TOP MENU> Window> Animator

3. Project> Take 001 DRAG AND DROP into Animator window, ‘Take 001’ turn in yellow because it is the default animation

4. Project> Animator Controller ‘PlayerAnimator’ DRAG AND DROP into Hierarchy> Asset (file name)> Animator> Controller

5. MAIN TOP BUTTON ‘Play’

Unity – Multiple Takes

Solution one

1. Inside 3DSMax you can create multiple animations inside timeline, example

a. frame 0-25 walk
b. frame 26-50 run
c. frame 51-100 die

2. File> Export Selected> FBX

FBX Export setup:

>Bake Animation
check Bake Animation
Start: 0 – End: 25

Save as walk.fbx

3. Unity> MAIN TOP MENU> Assets> Import New Asset…> walk.fbx

Project> you will find the Take001 animation of 1-25

Repeat the operation for all the takes you need.

Solution two

1. Inside 3DSMax you can create multiple animations inside timeline, example

a. frame 0-25 walk
b. frame 26-50 run
c. frame 51-100 die

2. File> Export Selected> FBX

FBX Export setup:

>Bake Animation
check Bake Animation
Start: 0 – End: 100

Save as walk.fbx, alla animations will be stored in a single file.

3. Unity> MAIN TOP MENU> Assets> Import New Asset…> walk.fbx

Project> select the new Asset (blue box icon)> Inspector> Animations> Clips use + or – to cut the Take using the procedure below:

a. + icon
b. Give the name
c. setup ‘Start’ ‘End’
d. ‘Apply’ button

Repeat the operation for all the takes you need.

Project> you will find the Take001 animation of 1-25 – Take002 etc…

By |Unity3D, Video Games Development|Commenti disabilitati su 3DS MAX – Biped to Unity Game Engine

Unity – Performance Test

Unity – Performance Test

Sometimes you need a benchmarks and system performance tests.

1. File> Open Project…> open your project
2. MAIN TOP MENU> Window> Profiler
3. MAIN TOP Play button to run the game

Now you can see inside Profiler Window:
– CPU Usage
– GPU Usage
– Rendering
– Memory
– Audio
– Physics
– Physics (2D)

By |Unity3D, Video Games Development|Commenti disabilitati su Unity – Performance Test

Unity 2D – Sprite Sheet Animation

Unity 2D – Sprite Sheet Animation

‘SpriteSheet’ is a larger image for combining multiple individual images into a single, efficiently laid out image.

By |Unity3D, Video Games Development|Commenti disabilitati su Unity 2D – Sprite Sheet Animation

Unity – Folders organization

Unity – Folders organization

Default Unity install path

C:\Programmi\Unity\

Asset Store

C:\Utenti\YouUserName\AppData\Roaming\Unity\Asset Store\PublisherName

\Particle Systems
\3D ModelsEnvironmentsLandscapes
\Complete ProjectsTemplates

Format sample: Cartoon FX Pack.unitypackage

By |Unity3D, Video Games Development|Commenti disabilitati su Unity – Folders organization

UNITY – JS Script – Ray casting

UNITY – JS Script – Ray casting

Ray casting is the use of ray-surface intersection tests to solve a variety of problems in computer graphics.
The first ray casting algorithm used for rendering was presented by Arthur Appel in 1968. The idea behind ray casting is to trace rays from the eye, one per pixel, and find the closest object blocking the path of that ray.

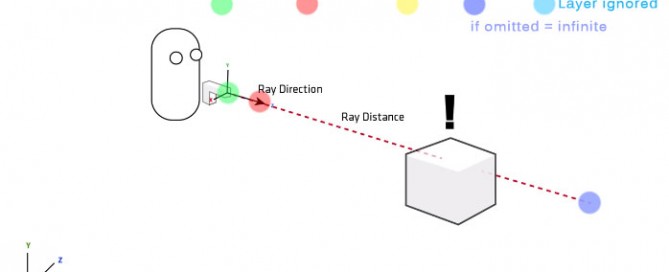
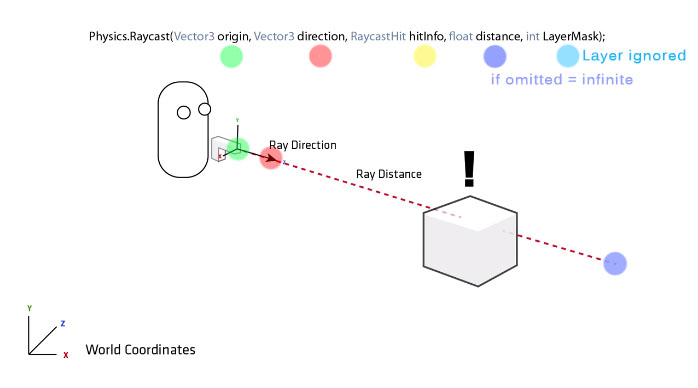
Ray casting traccia una linea da un oggetto verso l’infinito e ne rileva le intersezioni con altri oggetti. E’ come se l’oggetto avesse la capacità di vedere cosa si può intersecare con la sua traiettoria. Unity può tracciare linee di raycasting di lunghezza infinita, o limitata. Se la lunghezza è limitata tutti gli oggetti più lontani del limite imposto non saranno “visibili”. Il ray casting si basa sulla matematica dei vettori.

unity-raycasting

JAvascript Statement

static function Raycast(origin: Vector3, direction: Vector3, hitInfo: RaycastHit, distance: float = Mathf.Infinity, layerMask: int = DefaultRaycastLayers): bool;

origin: Vector3, -> l’origine del raggio (vettore)

direction: Vector3, -> la direzione del raggio (vettore)

hitInfo: RaycastHit, -> rileva se vi sono intersezioni

distance: float = Mathf.Infinity, -> lunghezza del raggio, se omesso = infinito

layerMask: int = DefaultRaycastLayers -> layer che saranno ignorati nel Ray casting

CASE 1: Raycast Debug.Log

1. Create a Sphere that falls and bource over a Cube (You have to use Physics 3D engine)

2. Attach to the Ball the script:

#pragma strict

function Update () {
		var hit : RaycastHit;
		if (Physics.Raycast (transform.position, -Vector3.up, hit)) {
			var distanceToGround = hit.distance;
                        // Casts a ray against all colliders in the scene 
                        // and returns detailed information on what was hit
			Debug.Log (distanceToGround);
		}
	}

CASE 2: Raycast Debug.Log + if

#pragma strict

function Update () {
    // function Update START -------------------------
		var hit : RaycastHit;
		if (Physics.Raycast (transform.position, -Vector3.up, hit)) {
			var distanceToGround = hit.distance;
			// Casts the ray against all colliders in the scene 
            // and returns detailed information on what was hit
			Debug.Log (distanceToGround);
			
			// Distance Controller START
			if (distanceToGround < 1)
       		{
             // Do a set of actions
             Debug.Log ("---- BOUNCE ----");
			}
			// Distance Controller END
		}
		
	// function Update END ----------------------------
	}

CASE 2: Raycast Debug.Log + if + function

#pragma strict

function Update () {
    // function Update() START -------------------------
		var hit : RaycastHit;
		
		// if Physics.raycast START
		if (Physics.Raycast (transform.position, -Vector3.up, hit)) {
			var distanceToGround = hit.distance;
			// Casts the ray against all colliders in the scene 
            // and returns detailed information on what was hit
			Debug.Log (distanceToGround);
			
			// Distance Controller START
			if (distanceToGround < 1)
       		{
             // Call a function           
             Bounce();
			}
			// Distance Controller END
		}
		// if Physics.raycast END
		
	// function Update() END ----------------------------
	}
	
	function Bounce ()
{
    Debug.Log ("---- BOUNCE FUNCTION ----");;
}
By |Unity3D|Commenti disabilitati su UNITY – JS Script – Ray casting