Unity – Import 3D Meshes

Unity – Import 3D Meshes

Import Static Mesh

1. File> New Project> Create New Project> 3D

2. ON THE TOP RIGHT ‘Layout’> 4 Split (it is best for 3D Object manipulation)

3a. Assets> Import New Asset> select the 3D Mesh
The assets has the same name of the loaded file

3b. Assets> Import New Asset> select the bitmap Texture

4. Project window> Assets> DRAG AND DROP the 3D Mesh over Scene window

AT THE MOMENT, YOU MUST NOT RESIZE, EVEN IT APPEARS SMALL IN THE WINDOW

THE MOST IMPORTANT 3D FORMAT SUPPORTED:

– OBJ
– FBX

THE MOST IMPORTANT TEXTURE FORMAT SUPPORTED:

– PSD (single or multi layered)
– PNG (with transparency)
– JPG (JPG format does not support transparency)

Setup

5. Select the 3D Mesh> Inspector> ‘Add Component’> Mesh Filter

6. Select the 3D Mesh> Inspector> ‘Add Component’> Mesh Renderer

NOTICE: Mesh Filter sends data to Mesh Renderer

7. Select the Mesh inside Hierarchy> Inspector> Mesh Filter> Assign Mesh> select the Mesh, it has the SAME NAME of 3DS MAX object name

8. Select the Mesh inside Hierarchy -> Inspector> Mesh Renderer> Materials> Select a Material
it has the SAME NAME of 3DS MAX bitmap texture map

9. Assets> Materials> select Material> Texture> select the Texture

10. First you must resize the Preview window to work better

11. Assets> select Texture> Inspector> Texture Type:

– Texture
– Normal Map
– GUI
– Sprite
– Cursor
– Reflection
– Cookie
– LightMap
– Advanced

Quality:

– Filter Mode
– Aniso Level

Optimization:

optimization for pc / mobile etc…

NOTICE:

the optimization setup does not change original file
– Unity can load Photoshop Layered Files, every change inside Unity does not change yhe original file. You can work with Photoshop and in the same time see texture changes inside Unity!


By |Unity3D|Commenti disabilitati su Unity – Import 3D Meshes

Unity – Input.GetAxis – Movement Behaviour

Unity – Input.GetAxis – Movement Behaviour

MOVEMENT BEHAVIOUR

NOTICE:
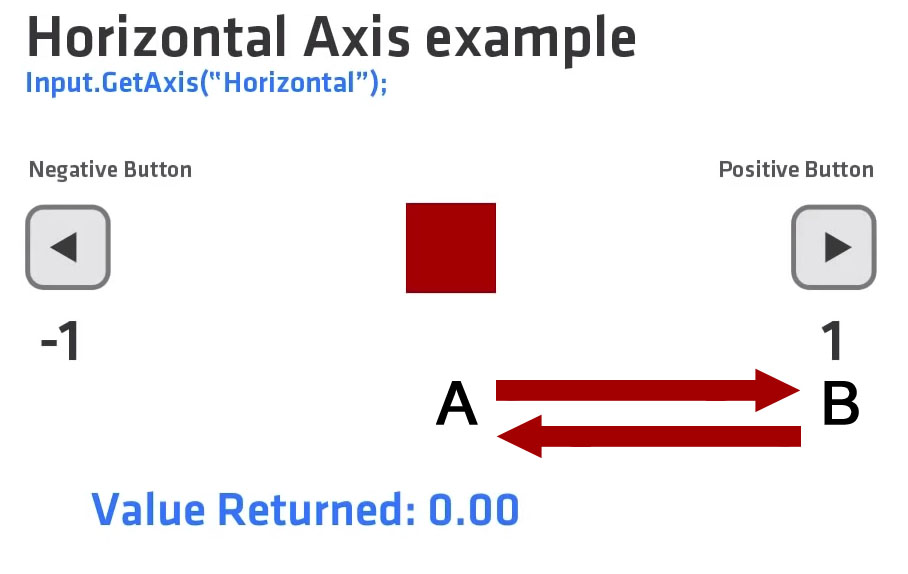
-> Input.GetKey e Input.GetButton -> return a BOOLEAN VALUE true or false
-> Input.GetAxis of keyboard and joystik -> return a VALUE from 1 to -1

The value will be in the range -1…1 for keyboard and joystick input. If the axis is setup to be delta mouse movement, the mouse delta is multiplied by the axis sensitivity and the range is not -1…1.

1. Create virtual Axes and buttons can be created in: MAIN TOP MENU> Edit> Project Settings> Input.

2. Setup Virtual Axis from right column.

unity-geyaxis

How does it works:
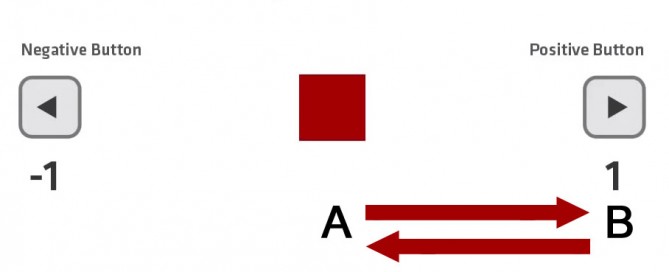
1. A position, the joy is not being pressed -> value returned 0.00
2. When we first press the key, in the first frame -> value returned is 0.01
3. We progress througth frames holding down the button (mantengo premuto) -> value returned increase
4. Holding down the button at the end -> value returned is 1
5. We release the button, in the first frame -> value returned is 0.99
6. We progress througth frames (button is released) -> value returned decrease
7. At the end -> value returned 0.00

Parameters of MAIN TOP MENU> Edit> Project Settings> Input> Horizon:

– Setup Axis
Positive Button: right ()

– Assign buttons:
Alt Positive Button: d
End users can configure Keyboard input in a nice screen configuration dialog

– Gravity, how fast the scale return to 0 after the button has been released (B -> A)
> gravity > fast return
< gravity < fast return 0.1: slow 3 : default 100: fast - Sensitivity, how fast the scale reaches 1 (A -> B) – unity x seconds
> sensitivity > responsive > fast
< sensitivity < resposnsive < fast 0.1: slow 3 : default 100: fast - Dead (to prevent unwanted little joystick movement) > dead zone < joystick sensibility < dead zone > joystick sensibility

– Snap
If enabled, the axis value will be immediately reset to zero after it receives opposite inputs. Only used when the Type is key / mouse button.

3. DRAG AND DROP the script over an object in the Hierarchy
Example: move an object using GetAxis – Horizontal

#pragma strict

function Start () {

}

function Update () {

 var horiz : float = Input.GetAxis("Horizontal");
 Debug.Log(horiz);
 transform.Translate(Vector3(horiz,0,0));
}

Statement: static function GetAxis(axisName: string): float;
axisName -> Virtual Axes names

Horizontal and Vertical Control – Complete Example

#pragma strict

function Start () {

}

var speed : float = 10.0; // to change speed

function Update () {

 var horiz : float = Input.GetAxis("Horizontal");
 var vert : float = Input.GetAxis("Vertical");

 // Make it move 10 meters per second instead of 10 meters per frame...
 horiz *= Time.deltaTime;
 vert *= Time.deltaTime;
 
 transform.Translate(Vector3(horiz*speed,vert*speed,0));
}
By |Unity3D|Commenti disabilitati su Unity – Input.GetAxis – Movement Behaviour

Unity – 2D Vector Math

Unity – 2D Vector Math

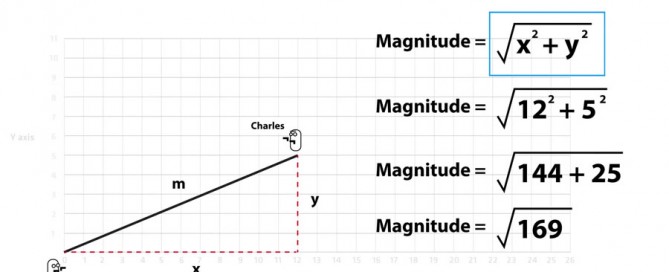
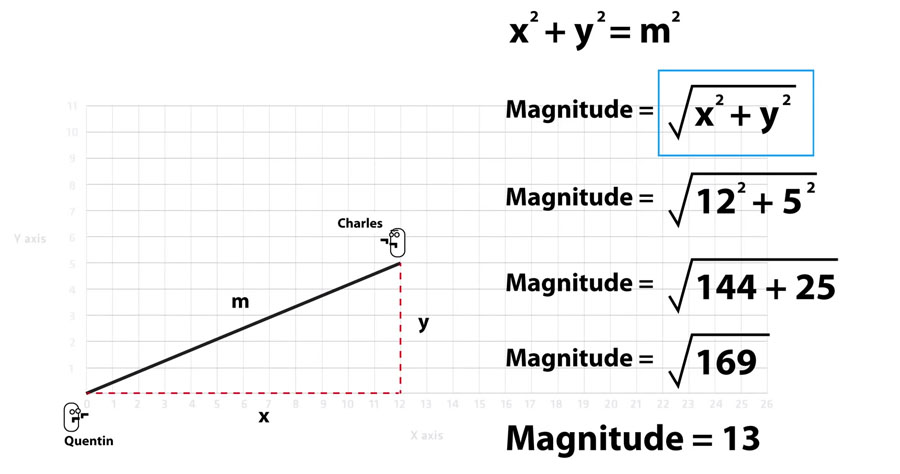
2D Vector Math uses Pythagoras’s Theorem.
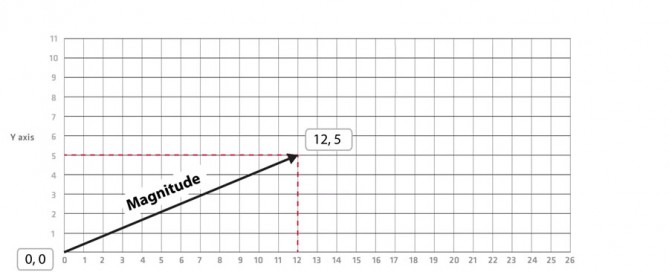
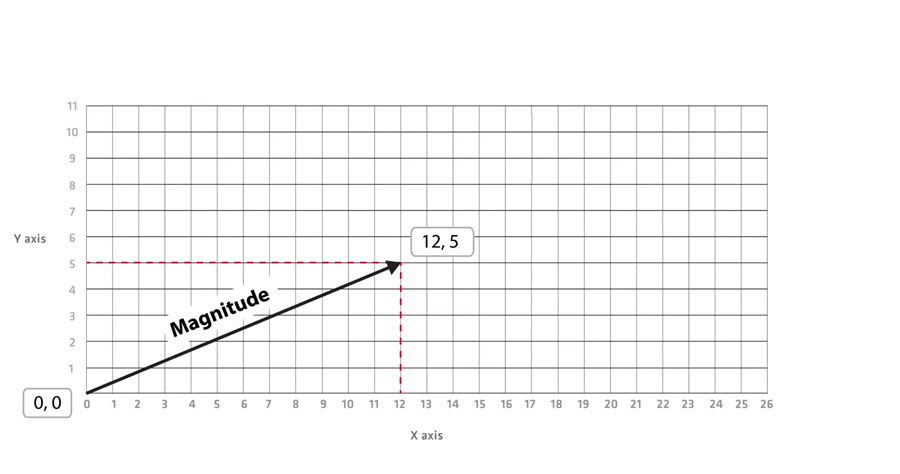
It has 2 components, x and y, that rapresent the point from origin 0,0 to any point on a 2D plane.

A vector has:
– Magnitude, it is the lenght of the vector
– Direction, it is the direction of movement

Below an example to calculate the distance between 2 characters

unity-vector-math-img-001

unity-vector-math-img-002

Vector Math can be used to predict position of moving objects.
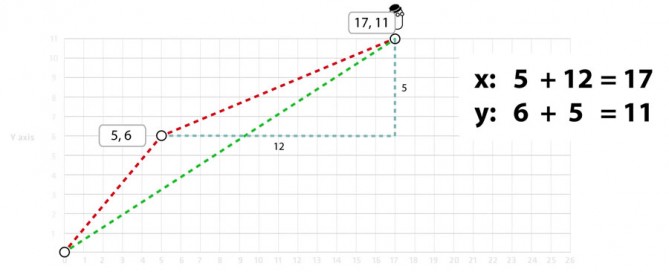
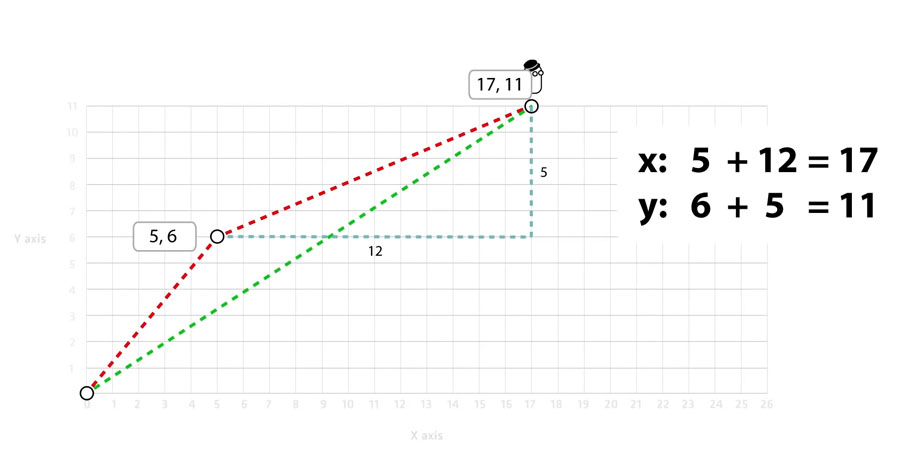
Below the character has a velocity o 12,5 per hour, it means it moves 12 units in x and 5 units in y per hour.
You can calculate the final position after one hour with vector math:

unity-vector-math-img-003

Unity has vector math functions.

Official guide at: http://docs.unity3d.com/Documentation/ScriptReference/Vector2.html

Calculate distance between two objects

var distance = Vector2.Distance(object1.transform.position, object2.transform.position);

Statement: Vector2.Distance(a,b) is the same as (a-b).magnitude.

By |Unity3D|Commenti disabilitati su Unity – 2D Vector Math

Unity – Hierarchies

Unity – Hierarchies

One of the most useful tools in producing computer animation is the ability to link objects together to form a chain. By linking one object to another, you create a parent-child relationship. Transforms applied to the parent are also transmitted to child objects. A chain is also referred to as a hierarchy.

1. MAIN TOP MENu> GameObject> Create Other> Cube

2. MAIN TOP MENu> GameObject> Create Other> Phere

3. MAIN TOp MENU> Window> Hierarchy> Drag The Sphere over the Cube> Sphere (child) Cube (parent)

4. In the viewport move the Sphere and move the Cube

5. Change on TOP LEFT Pivot/Center rotation and try rotate parent.

Select by name: Hierarchy Window> Search box: ‘t:light’ to show all lights

By |Unity3D|Commenti disabilitati su Unity – Hierarchies

Unity – Translate GameObjects

Unity – Translate GameObjects

Translate Meters x frame

DRAG AND DROP this script over a object in the Hierarchy:

#pragma strict

function Update ()
{
        transform.Translate(new Vector2(1,0));
}

Statement: transform.Translate(new Vector2(1,0)); -> transform.Translate(new Vector2(x,y));

It adds 1px of ‘x’ value of the 2D Vector. The object moves quickly because the transformation command is inside Update(), it means the code adds 1px every frame.

Translate Meters x seconds

DRAG AND DROP this script over a object in the Hierarchy:

#pragma strict

function Update ()
{
        transform.Translate(new Vector2(1,0)*Time.deltaTime);
}

NOTICE: *Time.deltaTime -> It converts the movement from meters x frame to meters x second

Translate Meters x frame + add velocity

DRAG AND DROP this script over a object in the Hierarchy:

#pragma strict

public var moveSpeed : float = 10f;

function Update ()
{
        transform.Translate(new Vector2(1,0)* moveSpeed *Time.deltaTime);
}

Invert movement

#pragma strict

public var moveSpeed : float = 10f;
public var xpos : float = 1;
public var ypos : float = 1;

function Update ()
{
        transform.Translate(new Vector2(xpos,ypos)* moveSpeed *Time.deltaTime);
}

NOTICE:
xpos= 1 move right
xpos= -1 move left

ypos= 1 move up
ypos= -1 move down

Vector2.right – Vector2.up

Vector2.right -> it this the same of -> new Vector2(1,0)
Vector2.up -> it this the same of -> new Vector2(0,1)

You can write:

#pragma strict

public var moveSpeed : float = 10f;
public var xpos : float = 1;
public var ypos : float = 1;

function Update ()
{
        transform.Translate(xpos*Vector2.right * moveSpeed * Time.deltaTime);
        transform.Translate(ypos*Vector2.up * moveSpeed * Time.deltaTime);
}

NOTICE:
xpos= 1 move right
xpos= -1 move left

ypos= 1 move up
ypos= -1 move down

By |Unity3D|Commenti disabilitati su Unity – Translate GameObjects