Web Design

WordPress – Sicurezza

WordPress – Sicurezza

Quando si parla di sicurezza sul web, non si intende la possibilità di realizzare una sicurezza totale del proprio web server o della propria applicazione web, ma di ottenere un livello di sicurezza accettabile in base all’importanza dei dati che dovremmo gestire.

Un esempio banale è la differenza che c’è tra garantire un livello sufficiente di sicurezza del sito web di un istituto bancario, e quello che basta al proprio blog personale. Ovviamente proteggere i dati delle carte di credito o dei conti correnti richiede molta più attenzione rispetto al voler proteggere dati che non sono sensibili.

La sicurezza possiamo ripartirla su due livelli:

1. Il server che ospita la nostra installazione WordPress

2. La nostra installazione WordPress

Un hacker potrebbe penetrare sfruttando delle falle del nostro fornitore di hosting, in questo caso potremo fare ben poco, se non cambiare fornitore… oppure sfruttare dei ‘buchi’ nella nostra installazione WordPress, in questo caso è nostro compito cercare di mantenerla il più sicuro possibile.

Gli attacchi più comuni attacchi ad un Blog WordPress sono:

1. Attacco Brute-Force per ottenere i dati di accesso, si tratta di una serie di tentativi al fine di trovare la giusta combinazione user/password per entrare in wp-admin

2. Inviare delle speciali ‘HTTP requests’ richieste in HTTP per sfruttare vulnerabilità specifiche.

Ecco alcune precauzioni che dovremo prendere:

Accesso sFTP

Per uplodare i file non utilizzare un normale software di FTP perchè i dati di accesso possono essere facilmente intercettati, utilizzare invece un software di sFTP (secure FTP), come ad esempio l’ottimo BitWise. In sFTP i dati vengono inviati criptati.

Hosting – HTTPS – SSL

– Non utilizzare ‘shared ID’ ma acquistare un IP proprietario

– Acquistare un certificato HTTPS SSL, che farà transitare ogni dato in forma criptata

Installazione

– Installare sempre l’ultima versione stabile deo software (stable realise)

– Selezionare al momento dell’installazine di WordPress una password sicura, la migliore combinazione è costituita di numeri+lettere+simboli speciali ed essere lunga almeno 10 caratteri ad esempio ‘raven%8090’

– Gestire correttamente i permessi di lettura-scrittura delle cartelle di WordPress, in particolare, riporto come scritto nella documentazione ufficiale:

/
The root WordPress directory: all files should be writable only by your user account, except .htaccess if you want WordPress to automatically generate rewrite rules for you.

/wp-admin/
The WordPress administration area: all files should be writable only by your user account.

/wp-includes/
The bulk of WordPress application logic: all files should be writable only by your user account.

/wp-content/
User-supplied content: intended to be writable by your user account and the web server process.

Within /wp-content/ you will find:

/wp-content/themes/
Theme files. If you want to use the built-in theme editor, all files need to be writable by the web server process. If you do not want to use the built-in theme editor, all files can be writable only by your user account.

/wp-content/plugins/
Plugin files: all files should be writable only by your user account.

Database

– se si amministrano più blog sullo stesso server, assegnare database diversi per ogni blog così in caso di intrusione all’interno di un blog non rischieremo che vengano compromessi anche gli altri.

– per le normali operazioni di WordPress gli accessi al DataBase necessitano solamente dei seguenti permessi: SELECT, INSERT, UPDATE and DELETE
Rimuovere il permesso per: DROP, ALTER, GRANT (attenzione che potrebbe essere necessario riattivarli temporaneamente per installare delle pluigin o dei temi)

Accessi degli utenti

– limitare i punti di accesso da parte di utenti esterni, limitare cioè form per raccolta dati, sondaggi etc… soprattutto se non sono strettamente necessari

– limitare l’installazione di plugin di terze parti, soprattutto se di dubbia provenienza o alla prima revisione

wp-admin/wp-login.php

– Nell’accesso al wp-admin installare un sistema di Captcha, questo limita le potenzialità di un attacco i Brute-Force Attack

– Proteggere l’accesso alla cartella wp-admin con l’utilizzo di .htaccess

Se usate CPanel:

1. Accedere a CPanel> Security> Directory Password> Selezionare la directory wp-admin> attivare l’accesso con password

PERICOLO! A questo punto alcune plugin potrebbero non funzionare correttamente!

2. Le plugin di WordPress dovranno accedere liberamente a /wp-admin/admin-ajax.php, per questo al file .htaccess installato in blog/wp-admin aggiungere questa eccezzione e limitare l’autenticazione a wp-login.php, il file finale risulterà simile a:

# Allow plugin access to admin-ajax.php around password protection
<Files admin-ajax.php>
Order allow,deny
Allow from all
Satisfy any
</Files>

<FilesMatch "wp-login.php">
AuthType Basic
AuthName "Secure Area"
AuthUserFile "/home/example/.htpasswds/public_html/wp-admin/passwd"
require valid-user
</FilesMatch>

– Bloccare i ‘badbots’. I ‘batbots’ sono degli spider maligni che ignorano i parametri di robot.txt e che vanno a leggere anche le cartelle che abbiamo chiesto di ignorare all’interno di robot.txt. I ‘badbots’ sono anche i programmi di download automatico quali ‘GetRight’.

1. Create nella vostra root, solitamente www/, un file .htaccess, con la lista dei badbots più famosi:


#BAD BOTS protection START 
RewriteEngine On 
RewriteCond %{HTTP_USER_AGENT} ^BlackWidow [OR] 
RewriteCond %{HTTP_USER_AGENT} ^Bot\ mailto:craftbot@yahoo.com [OR] 
RewriteCond %{HTTP_USER_AGENT} ^ChinaClaw [OR] 
RewriteCond %{HTTP_USER_AGENT} ^Custo [OR] 
RewriteCond %{HTTP_USER_AGENT} ^DISCo [OR] 
RewriteCond %{HTTP_USER_AGENT} ^Download\ Demon [OR] 
RewriteCond %{HTTP_USER_AGENT} ^eCatch [OR] 
RewriteCond %{HTTP_USER_AGENT} ^EirGrabber [OR] 
RewriteCond %{HTTP_USER_AGENT} ^EmailSiphon [OR] 
RewriteCond %{HTTP_USER_AGENT} ^EmailWolf [OR] 
RewriteCond %{HTTP_USER_AGENT} ^Express\ WebPictures [OR] 
RewriteCond %{HTTP_USER_AGENT} ^ExtractorPro [OR] 
RewriteCond %{HTTP_USER_AGENT} ^EyeNetIE [OR] 
RewriteCond %{HTTP_USER_AGENT} ^FlashGet [OR] 
RewriteCond %{HTTP_USER_AGENT} ^GetRight [OR] 
RewriteCond %{HTTP_USER_AGENT} ^GetWeb! [OR] 
RewriteCond %{HTTP_USER_AGENT} ^Go!Zilla [OR] 
RewriteCond %{HTTP_USER_AGENT} ^Go-Ahead-Got-It [OR] 
RewriteCond %{HTTP_USER_AGENT} ^GrabNet [OR] 
RewriteCond %{HTTP_USER_AGENT} ^Grafula [OR] 
RewriteCond %{HTTP_USER_AGENT} ^HMView [OR] 
RewriteCond %{HTTP_USER_AGENT} HTTrack [NC,OR] 
RewriteCond %{HTTP_USER_AGENT} ^Image\ Stripper [OR] 
RewriteCond %{HTTP_USER_AGENT} ^Image\ Sucker [OR] 
RewriteCond %{HTTP_USER_AGENT} Indy\ Library [NC,OR] 
RewriteCond %{HTTP_USER_AGENT} ^InterGET [OR] 
RewriteCond %{HTTP_USER_AGENT} ^Internet\ Ninja [OR] 
RewriteCond %{HTTP_USER_AGENT} ^JetCar [OR] 
RewriteCond %{HTTP_USER_AGENT} ^JOC\ Web\ Spider [OR] 
RewriteCond %{HTTP_USER_AGENT} ^larbin [OR] 
RewriteCond %{HTTP_USER_AGENT} ^LeechFTP [OR] 
RewriteCond %{HTTP_USER_AGENT} ^Mass\ Downloader [OR] 
RewriteCond %{HTTP_USER_AGENT} ^MIDown\ tool [OR] 
RewriteCond %{HTTP_USER_AGENT} ^Mister\ PiX [OR] 
RewriteCond %{HTTP_USER_AGENT} ^Navroad [OR] 
RewriteCond %{HTTP_USER_AGENT} ^NearSite [OR] 
RewriteCond %{HTTP_USER_AGENT} ^NetAnts [OR] 
RewriteCond %{HTTP_USER_AGENT} ^NetSpider [OR] 
RewriteCond %{HTTP_USER_AGENT} ^Net\ Vampire [OR] 
RewriteCond %{HTTP_USER_AGENT} ^NetZIP [OR] 
RewriteCond %{HTTP_USER_AGENT} ^Octopus [OR] 
RewriteCond %{HTTP_USER_AGENT} ^Offline\ Explorer [OR] 
RewriteCond %{HTTP_USER_AGENT} ^Offline\ Navigator [OR] 
RewriteCond %{HTTP_USER_AGENT} ^PageGrabber [OR] 
RewriteCond %{HTTP_USER_AGENT} ^Papa\ Foto [OR] 
RewriteCond %{HTTP_USER_AGENT} ^pavuk [OR] 
RewriteCond %{HTTP_USER_AGENT} ^pcBrowser [OR] 
RewriteCond %{HTTP_USER_AGENT} ^RealDownload [OR] 
RewriteCond %{HTTP_USER_AGENT} ^ReGet [OR] 
RewriteCond %{HTTP_USER_AGENT} ^SiteSnagger [OR] 
RewriteCond %{HTTP_USER_AGENT} ^SmartDownload [OR] 
RewriteCond %{HTTP_USER_AGENT} ^SuperBot [OR] 
RewriteCond %{HTTP_USER_AGENT} ^SuperHTTP [OR] 
RewriteCond %{HTTP_USER_AGENT} ^Surfbot [OR] 
RewriteCond %{HTTP_USER_AGENT} ^tAkeOut [OR] 
RewriteCond %{HTTP_USER_AGENT} ^Teleport\ Pro [OR] 
RewriteCond %{HTTP_USER_AGENT} ^VoidEYE [OR] 
RewriteCond %{HTTP_USER_AGENT} ^Web\ Image\ Collector [OR] 
RewriteCond %{HTTP_USER_AGENT} ^Web\ Sucker [OR] 
RewriteCond %{HTTP_USER_AGENT} ^WebAuto [OR] 
RewriteCond %{HTTP_USER_AGENT} ^WebCopier [OR] 
RewriteCond %{HTTP_USER_AGENT} ^WebFetch [OR] 
RewriteCond %{HTTP_USER_AGENT} ^WebGo\ IS [OR] 
RewriteCond %{HTTP_USER_AGENT} ^WebLeacher [OR] 
RewriteCond %{HTTP_USER_AGENT} ^WebReaper [OR] 
RewriteCond %{HTTP_USER_AGENT} ^WebSauger [OR] 
RewriteCond %{HTTP_USER_AGENT} ^Website\ eXtractor [OR] 
RewriteCond %{HTTP_USER_AGENT} ^Website\ Quester [OR] 
RewriteCond %{HTTP_USER_AGENT} ^WebStripper [OR] 
RewriteCond %{HTTP_USER_AGENT} ^WebWhacker [OR] 
RewriteCond %{HTTP_USER_AGENT} ^WebZIP [OR] 
RewriteCond %{HTTP_USER_AGENT} ^Wget [OR] 
RewriteCond %{HTTP_USER_AGENT} ^Widow [OR] 
RewriteCond %{HTTP_USER_AGENT} ^WWWOFFLE [OR] 
RewriteCond %{HTTP_USER_AGENT} ^Xaldon\ WebSpider [OR] 
RewriteCond %{HTTP_USER_AGENT} ^Zeus 
RewriteRule ^.* - [F,L]
#BAD BOTS protection END 

I badbots che entreranno riceveranno un errore ‘403 Forbidden’

– Modificare il ‘Login Form’ di Worpress con del codice aggiuntivo php

Sicurezza di wp-includes

Con questa modifica si impedirà la modifica degli script essenziali di WP dall’esterno:

Scaricare da blog/.htaccess, il codice che troveremo sarà:

RewriteEngine on


# BEGIN WordPress

<IfModule mod_rewrite.c>

RewriteEngine On

RewriteBase /blog/

RewriteRule ^index\.php$ - [L]

RewriteCond %{REQUEST_FILENAME} !-f

RewriteCond %{REQUEST_FILENAME} !-d

RewriteRule . /blog/index.php [L]

</IfModule>


# END WordPress

RewriteCond %{HTTP_HOST} ^blog\.lucedigitale\.com$ [OR]

RewriteCond %{HTTP_HOST} ^www\.blog\.lucedigitale\.com$

RewriteRule ^/?$ "http\:\/\/www\.lucedigitale\.com\/blog\/" [R=301,L]

Aggiungere le righe all’infuori di # BEGIN WordPress

# END WordPress
, altrimenti saranno sovrascritti:

PERICOLO! Questa modifica potrebbe portare al mulfunzionamento in caso di un setup multisito!

# Block the include-only files START
<IfModule mod_rewrite.c>
RewriteEngine On
RewriteBase /
RewriteRule ^wp-admin/includes/ - [F,L]
RewriteRule !^wp-includes/ - [S=3]
RewriteRule ^wp-includes/[^/]+\.php$ - [F,L]
RewriteRule ^wp-includes/js/tinymce/langs/.+\.php - [F,L]
RewriteRule ^wp-includes/theme-compat/ - [F,L]
</IfModule>
# Block the include-only files END

RewriteEngine on


# BEGIN WordPress

<IfModule mod_rewrite.c>

RewriteEngine On

RewriteBase /blog/

RewriteRule ^index\.php$ - [L]

RewriteCond %{REQUEST_FILENAME} !-f

RewriteCond %{REQUEST_FILENAME} !-d

RewriteRule . /blog/index.php [L]

</IfModule>


# END WordPress

RewriteCond %{HTTP_HOST} ^blog\.lucedigitale\.com$ [OR]

RewriteCond %{HTTP_HOST} ^www\.blog\.lucedigitale\.com$

RewriteRule ^/?$ "http\:\/\/www\.lucedigitale\.com\/blog\/" [R=301,L]

Sicurezza di wp-config.php

Con questa modifica sarà impossibile da web accedere a wp-config.php che contiene i file di configurazione di WP, inclusi i dati di accesso al Database.

Scaricare da blog/.htaccess, il codice che troveremo sarà:

RewriteEngine on


# BEGIN WordPress

<IfModule mod_rewrite.c>

RewriteEngine On

RewriteBase /blog/

RewriteRule ^index\.php$ - [L]

RewriteCond %{REQUEST_FILENAME} !-f

RewriteCond %{REQUEST_FILENAME} !-d

RewriteRule . /blog/index.php [L]

</IfModule>


# END WordPress

RewriteCond %{HTTP_HOST} ^blog\.lucedigitale\.com$ [OR]

RewriteCond %{HTTP_HOST} ^www\.blog\.lucedigitale\.com$

RewriteRule ^/?$ "http\:\/\/www\.lucedigitale\.com\/blog\/" [R=301,L]

In testa aggiungere il codice:

# Hide wp-config.php START
<files wp-config.php>
order allow,deny
deny from all
</files>
# Hide wp-config.php END

RewriteEngine on


# BEGIN WordPress

<IfModule mod_rewrite.c>

RewriteEngine On

RewriteBase /blog/

RewriteRule ^index\.php$ - [L]

RewriteCond %{REQUEST_FILENAME} !-f

RewriteCond %{REQUEST_FILENAME} !-d

RewriteRule . /blog/index.php [L]

</IfModule>


# END WordPress

RewriteCond %{HTTP_HOST} ^blog\.lucedigitale\.com$ [OR]

RewriteCond %{HTTP_HOST} ^www\.blog\.lucedigitale\.com$

RewriteRule ^/?$ "http\:\/\/www\.lucedigitale\.com\/blog\/" [R=301,L]

Ora se digitiamo sul browser blog/wp-config.php otterremo un errore ‘403 Permission Denied’

WordPress Dashboard

Con questa modifica togliamo i permessi alla DashBoard di editare i file, a tutti gli utenti, amministratore compreso.

Aprire blog/wp-config.php

ed aggiungere in testa:

define('DISALLOW_FILE_EDIT', true);

ATTENZIONE, questa riga equivale a rimuovere la capacità di editare da parte di ‘edit_themes’, ‘edit_plugins’ and ‘edit_files’. Può risultare disagevole durante la manutenzione del blog!

Installare PlugIn WordPress per la sicurezza

Per WordPress sono disponibili innumerevoli plugins con antivirus e firewall incorporati, effettuate una ricerca su Google con le keyword: ‘Top 10 Essential WordPress Security Plug-ins’.

ATTENZIONE! Le plugin per la sicurezza potrebbero inibire il funzionamento degli aggiornamenti, di altri plugins, rallentare la visualizzazione delle pagine, far lievitare rapidamente i dati contenuti nel database.

MySQL

– Rinominare l’utente admin creato di default e sostituirlo con uno nuovo.
Si può fare ciò:
a. da phpMyAdmin
OPPURE
b. con il comando MySQL:

UPDATE wp_users SET user_login = 'newuser' WHERE user_login = 'admin';, or by using a MySQL frontend like phpMyAdmin. 

– Cambiare il prefisso delle tabelle WordPress del database, che di default è di tipo: ‘wp_tablename’
PERICOLO! Questa operazione può causare la perdita di tutti dati!

Eliminare le informazioni di versione

Eliminare le informazioni sulla versione fornisce meno indicazioni agli hacker, quindi migliora la protezione del nostro sito.

– Eliminare o rinominare il file blog/readme.html che contiene le informazioni sulla versione

– Eliminare dall’header pagine html dei temi installati, TUTTI I TEMI INSTALLATI, la riga:

<meta name="generator" content="WordPress 3.5.2" />

o semplicemente rinominare le cartelle che contengono i temi di default

Copiare in fondo a: blog/wp-content/themes/yourtheme/functions.php

il seguente codice:

// hide the meta tag generator from head and rss START
function disable_version() {
   return '';
}
add_filter('the_generator','disable_version');
remove_action('wp_head', 'wp_generator');
// hide the meta tag generator from head and rss END

Nasconderà il ‘meta tag name’ che riporta la versione di WordPress.

By |Web Design, WordPress|Commenti disabilitati su WordPress – Sicurezza

WordPress – Creare menu in Admin Panel

WordPress – Creare menu in Admin Panel

Aprire blog/wp-content/themes/mytheme/functions.php

Aggiungere il codice:


/*---------------------------------------------------
register settings
----------------------------------------------------*/
function theme_settings_init(){
register_setting( 'theme_settings', 'theme_settings' );
}
 
/*---------------------------------------------------
add settings page to menu
----------------------------------------------------*/
function add_settings_page() {
add_menu_page( __( 'Your theme name' .' Theme Panel' ), __( 'Your theme name' .' Theme Panel' ), 'manage_options', 'settings', 'theme_settings_page');
}
 
/*---------------------------------------------------
add actions
----------------------------------------------------*/
add_action( 'admin_init', 'theme_settings_init' );
add_action( 'admin_menu', 'add_settings_page' );
 
/*---------------------------------------------------
Theme Panel Output
----------------------------------------------------*/
function theme_settings_page() {
    ?>
     <div class="wrap">
         <div id="icon-options-general"></div>
         <h2><?php _e( ' Theme Options' ) //your admin panel title ?></h2>
         <ul>
             <li>View Documentation |</li>
             <li>Visit Support </li>
         </ul>
         <p><span>Theme version</span></p>
         <div class="footer-credit">
            <p>This theme was made by <a title="Luce Digitale" href="http://www.lucedigitale.com" target="_blank" >Luce Digitale</a>.</p>
         </div>
     </div>
     <?php
}

NOTA BENE: qui si può aggiungere tutto il codice HTML che si vuole!

<div class="wrap">
         <div id="icon-options-general"></div>
         <h2><?php _e( ' Theme Options' ) //your admin panel title ?></h2>
         <ul>
             <li>View Documentation |</li>
             <li>Visit Support </li>
         </ul>
         <p><span>Theme version</span></p>
         <div class="footer-credit">
            <p>This theme was made by <a title="Luce Digitale" href="http://www.lucedigitale.com" target="_blank" >Luce Digitale</a>.</p>
         </div>
     </div>
By |Web Design, WordPress|Commenti disabilitati su WordPress – Creare menu in Admin Panel

How to Generate Coupon Codes

How to Generate Coupon Codes

It is a simple script that generates a Coupon Code and sends it to the user’s email.
We do not use databases.

gimme-code-2014-0007.zip

DOWNLOAD


We code 2 files in the same folder:

1. contatti.html -> it sends data to -> send_form_email.php

2. send_form_email.php -> a) it renders an HTML page with the coupon code b) it sends a email with the coupon code

HTML form: contatti.html

It gets data from users and it sends to ‘send_form_email.php’

<!DOCTYPE html PUBLIC "-//W3C//DTD XHTML 1.0 Transitional//EN" "http://www.w3.org/TR/xhtml1/DTD/xhtml1-transitional.dtd">
<html xmlns="http://www.w3.org/1999/xhtml">
<head>

<meta name="KeyWords" content="luce, digitale">
<meta name="Classification" content="luce, digitale">
<meta name="Description" content="luce, digitale">

<meta http-equiv="Content-Type" content="text/html; charset=UTF-8" />
<meta http-equiv="X-UA-Compatible" content="IE=EmulateIE7" />
<title>Codice sconto - test</title>
	
<!-- INIZIO VALIDAZIONE PRIVACY -->
<script type="text/javascript"> 
function validate(form) { 
// Checking if at least one period button is selected. Or not. 
if (!document.contactform.acconsento.checked) { 
	alert( "Per procedere acconsentire al trattamento dei dati"); 
 	return false; 
	} 
 
 	return true;
}
</script>
<!-- FINE VALIDAZIONE PRIVACY -->

<!-- INIZIO CONTENUTI -->
Contenuto di esempio: <br />IMMAGINE TESSERA - IMMAGINE OGGETTI DESIDERABILI <br /> Ottieni la tua tessera sconto! Compila i dati qui sotto e ti sarà inviato gratuitamente il tuo codice personale per ottenere la tessera sconto presso i nostri punti vendita!<br /><br />
<!-- FINE CONTENUTI -->
			  
<!-- INIZIO CONTACT FORM -->
<form name="contactform" method="post" action="send_form_email.php" onsubmit='return validate(this)'>
<table width="581">
<tr>
 <td width="144" valign="top">
  <label for="first_name">Username *</label>
 </td>
 <td width="425" valign="top">
  <input  type="text" name="first_name" maxlength="50" size="30">
 </td>
</tr>
<tr>
 <td valign="top"">
  <label for="last_name">Password *</label>
 </td>
 <td valign="top">
  <input  type="text" name="last_name" maxlength="50" size="30">
 </td>
</tr>
<tr>
 <td valign="top">
  <label for="email">Indirizzo Email  *</label>
 </td>
 <td valign="top">
  <input  type="text" name="email" maxlength="80" size="30">
 </td>
</tr>
<tr>
 <td valign="top">
  <label for="telephone">Cellulare</label>
 </td>
 <td valign="top">
  <input  type="text" name="telephone" maxlength="30" size="30">
 </td>
</tr>
<tr>
  <td valign="top">&nbsp;</td>
  <td valign="top">&nbsp;</td>
</tr>
<tr>
 <td valign="top">PRIVACY</td>
 <td valign="top"><textarea name="comments" cols="43" rows="5" readonly="readonly">Informativa ai sensi dell'art. 13, d. lgs 196/2003. I dati forniti, verranno trattati e custoditi da xxxxx & C s.a.s. PIVA xxxxx - DL. 196/2003. I dati potranno essere diffusi tra le sole società; controllate, affiliate, consociate e collegate al fine di fornirVi informazioni commerciali, per iniziative promozionali, per attività di ricerca e statistica ed al fine di consentire un migliore servizio. Voi avete diritto di rettificare, integrare o richiedere cancellazione dei dati forniti - DL. 196/2003.</textarea>
 </td>
</tr>
<tr>
  <td colspan="2" valign="top"><br>
      </td>
</tr>
<tr>
  <td colspan="2" valign="top">Manifestazione di consenso:</td>
  </tr>
<tr>
  <td colspan="2" valign="top"><input type="checkbox" name="acconsento" value="acconsento">
  Acconsento al trattamento dei miei dati personali.</td>
</tr>
<tr>
 <td colspan="2" style="text-align:center">
   <div align="left">
     <input type="submit" value="I n v i a  i l  M e s s a g g i o">   
   </div></td>
</tr>
</table>
</form>
<!-- FINE CONTACT FORM -->
			  

</body>
</html>

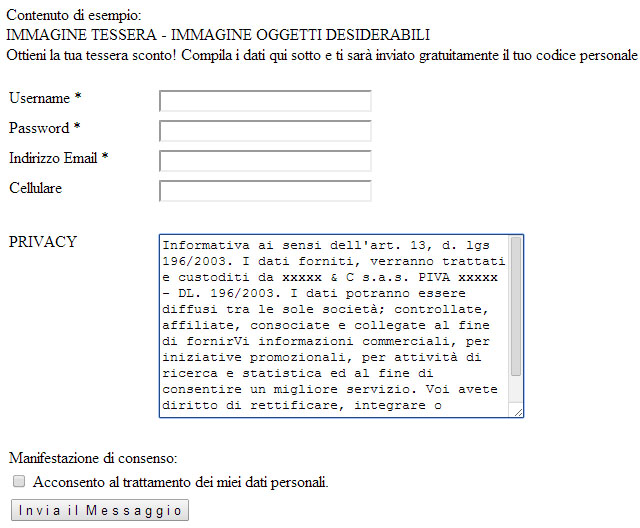
The result:

coupons-php-0001

PHP Engine: send_form_email.php

<?php
if(isset($_POST['email'])) {
     
    // EDIT THE 2 LINES BELOW AS REQUIRED
    // la linea sotto sarò la email a cui rispondere in caso di problemi con il codice tessera
    $email_to = "myemail@lucedigitale.com";
    $email_subject = "Il tuo codice sconto da myweb.com";
     
     
    function died($error) {
        // your error code can go here
        echo "Ci sono degli errori nel Form che hai compilato!<br>";
        echo "Gli errori appaiono sotto:<br /><br />";
        echo $error."<br />";
        echo "Torna indietro e correggi questi errori.<br /><br />";
        die();
    }
     
    // validation expected data exists
    if(!isset($_POST['first_name']) ||
        !isset($_POST['last_name']) ||
        !isset($_POST['email']) ||
        !isset($_POST['telephone']) ||
        !isset($_POST['comments'])) {
        died('Ci sono degli errori nel Form che hai compilato');      
    }
     
    $first_name = $_POST['first_name']; // required
    $last_name = $_POST['last_name']; // required
    $email_from = $_POST['email']; // required
    $telephone = $_POST['telephone']; // not required
    $comments = $_POST['comments']; // required
     
    $error_message = "";
    $email_exp = '/^[A-Za-z0-9._%-]+@[A-Za-z0-9.-]+\.[A-Za-z]{2,4}$/';
  if(!preg_match($email_exp,$email_from)) {
    $error_message .= 'Indirizzo email non valido.<br />';
  }
    $string_exp = "/^[A-Za-z .'-]+$/";
  if(!preg_match($string_exp,$first_name)) {
    $error_message .= 'Username non valido<br />';
  }
  if(!preg_match($string_exp,$last_name)) {
    $error_message .= 'Password non valida<br />';
  }
  if(strlen($comments) < 2) {
    $error_message .= 'Campo Richieste non valido<br />';
  }
  if(strlen($error_message) > 0) {
    died($error_message);
  }
    $email_message = "Form details below.\n\n";
     
    function clean_string($string) {
      $bad = array("content-type","bcc:","to:","cc:","href");
      return str_replace($bad,"",$string);
    }
     
// **************************
//Generazione del codice sconto - inizio
// **************************
//Creo 5 variabili numeriche random di 2 cifre, il codice sconto finale avrà quindi 10 cifre
$a=rand(11,20);
$b=rand(21,30);
$c=rand(31,40);
$d=rand(41,50);
$e=rand(51,60);
// Creo il codice sconto concatenando le variabili random
$codice=$a.$b.$c.$d.$e;
// **************************
//Generazione del codice sconto - fine
// **************************
	 
    $email_message .= "Username: ".clean_string($first_name)."\n";
    $email_message .= "Password: ".clean_string($last_name)."\n";
    $email_message .= "Email: ".clean_string($email_to)."\n";
    $email_message .= "Cellulare: ".clean_string($telephone)."\n";
    // invio il codice sconto
    $email_message .= "Grazie per la tua registrazione, il tuo codice sconto: ".clean_string($codice)."\n";
    // la riga sotto non la utilizzo perchè altrimenti arriverebbe in email tutto il testo della privacy
    // $email_message .= "Privacy: ".clean_string($comments)."\n";
    // aggiungo comunque un testo di commento standard alla email
    $email_message .= "Messaggio importante: Stampa questa email e presentati presso i nostri negozi per ricevere la tessera sconto";
     
// create email headers
// invio l'email all'indirizzo specificato nel form html cioè la variabile $email_from proveniente dal proprietario del sito della variabile $email_to specificata all'inizio del codice
$headers = 'From: '.$email_to."\r\n".
'Reply-To: '.$email_to."\r\n" .
'X-Mailer: PHP/' . phpversion();
@mail($email_from, $email_subject, $email_message, $headers); 

// Visualizzo il codice sconto nella pagina in caso l'email non arrivi
// o il provider blocchi le email al superamento del limite giornaliero
echo "<center>Grazie per la registrazione! Stampa questa pagina ed esibiscila al punto vendita. Il tuo codice sconto: ".$codice."<center>";
?>
 
<!-- include your own success html here -->
 <center>Torna al sito <a href="http://www.lucedigitale.com" target="_self">www.lucedigitale.com</center>

 
<?php
}
?>

The HTML page – coupon code message:

Grazie per la registrazione! Stampa questa pagina ed esibiscila al punto vendita.
Il tuo codice sconto: 1329374260
Torna al sito www.lucedigitale.com

The final email content:

Form details below.

Username: blabla
Password: blabla
Email: myemail@lucedigitale.com
Cellulare: 123 456 7890
Grazie per la tua registrazione, il tuo codice sconto: 1329374260
Messaggio importante: Stampa questa email e presentati presso i nostri negozi per ricevere la tessera sconto

By |PHP, Web Design|Commenti disabilitati su How to Generate Coupon Codes

Disabling WordPress Automatic Updates

Disabling WordPress Automatic Updates

Wordpress 3.7 or over has an automatic updates function.

There are users who run WordPress for clients and have their own ways to update WordPress when a new version is available. Lastly, there are users who just want to do their updates manually and have more control over it.

Open wp-config.php file and add:

define( 'WP_AUTO_UPDATE_CORE', false );

This will disable the WordPress automatic updater, and you will still get notified when there is a new version available, so you can update at your own convenience.

By |Web Design, WordPress|Commenti disabilitati su Disabling WordPress Automatic Updates

PHP MySQL code to extract data from MySQL table and display as JSON

MySQL -> PHP -> JSON Layer -> JS/HTML

To prevent database password sniffing you must not get a direct access to database (sending database access datas).
The best way is to call a PHP engine and after, the PHP engine will render simple JSON data structure.
In the end you can use JScript to write, on the fly, the final HTML code.

json structure

We need store this simple datas:

Users:

Andrea Tonin January, 12 2012
Riccardo Santato April, 28 2010

We will create this json structure:

{"users":[
        {
            "firstName":"Andrea",
            "lastName":"Tonin",
            "joined": {
                "month":"January",
                "day":12,
                "year":2012
            }
        },
        {
            "firstName":"Riccardo",
            "lastName":"Santato",
            "joined": {
                "month":"April",
                "day":28,
                "year":2010
            }
        }
]}

Create database

Open phpMyAdmin

On the top localhost> mydatabase

Use phpMyAdmin to create:

Left Column> ‘Crea tabella’> MyISAM

Table name: ‘users’

PhpMyAdmin> In Alto> linguetta Struttura> aggiungere i campi

Campo: id
Tipo: INT
Lunghezza: 20
Predefinito: Nessuno
Null: deselezionato
Indice: PRIMARY
AUTO_INCREMENT: selezionato

Campo: firstName
Tipo: VARCHAR
Lunghezza: 255
Predefinito: Nessuno
Null: deselezionato
Indice: nessuno
AUTO_INCREMENT: deselezionato

Campo: lastName
Tipo: VARCHAR
Lunghezza: 255
Predefinito: Nessuno
Null: deselezionato
Indice: nessuno
AUTO_INCREMENT: deselezionato

Campo: month
Tipo: VARCHAR
Lunghezza: 20
Predefinito: Nessuno
Null: deselezionato
Indice: nessuno
AUTO_INCREMENT: deselezionato

Campo: day
Tipo: INT
Lunghezza: 2
Predefinito: Nessuno
Null: deselezionato
Indice: nessuno
AUTO_INCREMENT: deselezionato

Campo: year
Tipo: INT
Lunghezza: 4
Predefinito: Nessuno
Null: deselezionato
Indice: nessuno
AUTO_INCREMENT: deselezionato

The final result inside phpMyAdmin:

mysql-0009

PhpMyAdmin> In Alto> linguetta Inserisci>

Aggiungere i campi:

Andrea Tonin January, 12 2012
Riccardo Santato April, 28 2010

colonna di sinistra PhpMyAdmin> click su ‘users’>

mysql-0010

PHP json translator – php-json.php

<?php
$host="localhost"; //lasciare com'è se utilizzate bluehost
$username="lucedigi_user"; 
$password="mypassword"; 
$db_name="lucedigi_testphp"; // database name
$tbl_name="users"; //indicate la tabella presente nel database a cui si deve collegare 
  
// Connetti al server e seleziona il database
mysql_connect("$host", "$username", "$password")or die("cannot connect");
mysql_select_db("$db_name")or die("DB non connesso");
 
// JSON TRANSLATOR CODE START ###################################
 
$sql = "select * from users"; //indicate la tabella presente nel database a cui si deve collegare 
$result = mysql_query($sql);
$json = array();
if(mysql_num_rows($result)){
while($row=mysql_fetch_row($result)){
$json['users'][]=$row;  //indicate la tabella presente nel database a cui si deve collegare 
}
}
mysql_close($db_name);
echo json_encode($json); // json_encode() PHP Function
 
// JSON TRANSLATOR CODE END ####################################
?> 

Notice:

echo json_encode($json); // json_encode() PHP Function

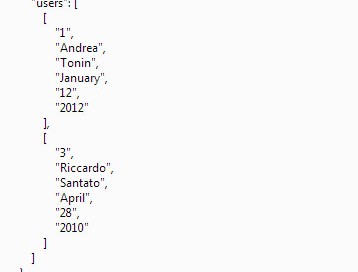
If you execute php-json.php, you will see:

{“users”:[[“1″,”Andrea”,”Tonin”,”January”,”12″,”2012″],[“3″,”Riccardo”,”Santato”,”April”,”28″,”2010″]]}

JScript Render – js-json.php

<!DOCTYPE html>
 
<html>
<head> 
</head>
 
<body>

    <!-- Write with PHP include function -->
    Write with PHP include function: <br>
    <?php include("php-json.php"); ?>
     
    <script>
	// Write with Javascript
	var jsoncontent='<?php include("phpjson.php"); ?>';
	document.write('<br>Write with JavaScript - simple variable:<br>');
	document.write(jsoncontent);
    </script>
	
</body>
 
</html>

If you execute js-json.php, you will see:

Write with PHP include function:
{“users”:[[“1″,”Andrea”,”Tonin”,”January”,”12″,”2012″],[“3″,”Riccardo”,”Santato”,”April”,”28″,”2010″]]}
Write with JavaScript – simple variable:
{“users”:[[“1″,”Andrea”,”Tonin”,”January”,”12″,”2012″],[“3″,”Riccardo”,”Santato”,”April”,”28″,”2010″]]}

You can store the data inside a javascript object:

<!DOCTYPE html>
  
<html>
<head> 
</head>
  
<body> 
    <script>
    // Write with Javascript
    var jsoncontent='<?php include("php-json.php"); ?>';
    var obj = JSON.parse(jsoncontent);
    alert(JSON.stringify(obj, null, 4));
    </script>   
</body>
  
</html>

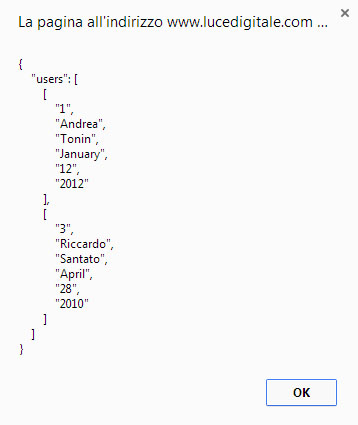
Notice: JSON.stringify function to print out Javascript objects

The result is:
json-0001

By |JavaScript, JSON, MySQL, PHP, Web Design|Commenti disabilitati su PHP MySQL code to extract data from MySQL table and display as JSON