PHP Development – Easy PHP – NetBeans IDE for noobs

What is and IDE?

To develop HTML and CSS you can use an advance notepad as NotePad++ (http://notepad-plus-plus.org/).
A tool like that is very useful for:
– Syntax Highlighting and Syntax Folding
– Auto-completion: Word completion, Function completion and Function parameters hint
– Multi-View

To edit simple PHP code you can use NotePad++ but if you want develop an application with variables and classes you will need an IDE environment. An integrated development environment (IDE) or interactive development environment is a software application that provides comprehensive facilities to computer programmers for software development.
An IDE normally consists of:
– Syntax Highlighting and Syntax Folding
– Auto-completion: Word completion, Function completion and Function parameters hint
– Multi-View
– Build Automation Tool
– Debugger
– Ready to use code for graphic elements as windows, slides, buttons.
– Project Support to organize files better

Debugger help you to find evil bugs in less time.

Today we will try NetBeans IDE (https://netbeans.org/).
NetBeans IDE is free and by Oracle.

What is a WAMP?

A WAMP (Windows web development environment) allows you to create web applications with Apache, PHP and a MySQL database without installing them in your system. It is a like a magic standalone box :)

I like to use EasyPHP(http://www.easyphp.org/).

Install and Run EasyPHP

1. Go to http://www.easyphp.org/ download ‘E Development Server’ and install

2. Go to your installation folder, usually Programmi(x86)> EasyPHP> data> localweb> www> create the folder ‘test-net-beans’

3. If you have Skype running, drop it because it uses the same port of EasyPHP

4. Run EasyPHP

5. Barra di Windows> icone nascoste> RMB over EasyPHP> Administrator to see versions of Apache PHP and MYSQL

6. Barra di Windows> icone nascoste> RMB over EasyPHP> Local Web> www, to see the root folder of your website

Install and Run NetBean IDE

1. Download the package here http://www.oracle.com/technetwork/java/javase/downloads/jdk-netbeans-jsp-142931.html
This package includes NetBeans 8.0.2 + JDK, one installation, two packages!
Lanch the .exe and install

2. Open NetBeans IDE> MAIN TOP MENU> Tools> Plugins> ‘Available Plugins’ tab> check PHP> ‘Install’ button, then restat IDE

New Project – Hello World!

0. Run NetBeans IDE

1. MAIN TOP MENU> File> New project> PHP Application

2.
Project Name: TestNetBeans
Sources Folder: usually Programmi(x86)> EasyPHP> data> localweb> www> test-net-beans
PHP Version: the same setup in barra di Windows> Icone nascoste> RMB Easy PHP> Administration

3.
Run As: Local Web Site
Project URL: http://localhost/www/test-netbeans/

4. PHP Frameworks: leave blank

NOTICE: inside Programmi(x86)> EasyPHP> data> localweb> www> create the folder ‘test-net-beans’ now there is the folder /nbproject

5. NetBeans> MAIN TOP MENU> File> New File> PHP> PHP File (empty php file)

6.
File Name: index
Folder: Browse the root folder or wherever you want, ‘Finish’, good! We have our first index.php! Congrats!

7. Write inside index.php:


<?php
/* 
 * My first index file
 */
echo "Hello World!";
?>

8. MAIN TOOLBAR> Play!

PHP Application with Existing Sources

0. Run NetBeans IDE

1. MAIN TOP MENU> File> New project> PHP Application with Existing Sources

2.
Project Name: TestNetBeans
Sources Folder: usually Programmi(x86)> EasyPHP> data> localweb> www> my-old-project
Project Name: my-old-project
PHP Version: the same of EasyPHP

3.
Run As: Local Web Site
Project URL: http://127.0.0.1/www/my-old-project/
NOTE: you can modify later at File> Project Properties> Run Configuration> Project URL
Index Folder: index.php or other

Debug

1. NetBeans> MAIN TOP TOOLBAR> Debug Project, it will open a page like this: ‘http://127.0.0.1/www/my-website-folder/index.php?XDEBUG_SESSION_START=netbeans-xdebug

2. MAIN TOOL BAR> ‘Step Into'(F7) to debug step by step

Resume

The combination of tools is simple:

1. Easy PHP acts like a webserver, run Apache, PHP and MySQL in a sandbox and hosts the web site inder /www/mysite folder
2. NetBeans create a project file inside /www/mysite/nbproject and manages/edits .php files inside /www/mysite folder

NeBeans IDE edit -> | /www folder of EasyPHP WAMP |

By |PHP, Web Design|Commenti disabilitati su PHP Development – Easy PHP – NetBeans IDE for noobs

How to Generate Coupon Codes

How to Generate Coupon Codes

It is a simple script that generates a Coupon Code and sends it to the user’s email.
We do not use databases.

gimme-code-2014-0007.zip

DOWNLOAD


We code 2 files in the same folder:

1. contatti.html -> it sends data to -> send_form_email.php

2. send_form_email.php -> a) it renders an HTML page with the coupon code b) it sends a email with the coupon code

HTML form: contatti.html

It gets data from users and it sends to ‘send_form_email.php’

<!DOCTYPE html PUBLIC "-//W3C//DTD XHTML 1.0 Transitional//EN" "http://www.w3.org/TR/xhtml1/DTD/xhtml1-transitional.dtd">
<html xmlns="http://www.w3.org/1999/xhtml">
<head>

<meta name="KeyWords" content="luce, digitale">
<meta name="Classification" content="luce, digitale">
<meta name="Description" content="luce, digitale">

<meta http-equiv="Content-Type" content="text/html; charset=UTF-8" />
<meta http-equiv="X-UA-Compatible" content="IE=EmulateIE7" />
<title>Codice sconto - test</title>
	
<!-- INIZIO VALIDAZIONE PRIVACY -->
<script type="text/javascript"> 
function validate(form) { 
// Checking if at least one period button is selected. Or not. 
if (!document.contactform.acconsento.checked) { 
	alert( "Per procedere acconsentire al trattamento dei dati"); 
 	return false; 
	} 
 
 	return true;
}
</script>
<!-- FINE VALIDAZIONE PRIVACY -->

<!-- INIZIO CONTENUTI -->
Contenuto di esempio: <br />IMMAGINE TESSERA - IMMAGINE OGGETTI DESIDERABILI <br /> Ottieni la tua tessera sconto! Compila i dati qui sotto e ti sarà inviato gratuitamente il tuo codice personale per ottenere la tessera sconto presso i nostri punti vendita!<br /><br />
<!-- FINE CONTENUTI -->
			  
<!-- INIZIO CONTACT FORM -->
<form name="contactform" method="post" action="send_form_email.php" onsubmit='return validate(this)'>
<table width="581">
<tr>
 <td width="144" valign="top">
  <label for="first_name">Username *</label>
 </td>
 <td width="425" valign="top">
  <input  type="text" name="first_name" maxlength="50" size="30">
 </td>
</tr>
<tr>
 <td valign="top"">
  <label for="last_name">Password *</label>
 </td>
 <td valign="top">
  <input  type="text" name="last_name" maxlength="50" size="30">
 </td>
</tr>
<tr>
 <td valign="top">
  <label for="email">Indirizzo Email  *</label>
 </td>
 <td valign="top">
  <input  type="text" name="email" maxlength="80" size="30">
 </td>
</tr>
<tr>
 <td valign="top">
  <label for="telephone">Cellulare</label>
 </td>
 <td valign="top">
  <input  type="text" name="telephone" maxlength="30" size="30">
 </td>
</tr>
<tr>
  <td valign="top">&nbsp;</td>
  <td valign="top">&nbsp;</td>
</tr>
<tr>
 <td valign="top">PRIVACY</td>
 <td valign="top"><textarea name="comments" cols="43" rows="5" readonly="readonly">Informativa ai sensi dell'art. 13, d. lgs 196/2003. I dati forniti, verranno trattati e custoditi da xxxxx & C s.a.s. PIVA xxxxx - DL. 196/2003. I dati potranno essere diffusi tra le sole società; controllate, affiliate, consociate e collegate al fine di fornirVi informazioni commerciali, per iniziative promozionali, per attività di ricerca e statistica ed al fine di consentire un migliore servizio. Voi avete diritto di rettificare, integrare o richiedere cancellazione dei dati forniti - DL. 196/2003.</textarea>
 </td>
</tr>
<tr>
  <td colspan="2" valign="top"><br>
      </td>
</tr>
<tr>
  <td colspan="2" valign="top">Manifestazione di consenso:</td>
  </tr>
<tr>
  <td colspan="2" valign="top"><input type="checkbox" name="acconsento" value="acconsento">
  Acconsento al trattamento dei miei dati personali.</td>
</tr>
<tr>
 <td colspan="2" style="text-align:center">
   <div align="left">
     <input type="submit" value="I n v i a  i l  M e s s a g g i o">   
   </div></td>
</tr>
</table>
</form>
<!-- FINE CONTACT FORM -->
			  

</body>
</html>

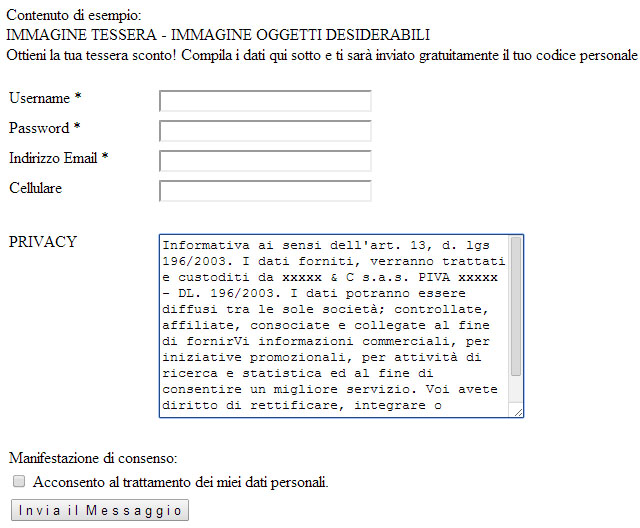
The result:

coupons-php-0001

PHP Engine: send_form_email.php

<?php
if(isset($_POST['email'])) {
     
    // EDIT THE 2 LINES BELOW AS REQUIRED
    // la linea sotto sarò la email a cui rispondere in caso di problemi con il codice tessera
    $email_to = "myemail@lucedigitale.com";
    $email_subject = "Il tuo codice sconto da myweb.com";
     
     
    function died($error) {
        // your error code can go here
        echo "Ci sono degli errori nel Form che hai compilato!<br>";
        echo "Gli errori appaiono sotto:<br /><br />";
        echo $error."<br />";
        echo "Torna indietro e correggi questi errori.<br /><br />";
        die();
    }
     
    // validation expected data exists
    if(!isset($_POST['first_name']) ||
        !isset($_POST['last_name']) ||
        !isset($_POST['email']) ||
        !isset($_POST['telephone']) ||
        !isset($_POST['comments'])) {
        died('Ci sono degli errori nel Form che hai compilato');      
    }
     
    $first_name = $_POST['first_name']; // required
    $last_name = $_POST['last_name']; // required
    $email_from = $_POST['email']; // required
    $telephone = $_POST['telephone']; // not required
    $comments = $_POST['comments']; // required
     
    $error_message = "";
    $email_exp = '/^[A-Za-z0-9._%-]+@[A-Za-z0-9.-]+\.[A-Za-z]{2,4}$/';
  if(!preg_match($email_exp,$email_from)) {
    $error_message .= 'Indirizzo email non valido.<br />';
  }
    $string_exp = "/^[A-Za-z .'-]+$/";
  if(!preg_match($string_exp,$first_name)) {
    $error_message .= 'Username non valido<br />';
  }
  if(!preg_match($string_exp,$last_name)) {
    $error_message .= 'Password non valida<br />';
  }
  if(strlen($comments) < 2) {
    $error_message .= 'Campo Richieste non valido<br />';
  }
  if(strlen($error_message) > 0) {
    died($error_message);
  }
    $email_message = "Form details below.\n\n";
     
    function clean_string($string) {
      $bad = array("content-type","bcc:","to:","cc:","href");
      return str_replace($bad,"",$string);
    }
     
// **************************
//Generazione del codice sconto - inizio
// **************************
//Creo 5 variabili numeriche random di 2 cifre, il codice sconto finale avrà quindi 10 cifre
$a=rand(11,20);
$b=rand(21,30);
$c=rand(31,40);
$d=rand(41,50);
$e=rand(51,60);
// Creo il codice sconto concatenando le variabili random
$codice=$a.$b.$c.$d.$e;
// **************************
//Generazione del codice sconto - fine
// **************************
	 
    $email_message .= "Username: ".clean_string($first_name)."\n";
    $email_message .= "Password: ".clean_string($last_name)."\n";
    $email_message .= "Email: ".clean_string($email_to)."\n";
    $email_message .= "Cellulare: ".clean_string($telephone)."\n";
    // invio il codice sconto
    $email_message .= "Grazie per la tua registrazione, il tuo codice sconto: ".clean_string($codice)."\n";
    // la riga sotto non la utilizzo perchè altrimenti arriverebbe in email tutto il testo della privacy
    // $email_message .= "Privacy: ".clean_string($comments)."\n";
    // aggiungo comunque un testo di commento standard alla email
    $email_message .= "Messaggio importante: Stampa questa email e presentati presso i nostri negozi per ricevere la tessera sconto";
     
// create email headers
// invio l'email all'indirizzo specificato nel form html cioè la variabile $email_from proveniente dal proprietario del sito della variabile $email_to specificata all'inizio del codice
$headers = 'From: '.$email_to."\r\n".
'Reply-To: '.$email_to."\r\n" .
'X-Mailer: PHP/' . phpversion();
@mail($email_from, $email_subject, $email_message, $headers); 

// Visualizzo il codice sconto nella pagina in caso l'email non arrivi
// o il provider blocchi le email al superamento del limite giornaliero
echo "<center>Grazie per la registrazione! Stampa questa pagina ed esibiscila al punto vendita. Il tuo codice sconto: ".$codice."<center>";
?>
 
<!-- include your own success html here -->
 <center>Torna al sito <a href="http://www.lucedigitale.com" target="_self">www.lucedigitale.com</center>

 
<?php
}
?>

The HTML page – coupon code message:

Grazie per la registrazione! Stampa questa pagina ed esibiscila al punto vendita.
Il tuo codice sconto: 1329374260
Torna al sito www.lucedigitale.com

The final email content:

Form details below.

Username: blabla
Password: blabla
Email: myemail@lucedigitale.com
Cellulare: 123 456 7890
Grazie per la tua registrazione, il tuo codice sconto: 1329374260
Messaggio importante: Stampa questa email e presentati presso i nostri negozi per ricevere la tessera sconto

By |PHP, Web Design|Commenti disabilitati su How to Generate Coupon Codes

PHP MySQL code to extract data from MySQL table and display as JSON

MySQL -> PHP -> JSON Layer -> JS/HTML

To prevent database password sniffing you must not get a direct access to database (sending database access datas).
The best way is to call a PHP engine and after, the PHP engine will render simple JSON data structure.
In the end you can use JScript to write, on the fly, the final HTML code.

json structure

We need store this simple datas:

Users:

Andrea Tonin January, 12 2012
Riccardo Santato April, 28 2010

We will create this json structure:

{"users":[
        {
            "firstName":"Andrea",
            "lastName":"Tonin",
            "joined": {
                "month":"January",
                "day":12,
                "year":2012
            }
        },
        {
            "firstName":"Riccardo",
            "lastName":"Santato",
            "joined": {
                "month":"April",
                "day":28,
                "year":2010
            }
        }
]}

Create database

Open phpMyAdmin

On the top localhost> mydatabase

Use phpMyAdmin to create:

Left Column> ‘Crea tabella’> MyISAM

Table name: ‘users’

PhpMyAdmin> In Alto> linguetta Struttura> aggiungere i campi

Campo: id
Tipo: INT
Lunghezza: 20
Predefinito: Nessuno
Null: deselezionato
Indice: PRIMARY
AUTO_INCREMENT: selezionato

Campo: firstName
Tipo: VARCHAR
Lunghezza: 255
Predefinito: Nessuno
Null: deselezionato
Indice: nessuno
AUTO_INCREMENT: deselezionato

Campo: lastName
Tipo: VARCHAR
Lunghezza: 255
Predefinito: Nessuno
Null: deselezionato
Indice: nessuno
AUTO_INCREMENT: deselezionato

Campo: month
Tipo: VARCHAR
Lunghezza: 20
Predefinito: Nessuno
Null: deselezionato
Indice: nessuno
AUTO_INCREMENT: deselezionato

Campo: day
Tipo: INT
Lunghezza: 2
Predefinito: Nessuno
Null: deselezionato
Indice: nessuno
AUTO_INCREMENT: deselezionato

Campo: year
Tipo: INT
Lunghezza: 4
Predefinito: Nessuno
Null: deselezionato
Indice: nessuno
AUTO_INCREMENT: deselezionato

The final result inside phpMyAdmin:

mysql-0009

PhpMyAdmin> In Alto> linguetta Inserisci>

Aggiungere i campi:

Andrea Tonin January, 12 2012
Riccardo Santato April, 28 2010

colonna di sinistra PhpMyAdmin> click su ‘users’>

mysql-0010

PHP json translator – php-json.php

<?php
$host="localhost"; //lasciare com'è se utilizzate bluehost
$username="lucedigi_user"; 
$password="mypassword"; 
$db_name="lucedigi_testphp"; // database name
$tbl_name="users"; //indicate la tabella presente nel database a cui si deve collegare 
  
// Connetti al server e seleziona il database
mysql_connect("$host", "$username", "$password")or die("cannot connect");
mysql_select_db("$db_name")or die("DB non connesso");
 
// JSON TRANSLATOR CODE START ###################################
 
$sql = "select * from users"; //indicate la tabella presente nel database a cui si deve collegare 
$result = mysql_query($sql);
$json = array();
if(mysql_num_rows($result)){
while($row=mysql_fetch_row($result)){
$json['users'][]=$row;  //indicate la tabella presente nel database a cui si deve collegare 
}
}
mysql_close($db_name);
echo json_encode($json); // json_encode() PHP Function
 
// JSON TRANSLATOR CODE END ####################################
?> 

Notice:

echo json_encode($json); // json_encode() PHP Function

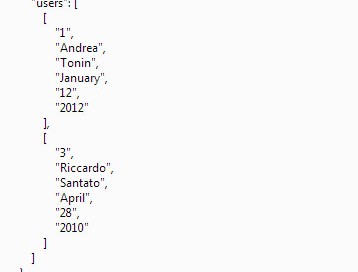
If you execute php-json.php, you will see:

{“users”:[[“1″,”Andrea”,”Tonin”,”January”,”12″,”2012″],[“3″,”Riccardo”,”Santato”,”April”,”28″,”2010″]]}

JScript Render – js-json.php

<!DOCTYPE html>
 
<html>
<head> 
</head>
 
<body>

    <!-- Write with PHP include function -->
    Write with PHP include function: <br>
    <?php include("php-json.php"); ?>
     
    <script>
	// Write with Javascript
	var jsoncontent='<?php include("phpjson.php"); ?>';
	document.write('<br>Write with JavaScript - simple variable:<br>');
	document.write(jsoncontent);
    </script>
	
</body>
 
</html>

If you execute js-json.php, you will see:

Write with PHP include function:
{“users”:[[“1″,”Andrea”,”Tonin”,”January”,”12″,”2012″],[“3″,”Riccardo”,”Santato”,”April”,”28″,”2010″]]}
Write with JavaScript – simple variable:
{“users”:[[“1″,”Andrea”,”Tonin”,”January”,”12″,”2012″],[“3″,”Riccardo”,”Santato”,”April”,”28″,”2010″]]}

You can store the data inside a javascript object:

<!DOCTYPE html>
  
<html>
<head> 
</head>
  
<body> 
    <script>
    // Write with Javascript
    var jsoncontent='<?php include("php-json.php"); ?>';
    var obj = JSON.parse(jsoncontent);
    alert(JSON.stringify(obj, null, 4));
    </script>   
</body>
  
</html>

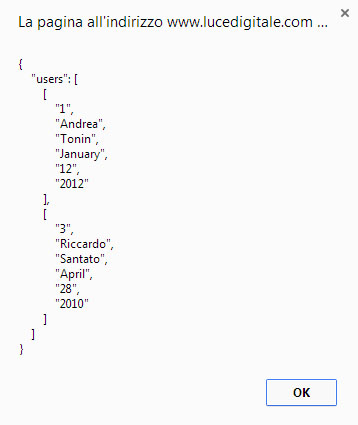
Notice: JSON.stringify function to print out Javascript objects

The result is:
json-0001

By |JavaScript, JSON, MySQL, PHP, Web Design|Commenti disabilitati su PHP MySQL code to extract data from MySQL table and display as JSON

How to use multiple HTML form and only one PHP engine

How to use multiple HTML form and only one PHP engine

form.html

<html>
<body>
  
<form action="engine.php?action=firstEvent" method="post">
    Text: <input type="text" name="content"><br/>
    <input type="submit" value="Insert Event">
</form>

<form action="engine.php?action=secondEvent" method="post">
    Text: <input type="text" name="content"><br/>
    <input type="submit" value="Insert Event">
</form>

<form action="engine.php?action=thirdEvent" method="post">
    Text: <input type="text" name="content"><br/>
    <input type="submit" value="Insert Event">
</form>
  
</body>
</html>

engine.php

<?php
// Get HTML form data
if($_GET['action'] == 'firstEvent'){
    echo 'firstEvent <br>';
    $content = $_REQUEST['content']; 
    echo $content;
}

if($_GET['action'] == 'secondEvent'){
    echo 'secondEvent <br>';
    $content = $_REQUEST['content']; 
    echo $content;
}

if($_GET['action'] == 'thirdEvent'){
    echo 'thirdEvent <br>';
    $content = $_REQUEST['content']; 
    echo $content;
}
?>

Notice that the HTML form can send:
– engine.php?action=firstEvent
– engine.php?action=secondtEvent
– engine.php?action=thirdEvent

The PHP script makes different actions if it gets:
– GET[‘action’] == ‘firstEvent’
– GET[‘action’] == ‘secondEvent’
– GET[‘action’] == ‘thirdEvent’

By |PHP, Web Design|Commenti disabilitati su How to use multiple HTML form and only one PHP engine

PHP – MySQL – Simple Calendar

PHP – MySQL – Simple Calendar

DOWNLOAD


We want a calendar like this:

—–

Title of the event

Start date – End date

Content bla bla bla … Lorem ipsum dolor sit amet, consectetuer adipiscing elit. Aenean commodo ligula eget dolor. Aenean massa. Cum sociis natoque penatibus et magnis dis parturient montes, nascetur ridiculus mus. Donec quam felis, ultricies nec, pellentesque eu, pretium quis, sem. Nulla consequat massa quis enim. Donec pede justo, fringilla vel, aliquet nec, vulputate eget, arcu. In enim justo, rhoncus ut, imperdiet a, venenatis vitae, justo. Nullam dictum felis eu pede mollis pretium. Integer tincidunt. Cras dapibus. Vivamus elementum semper nisi. Aenean vulputate eleifend tellus.

Link>

—–

Create database

Entriamo in phpMyAdmin

In alto posizioniamoci su localhost> mydatabase

Usando phpMyAdmin creiamo:

Colonna di sinistra> ‘Crea tabella’> MyISAM

Nome tabella: calendar’

Struttura> aggiungere i campi

Campo: id
Tipo: INT
Lunghezza: 20
Predefinito: Nessuno
Null: deselezionato
Indice: PRIMARY
AUTO_INCREMENT: selezionato

Campo: title
Tipo: VARCHAR
Lunghezza: 255
Predefinito: Nessuno
Null: deselezionato
Indice: nessuno
AUTO_INCREMENT: deselezionato

Campo: link
Tipo: VARCHAR
Lunghezza: 255
Predefinito: Nessuno
Null: deselezionato
Indice: nessuno
AUTO_INCREMENT: deselezionato

Campo: content
Tipo: LONGTEXT -> it must contain max 4,294,967,295 characters
Lunghezza: -> non specifichiamo nulla
Predefinito: Nessuno
Null: deselezionato
Indice: nessuno
AUTO_INCREMENT: deselezionato

Campo: startDate
Tipo: DATETIME -> Format: YYYY-MM-DD HH:MM:SS Example: 2014-12-31 23:59:59

Campo: endDate
Tipo: DATETIME -> Format: YYYY-MM-DD HH:MM:SS Example: 2014-12-31 23:59:59

PhpMyAdmin
php-mysql-008

calendar_input_form.php

The input form

<!-- CONNESSIONE DB START -->
<?php
// Create DATABASE connection - START
// Statement: mysqli_connect(host,username,password,dbname)
// NOTICE: se lo script è installato nello stesso server del Data Base, host->localhost
$con=mysqli_connect("localhost","lucedigi_user","mypassword","lucedigi_testphp");
// Check connection
if (mysqli_connect_errno())
  {
  echo "<br> Failed to connect to MySQL: " . mysqli_connect_error();
  }
else
  {
  echo "Great! Connect to MySQL!<br><br>";
  }
  // Create DATABASE connection - END
  ?>
<!-- CONNESSIONE DB END -->

<html>
<body>
 
<!-- FORM INSERT START -->
<!-- Send data to calendar_insert_engine.php -->
<form action="calendar_insert_engine.php?action=addEvent" method="post">
    Title: <input type="text" name="title"><br/>
    Link: <input type="text" name="link"><br/>
    Start date (YYYY-MM-DD HH:MM): <input type="text" name="startDate"><br/>
    End date (YYYY-MM-DD HH:MM): <input type="text" name="endDate"><br/>
    Content: <br/>
    <textarea rows="15" cols="30" name="content"></textarea><br/>
    <input type="submit" value="Insert Event">
</form>
<!-- FORM INSERT END -->
 
</body>
</html>

<!-- QUERY DB START -->
<?php
// SELECT asterisco (tutti i dati) dalla tabella START
// inserisco i dati nella variabile $result
// ordinati in base a startDate in ordine decrescente
$result = mysqli_query($con,"SELECT * FROM calendar ORDER BY startDate DESC");
 
echo "<strong>Calendar - Event List: (Order by startDate DESC)</strong>";
echo "<br><br>ID - Title - Link - Start date - End date - Content<br>";
// Restituisce il set di record come un array
// ad ogni chiamata viene restituita la riga successiva
while($row = mysqli_fetch_array($result))
  {
  // Visualizza a video i dati
  echo $row['id'] . " - " .$row['title'] . " - " . $row['link'] . " - " . $row['startDate'] . " - " . $row['endDate'] . " - " . $row['content'];
  echo "<br>";
  }
// SELECT asterisco (tutti i dati) dalla tabella END
 
mysqli_close($con); 
echo "<br>Great! Connection Closed!"; 
?>
<!-- QUERY DB END -->

calendar_insert_engine.php

The PHP engine to store data

<?php
 
$host="localhost"; //lasciare com'è se utilizzate bluehost
$username="lucedigi_user"; 
$password="mypassword"; 
$db_name="lucedigi_testphp"; // database name
$tbl_name="calendar"; //Indicate la tabella presente nel database a cui si deve collegare 
 
// Connetti al server e seleziona il database
mysql_connect("$host", "$username", "$password")or die("cannot connect");
mysql_select_db("$db_name")or die("DB non connesso");
 
// Ottengo i dati dal form HTML
// Se dal form arriva - action=addEvent - esegui il seguente
if($_GET['action'] == 'addEvent'){
    $title = mysql_real_escape_string($_POST['title']);
    $link = mysql_real_escape_string($_POST['link']);
    $content = mysql_real_escape_string($_POST['content']);
    $startDate = date('Y-m-d H:i:s', strtotime($_POST['startDate'] . ":00"));
    $endDate = date('Y-m-d H:i:s', strtotime($_POST['endDate'] . ":00"));

    // Invio una query per inserire i dati
    mysql_query("INSERT INTO calendar VALUES (null, '$title', '$link', '$content', '$startDate', '$endDate');");
	echo "Great! New Record Inserted!";
}

?>

IMPROVE INPUT FORM WITH date tag

<!-- CONNESSIONE DB START -->
<?php
// Create DATABASE connection - START
// Statement: mysqli_connect(host,username,password,dbname)
// NOTICE: se lo script è installato nello stesso server del Data Base, host->localhost
$con=mysqli_connect("localhost","lucedigi_user","mypassword","lucedigi_testphp");
// Check connection
if (mysqli_connect_errno())
  {
  echo "<br> Failed to connect to MySQL: " . mysqli_connect_error();
  }
else
  {
  echo "Great! Connect to MySQL!<br><br>";
  }
  // Create DATABASE connection - END
  ?>
<!-- CONNESSIONE DB END -->

<html>
<body>
 
<!-- FORM INSERT START -->
<!-- Send data to calendar_insert_engine.php -->
<form action="calendar_insert_engine.php?action=addEvent" method="post">
    Title: <input type="text" name="title"><br/>
    Link: <input type="text" name="link"><br/>
    Start date (this send -> 2018-02-05): <input type="date" name="startDate"><br/>
    End date (this send -> 2018-02-05): <input type="date" name="endDate"><br/>
    Content: <br/>
    <textarea rows="15" cols="30" name="content"></textarea><br/>
    <input type="submit" value="Insert Event">
</form>
<!-- FORM INSERT END -->
 
</body>
</html>

<!-- QUERY DB START -->
<?php
// SELECT asterisco (tutti i dati) dalla tabella START
// inserisco i dati nella variabile $result
// ordinati in base a startDate in ordine decrescente
$result = mysqli_query($con,"SELECT * FROM calendar ORDER BY startDate DESC");
 
echo "<strong>Calendar - Event List: (Order by startDate DESC)</strong>";
echo "<br><br>ID - Title - Link - Start date - End date - Content<br>";
// Restituisce il set di record come un array
// ad ogni chiamata viene restituita la riga successiva
while($row = mysqli_fetch_array($result))
  {
  // Visualizza a video i dati
  echo $row['id'] . " - " .$row['title'] . " - " . $row['link'] . " - " . $row['startDate'] . " - " . $row['endDate'] . " - " . $row['content'];
  echo "<br>";
  }
// SELECT asterisco (tutti i dati) dalla tabella END
 
mysqli_close($con); 
echo "<br>Great! Connection Closed!"; 
?>
<!-- QUERY DB END -->
<?php
 
$host="localhost"; //lasciare com'è se utilizzate bluehost
$username="lucedigi_user"; 
$password="mypassword"; 
$db_name="lucedigi_testphp"; // database name
$tbl_name="calendar"; //Indicate la tabella presente nel database a cui si deve collegare 
 
// Connetti al server e seleziona il database
mysql_connect("$host", "$username", "$password")or die("cannot connect");
mysql_select_db("$db_name")or die("DB non connesso");
 
// Ottengo i dati dal form HTML
// Se dal form arriva - action=addEvent - esegui il seguente
if($_GET['action'] == 'addEvent'){
    $title = mysql_real_escape_string($_POST['title']);
    $link = mysql_real_escape_string($_POST['link']);
    $content = mysql_real_escape_string($_POST['content']);
    $startDate = date('Y-m-d H:i:s', strtotime($_POST['startDate'] . " 00:00:00"));
    $endDate = date('Y-m-d H:i:s', strtotime($_POST['endDate'] . " 00:00:00"));

    // Invio una query per inserire i dati
    mysql_query("INSERT INTO calendar VALUES (null, '$title', '$link', '$content', '$startDate', '$endDate');");
	echo "Great! New Record Inserted!";
}

?>

Notice:
the HTML form send data as 2018-02-05
the PHP script add ” 00:00:00″ -> strtotime($_POST[‘startDate’] . ” 00:00:00″
because MySQL DATETIME needs the format: YYYY-MM-DD HH:MM:SS Example: 2014-12-31 23:59:59

By |PHP, Web Design|Commenti disabilitati su PHP – MySQL – Simple Calendar