indiegamedev

Unreal Engine – Basic Material – Sample

Unreal Engine – Basic Material – Sample

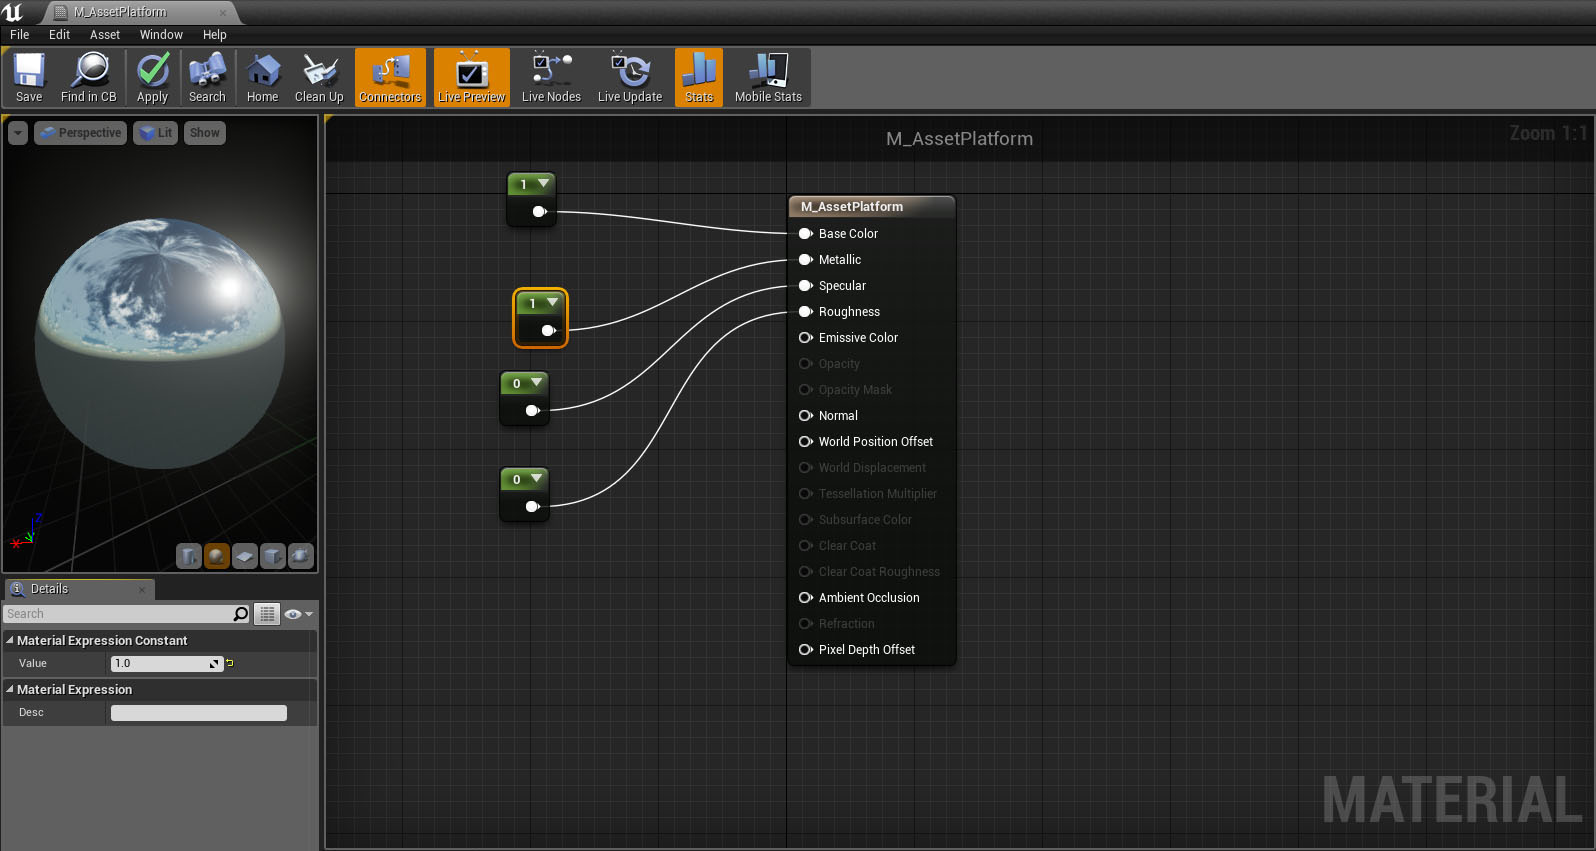
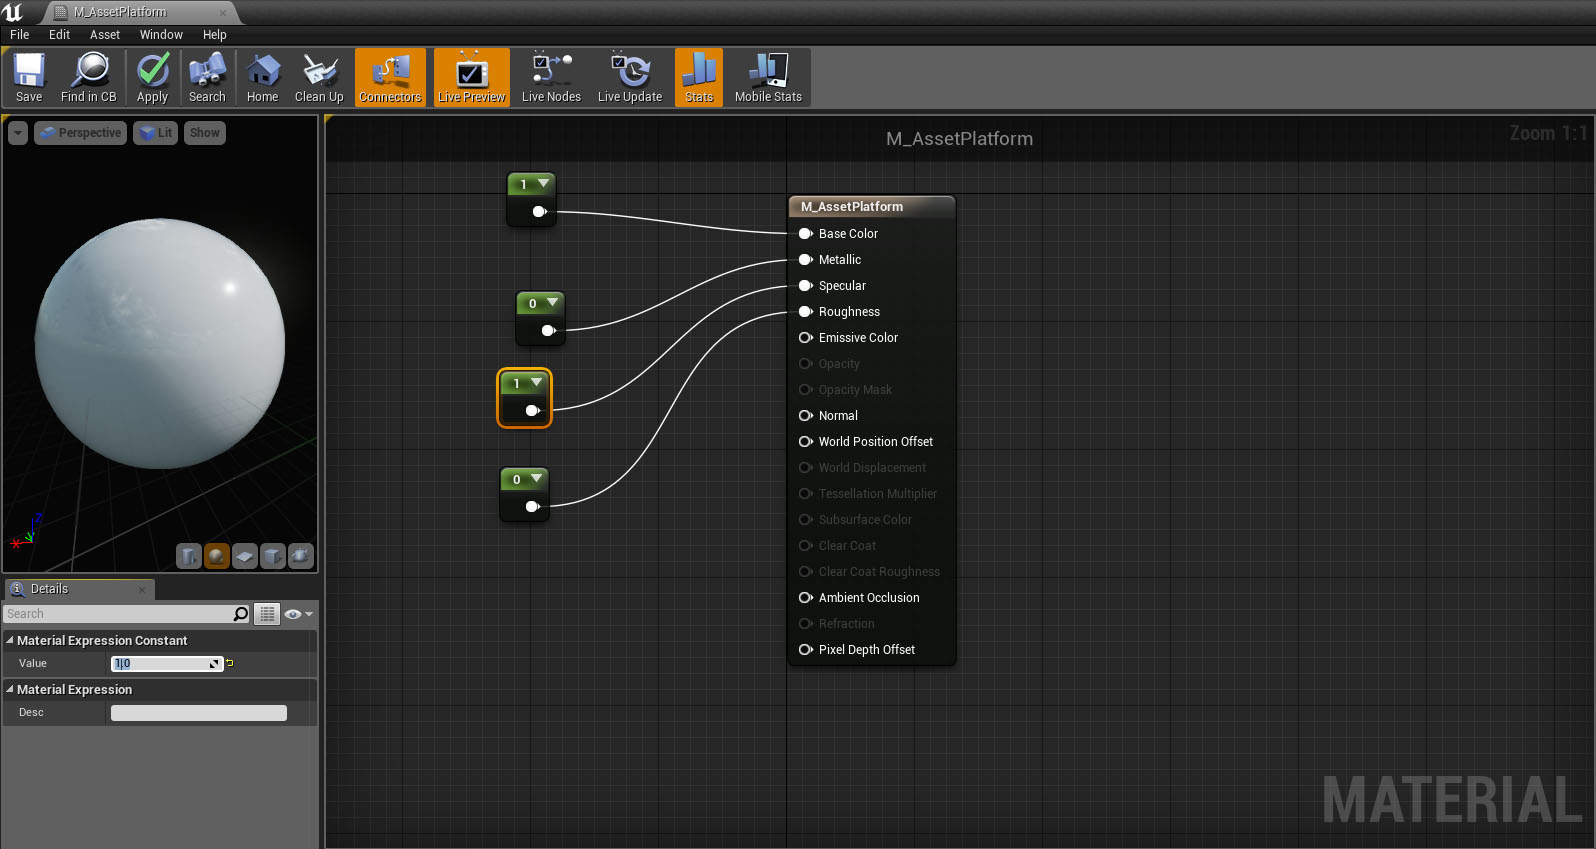
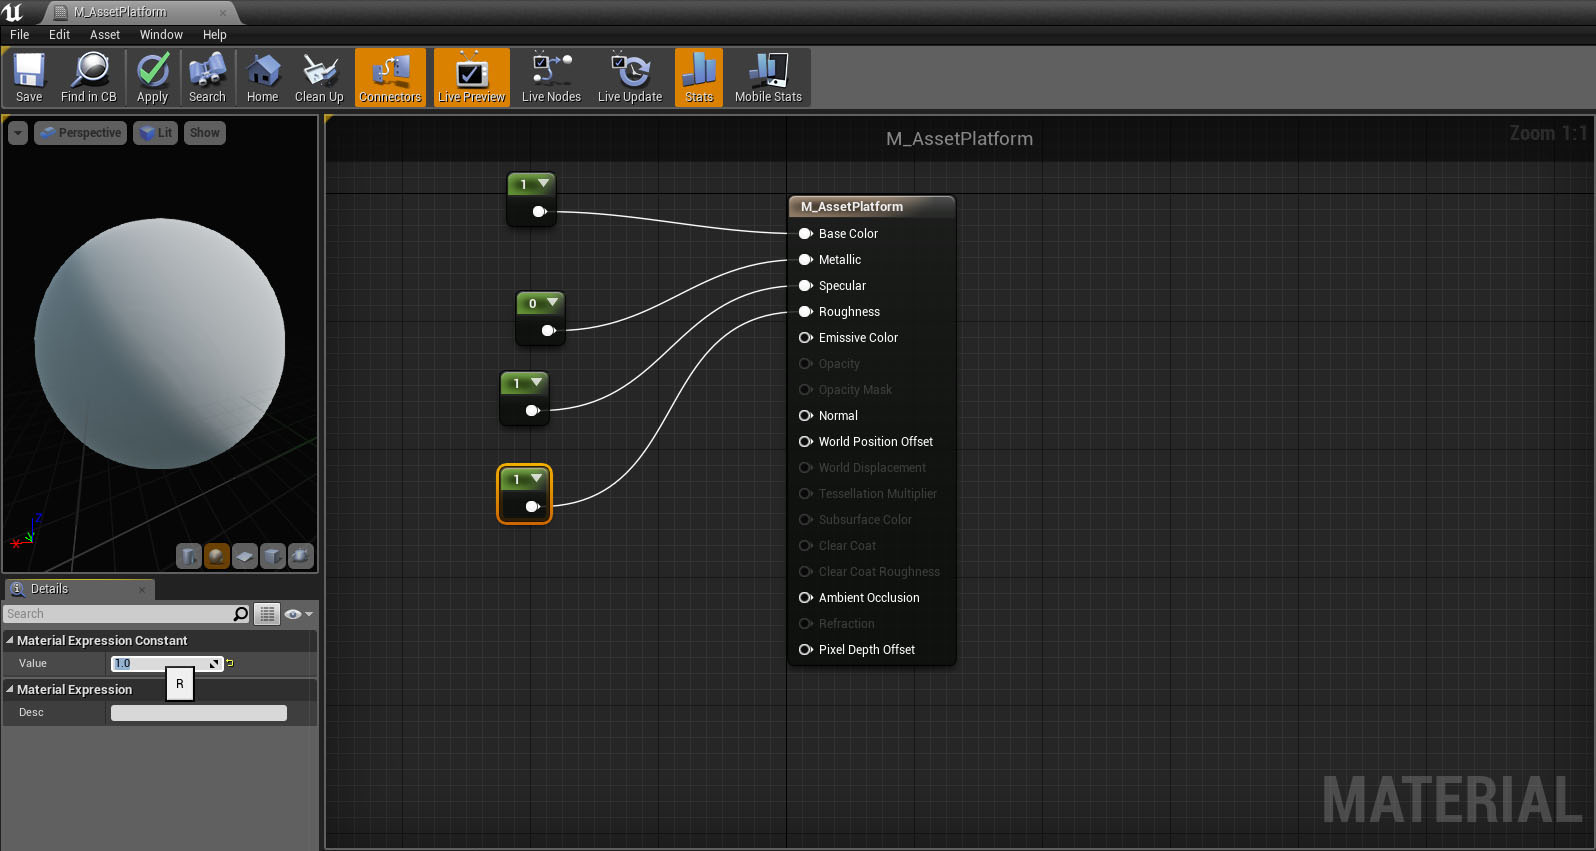
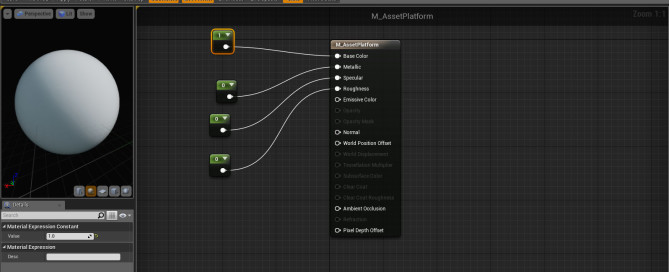
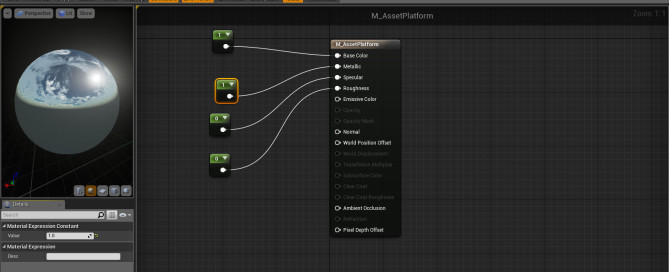
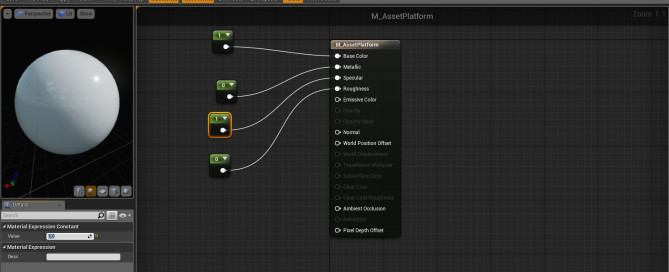
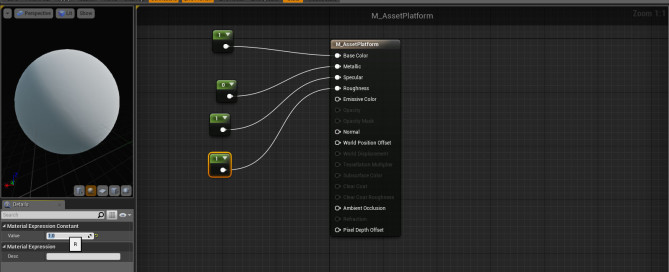
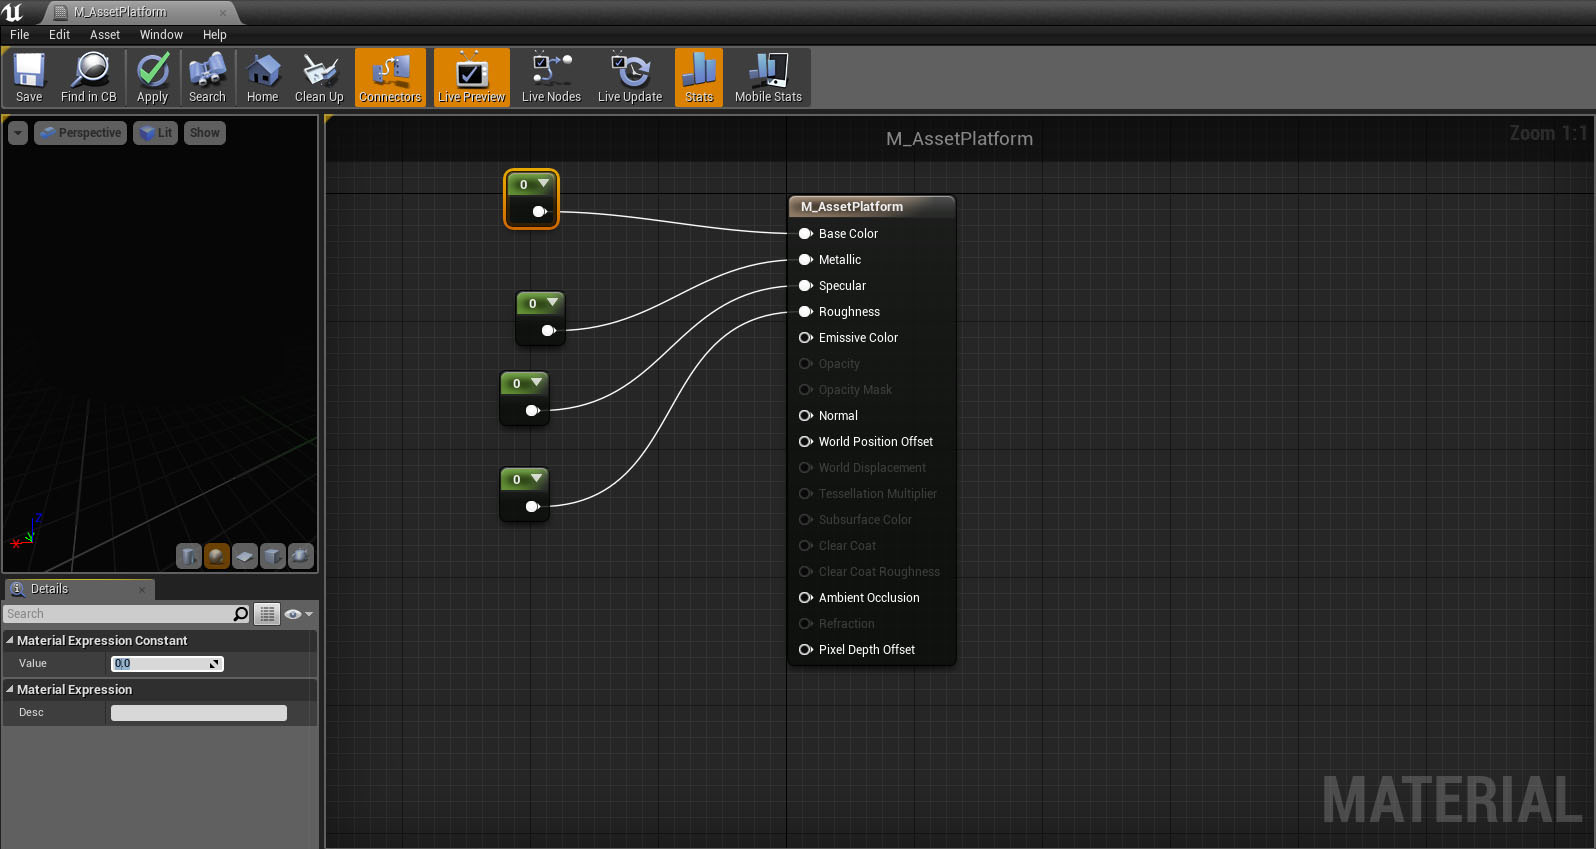
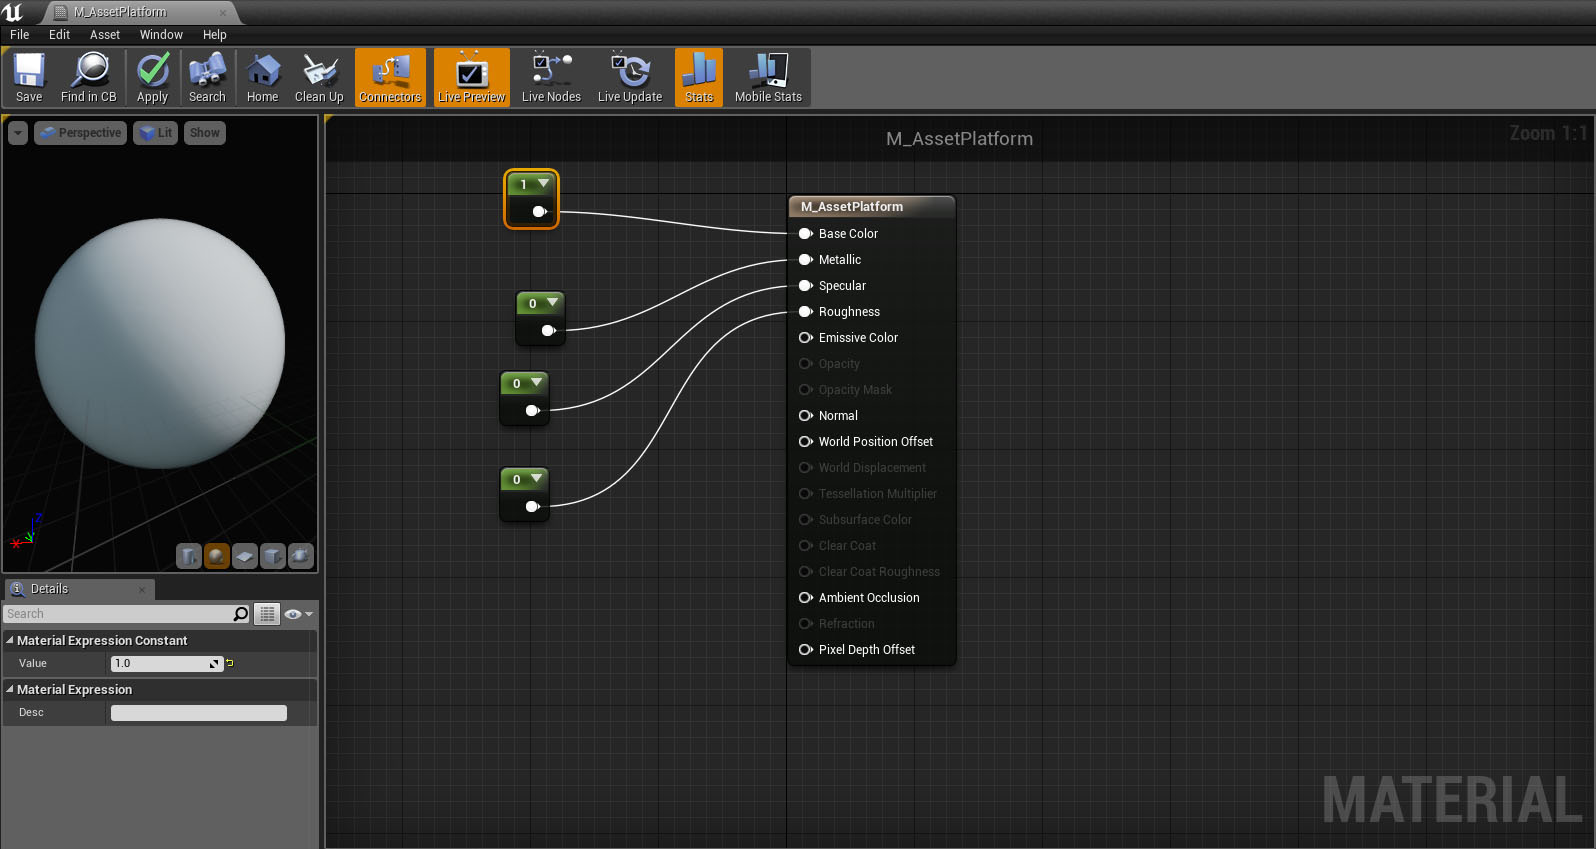
A simple basic material to understand how Unreal 4 Material Editor Works.

1. RIGHT COLUMN> here the nodes

2. LEFT COLUMN> here the setup

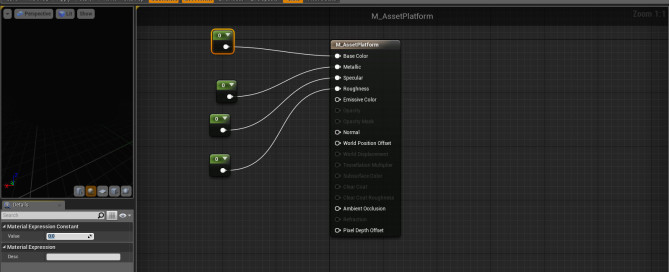
NOTICE: Base Color
base-color-0
base-color-1
NOTICE: Metallic
metallic-1
NOTICE: Specular
specular-1
NOTICE: Roughness
roughness-1

By |Unreal Engine, Video Games Development|Commenti disabilitati su Unreal Engine – Basic Material – Sample

Unreal Engine 4 – How manage Materials

Unreal Engine 4 – How manage Materials

Cut / Copy / Paste Materials – Current Project

Inside a project with:

Content Browser>
– MyFolder
– StarterContent/Materials/M_Basic_Floor>

1. RMB over a material, choose Rename/Delete/Duplicate
2. DRAG AND DROP the material from thumbnail area to ‘MyFolder’, a menu appears Copy Here/Move Here

Migrate Materials – To Another Project

First organize the folder and subfolder structures, example:

Content Browser>
– MyLibrary
– – Brick (put shader material here)
– – Metal (put shader material here)
– – Glass (put shader material here)
– – Textures (put All textures here, some shaders will share same textures)

Content Browser>
– MyFolder
– StarterContent/Materials/M_Basic_Floor>

1. RMB over a material (or a folder), choose Asset Actions> Migrate…> Select the ‘Content’ folder of another project.

NOTICE: point to ‘Content’ folder or the engine will give you an error message.

NOTICE: this tool automatic migrates all dependencies.

NOTICE: Migrate reconstructs ALL the folder and subfolder structure

By |Unreal Engine, Video Games Development|Commenti disabilitati su Unreal Engine 4 – How manage Materials

Unreal Engine 4 – How to create Materials – Basic Tutorial

Unreal Engine 4 – How to create Materials – Basic Tutorial

Materials are assets applied to meshes, contributing to a scene’s visual aesthetic.

Flat Color Material

1. Run Unreal Engine 4

2. Content Browser> Add New> Material> rename it ‘MyMaterial’, the asterisk means that it is non saved yet.

3. Content Browser> Save All

4. Double Click on ‘MyMaterial’ thumbnail, the Material Editor will be opened
.

NOTICE the Main Material Node for ‘MyMaterial’ in the middle.

The hotkeys are:
– 1,2,3,4: create 1-4 Vector Constant Node
– U: UV Coordinates
– T: Texture Samples Node
– S,V Scalar parameter, Vector Parameter
– A,D,M: Add, Divide, Multiply

– LMB: drag selection box
– RMB: pan
– Mouse Wheel: zoomin/out

5. RIGHT COLUMN> Constants> Constant3Vector (3Vector means RGB, 4Vector means RGBA)

– RMB over Constant3Vector to Delete, Cut, Copy, Duplicate etc…
– DOUBLE LMB to options, set R=255 G=000 B=000

6. Connect Constant3Vector to Base Color

7. TOP TOOLBAR> ‘Apply’ to apply the mod to material inside Content Browser

8. TOP TOOLBAR> ‘Save’ to save the asset, it is the same of Content Browser> Save All

A Rock Material – Diffuse and Normal

Shader Type

1. Click over ‘MyMaterial’ Main Material Node, it will turn to yellow, now it is selected

2. LEFT COLUMN> Material> Shading Model> Subsurface, MyMaterial pins changes

Color

3. RIGHT COLUMN> Texture> Texture Sample, drag and drop it in the working area

4. LMB over Texture Sample, LEFT COLUMN> notice ‘Material Expression Texture Base’

5. Content Browser> DRAG AND DROP a color texture over ‘Material Expression Texture Base’ slot

6. Connect Texture Sample (the diffuse map)> white pin TO MyMaterial> Base Color pin

Normal

7. Repeat from point 3 to 5 for Normal Map

8. Connect Texture Sample (the normal map)> white pin TO MyMaterial> Normal Color pin

Constant Nodes

For italian people; sono semplicemente delle costanti numeriche, ad esempio collego un Constant node con valore 0.5 a Opacity per avere un materiale trasparente al 50%.

1. RIGHT COLUMN> DRAG 3 ‘Constant’ and 1 ‘Constant3Vector’

2. DOUBLE LMB over:
– Constant, LEFT COLUMN set 0
– Constant, LEFT COLUMN set 0.8
– Constant, LEFT COLUMN set 0.95
– Constant3Vector, LEFT COLUMN set RED 255 0 0

3. Make the connections

Constant (0)-> Specular
Constant (0.8)-> Roughness
Constant (0.95)-> Opacity
Constant3Vector (RED) -> Sub Surface Color

Assign a material to a mesh (Actor) in the scene

Content Browser> DRAG AND DROP the Material over the mesh in the 3D Viewport

OR

RIGHT COLUMN> World Outliner> select the mesh> RIGHT COLUMN> Details> Materials> use the dropdown menu to assign material

Ref: https://docs.unrealengine.com/latest/INT/Engine/Content/QuickStart/2/index.html

By |Unreal Engine, Video Games Development|Commenti disabilitati su Unreal Engine 4 – How to create Materials – Basic Tutorial

3D Low Poly Characters for Games – Basic Workflow

Hi all,
today I will write about my favourite workflow to create low poly characters for games.
I will use 3DS Max + 3D Coat + Substance Painter + Photoshop.
You can do the same with other softwares, for example using 3DS Max + MudBox or Maya + ZBrush and so on…
The important is the file format you choose to exchange data.
To avoid plugins with fragile bridges I export using .fbx format + bitmap textures, after that I reconstruct by hand shaders inside Unity or Unreal.
With this workflow every software are independent and I can change tools whenever.

3DS Max – Scene Setup

1. Setup the scene with the System Unit Scale>1 Unit=1,0 Centimeters;
as described here:
http://www.lucedigitale.com/blog/3ds-max-micro-reference-manual-unit-setup-interiors/

2. Create a Box of 1x1x1m as reference

3. Create one or more Planes of 1x1m to map the image reference of your character, you will resize it to 1,80m if your character is 1,80m height

4. Setup the Viewport: Shaded + Edged Faces

5. RIGHT COLUMN> Utilities> Polygon Count

3DS Max – Modeling one side

CASE 1a.
I have a small collection of 1.000 poly people, male, female, fat, old, cartoon etc… with a very basic poly structure, starting from here I save a lot of time.
The low res character have a basic T pose and a structure suitable for animations.
Go to point 2

CASE 1b.
If you start from a hires model you will need first retopo it using 3D Coat.
Follow the lesson here:
http://www.lucedigitale.com/blog/3d-coat-retopo/
Consider to generate normal + occlusion map here to use the detail of hi res mesh.
Export to 3DS Max.
Go to point 2

2. RIGHT COLUMN> RMB over the Mesh name> Convert To: Editable Poly

4. The most used tools of ‘Editable Poly’ are:

Element

– Attach
– Detach

Polygon

– Create
– Slice Plane
– Quick Slice
– Cut (IT WORKS GREAT!)
– Make Planar
– View Align
– Relax
– Auto Smooth
– Use NURMS Subdivision (RMB over the Mesh name> Convert To: Editable Poly to collapse)

Border

– Double Click to select the entire loop
– CTRL + Click to use Additive Selection
– Split

Vertex

– Remove (remove the vertex without erase poly structure)
– Weld
– Target Weld
– Remove Isolated Vertices (to clear the mesh)

3DS Max – Mirror the other side

1. ‘Editable Poly’> select the middle vertices> Make Planar X> Move command to X=0

2. ‘Editable Poly’> modifers ‘Mirror’> Mirror AxisX, check ‘Copy’

3. ‘Editable Poly’> ‘Show end result on’

4. In the end ‘Editable Poly’> Vertex> Weld

5. RMB over the Mesh name> Collapse All

3DS Max – Export

1. RIGHT COLUMN> Hierarchy> Affect Pivot Only> move to 0,0,0

2. RIGHT COLUMN> Utilities> Reset XForm

3. Select the Mesh> RIGHT COLUMN> Modify> Modifier List> UVW Mapping Clear> RMB> Collapse All (remove old UVW)

4. Select the mesh> Export> Export Selected> name.fbx

3D-Coat – UV Mapping – Paint Texture

Remember that for games you have only one texture, usually 1024x1024px with all body UVW.
Leave more space for head and hands.

1. Run 3D Coat, into Wizard window select ‘UV Map Mesh’ etc…
Follow my tutorial here:
http://www.lucedigitale.com/blog/3d-coat-uv-mapping/

2. Switch 3D Coat to Paint.
Follow my tutorial here:
http://www.lucedigitale.com/blog/3d-coat-paint-texture/

You can paint here only diffuse channel, or diffuse + normal + specular.

3D Coat – Export

1. LEFT COLUMN> Commands> Apply UV-set
2. File> Export Model> .fbx and texture will be exported in the same folder
3. ‘OK’

Allegorithmic – Bitmap2Material

If you paint only diffuse color you can generate normal and specular with just one click using ‘Bitmap2Material’ software.
Follow the lesson here:
http://www.lucedigitale.com/blog/allegorithmic-bitmap2material-basic-tutorial/

Allegorithmic – Substance Painter – Paint Texture

To add more detail to your texture you can you Substance Painter, there are unbelivable tools here as ‘Paint with particles’

Follow the lesson here:
http://www.lucedigitale.com/blog/allegorithmic-substance-painter-basic-tutorial/

Photoshop

Use Photoshop for textures color correction.

3DS Max – Importing – Material

1. 3DS Max> Import> .fbx
2. Select the object> RIGHT COLUMN> Modify> Modifier List> Unwrap UVW
3. Select Unwrap UVW modifier> Edit UVs> Open UV Editor…, then you will see the work you have done using 3D Coat
4. Create a Material> Diffuse > Bitmap> assign the color texture created by 3D Coat, activate ‘Show Shaded Material’
5. DRAG and DROP the Material over the Mesh in the viewport

3DS Max – Face Expression

There are many ways to do that, the classic is:

1. Edit> Cloce> Copy and duplicate the Mesh, and move away from the original one, name it ‘Open Mouth’

2. Modify the face to create a new expression, not add or remove vertex o poly, only move it.

3. Select the original Mesh> RIGHT COLUMN> Modify> Modifier List> Morpher> Pick Object from Scene

4. Create others face expressions, try google-images ‘face expression’ to find useful photos

Follow the tutorial here:
http://www.lucedigitale.com/blog/3ds-max-micro-reference-manual-modifiers-animation-morpher/

3DS Max – Skeletal Animation

CASE 1. Humans
Use’Biped’ + Skin modifier
Follow the lesson here:
http://www.lucedigitale.com/blog/3ds-max-rigging-biped-skin/

CASE 2. Animals
Use ‘CAT’ rig + Skin modifier
Follow the lesson here:
http://www.lucedigitale.com/blog/3ds-max-rigging-cat-skin/

ADDITIONAL BONES
Follow the lesson here:
http://www.lucedigitale.com/blog/3ds-max-micro-reference-manual-animation-bones/

INVERSE KINEMATICS
Follow the lesson here:
http://www.lucedigitale.com/blog/3ds-max-micro-reference-manual-animation-inverse-kinematics/

3DS Max – Open Subdivision Surfaces

In this step you will convert the low poly model in a hi res model for a cinematic intro.

1. ‘Editable Poly’> modifers ‘OpenSubdiv’

3DS Max – Export for Games

The important is the file format you choose to exchange data.
To avoid plugins with fragile bridges I export using .fbx format + bitmap textures (diffuse + specular + normal + occlusion), after that I reconstruct by hand shaders inside Unity or Unreal Engine.
With this workflow every software are independent and I can change tools whenever.
By |3D Graphic, 3DS Max, Video Games Development|Commenti disabilitati su 3D Low Poly Characters for Games – Basic Workflow

MMORPG Anatomy – Basic Concepts

Today I will write about creating a MMORPG, basic concepts and variables only.

First, what is a MMORPG?

Massively multiplayer online role-playing games (MMORPGs) blend the genres of role-playing video games and massively multiplayer online games, potentially in the form of web browser-based games, in which a very large number of players interact with one another within a world.

As in all RPGs, the player assume the role of a character (often in a fantasy world or science-fiction world) and takes control over many of that character’s actions. MMORPGs are distinguished from single-player or small multi-player online RPGs by the number of players able to interact together, and by the game’s persistent world (usually hosted by the game’s publisher), which continues to exist and evolve while the player is offline and away from the game.

Main concepts

The idea is:
1. You, player have to fight monsters and/or other players to improve your skills.
2. Over time the strong players/monsters are going to beat you because they have more skills and power…
3. It’s time to improve your skill to take your revenge… again and again…

We have 2 protagonist: the player and the monster, this is the ultra basic concept, but it is not simple as it looks.

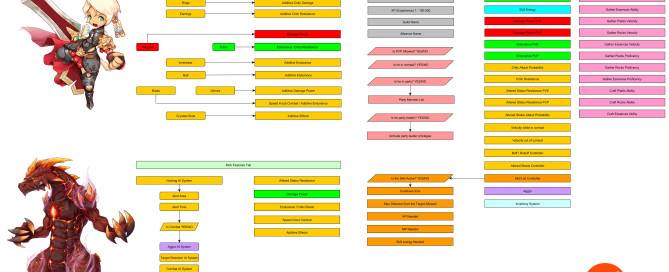
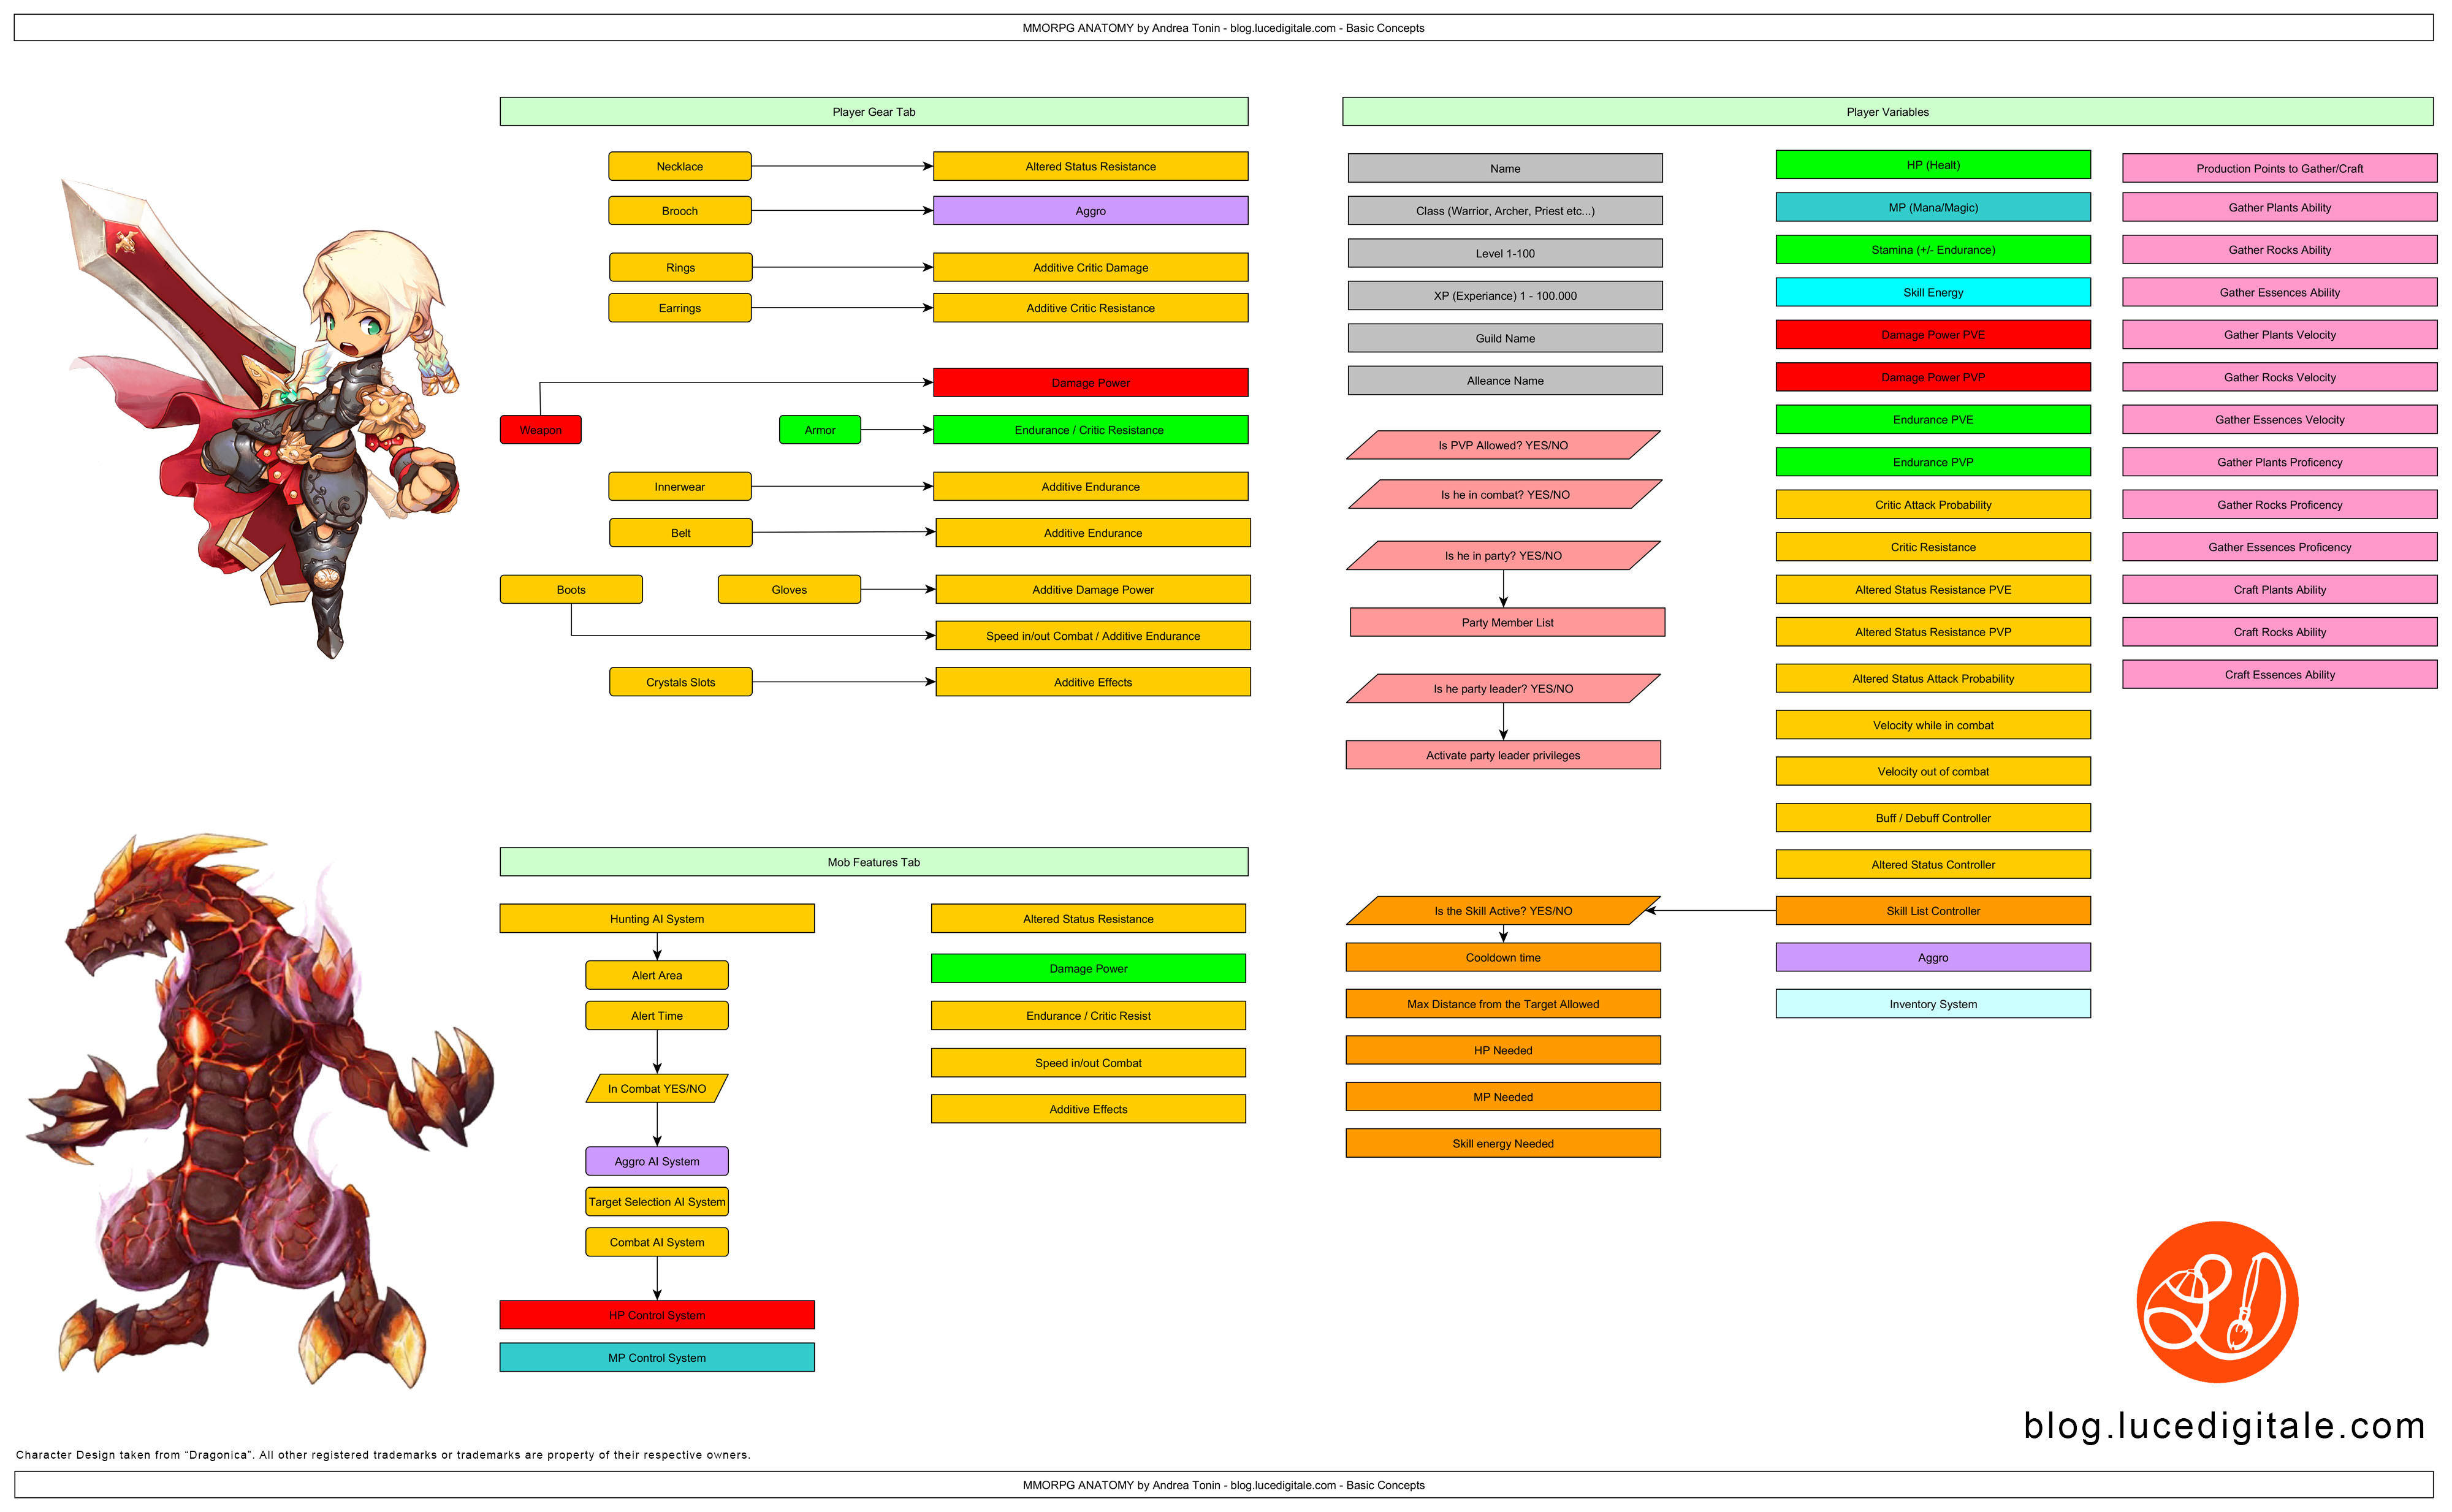
Click over the flow chart below:

mmorpg-anatomy-by-andrea-tonin-001

Classes

In a classic MMORPG there are 4 classes, every class has different skills and features.
This step is really important to understand because if you fail the character setup the game will be trash.
The right setup  is important to improve team play, strategies and general game play.

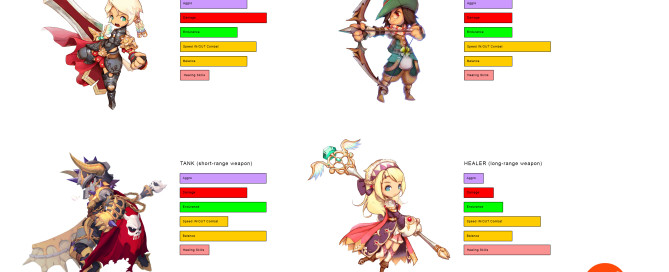
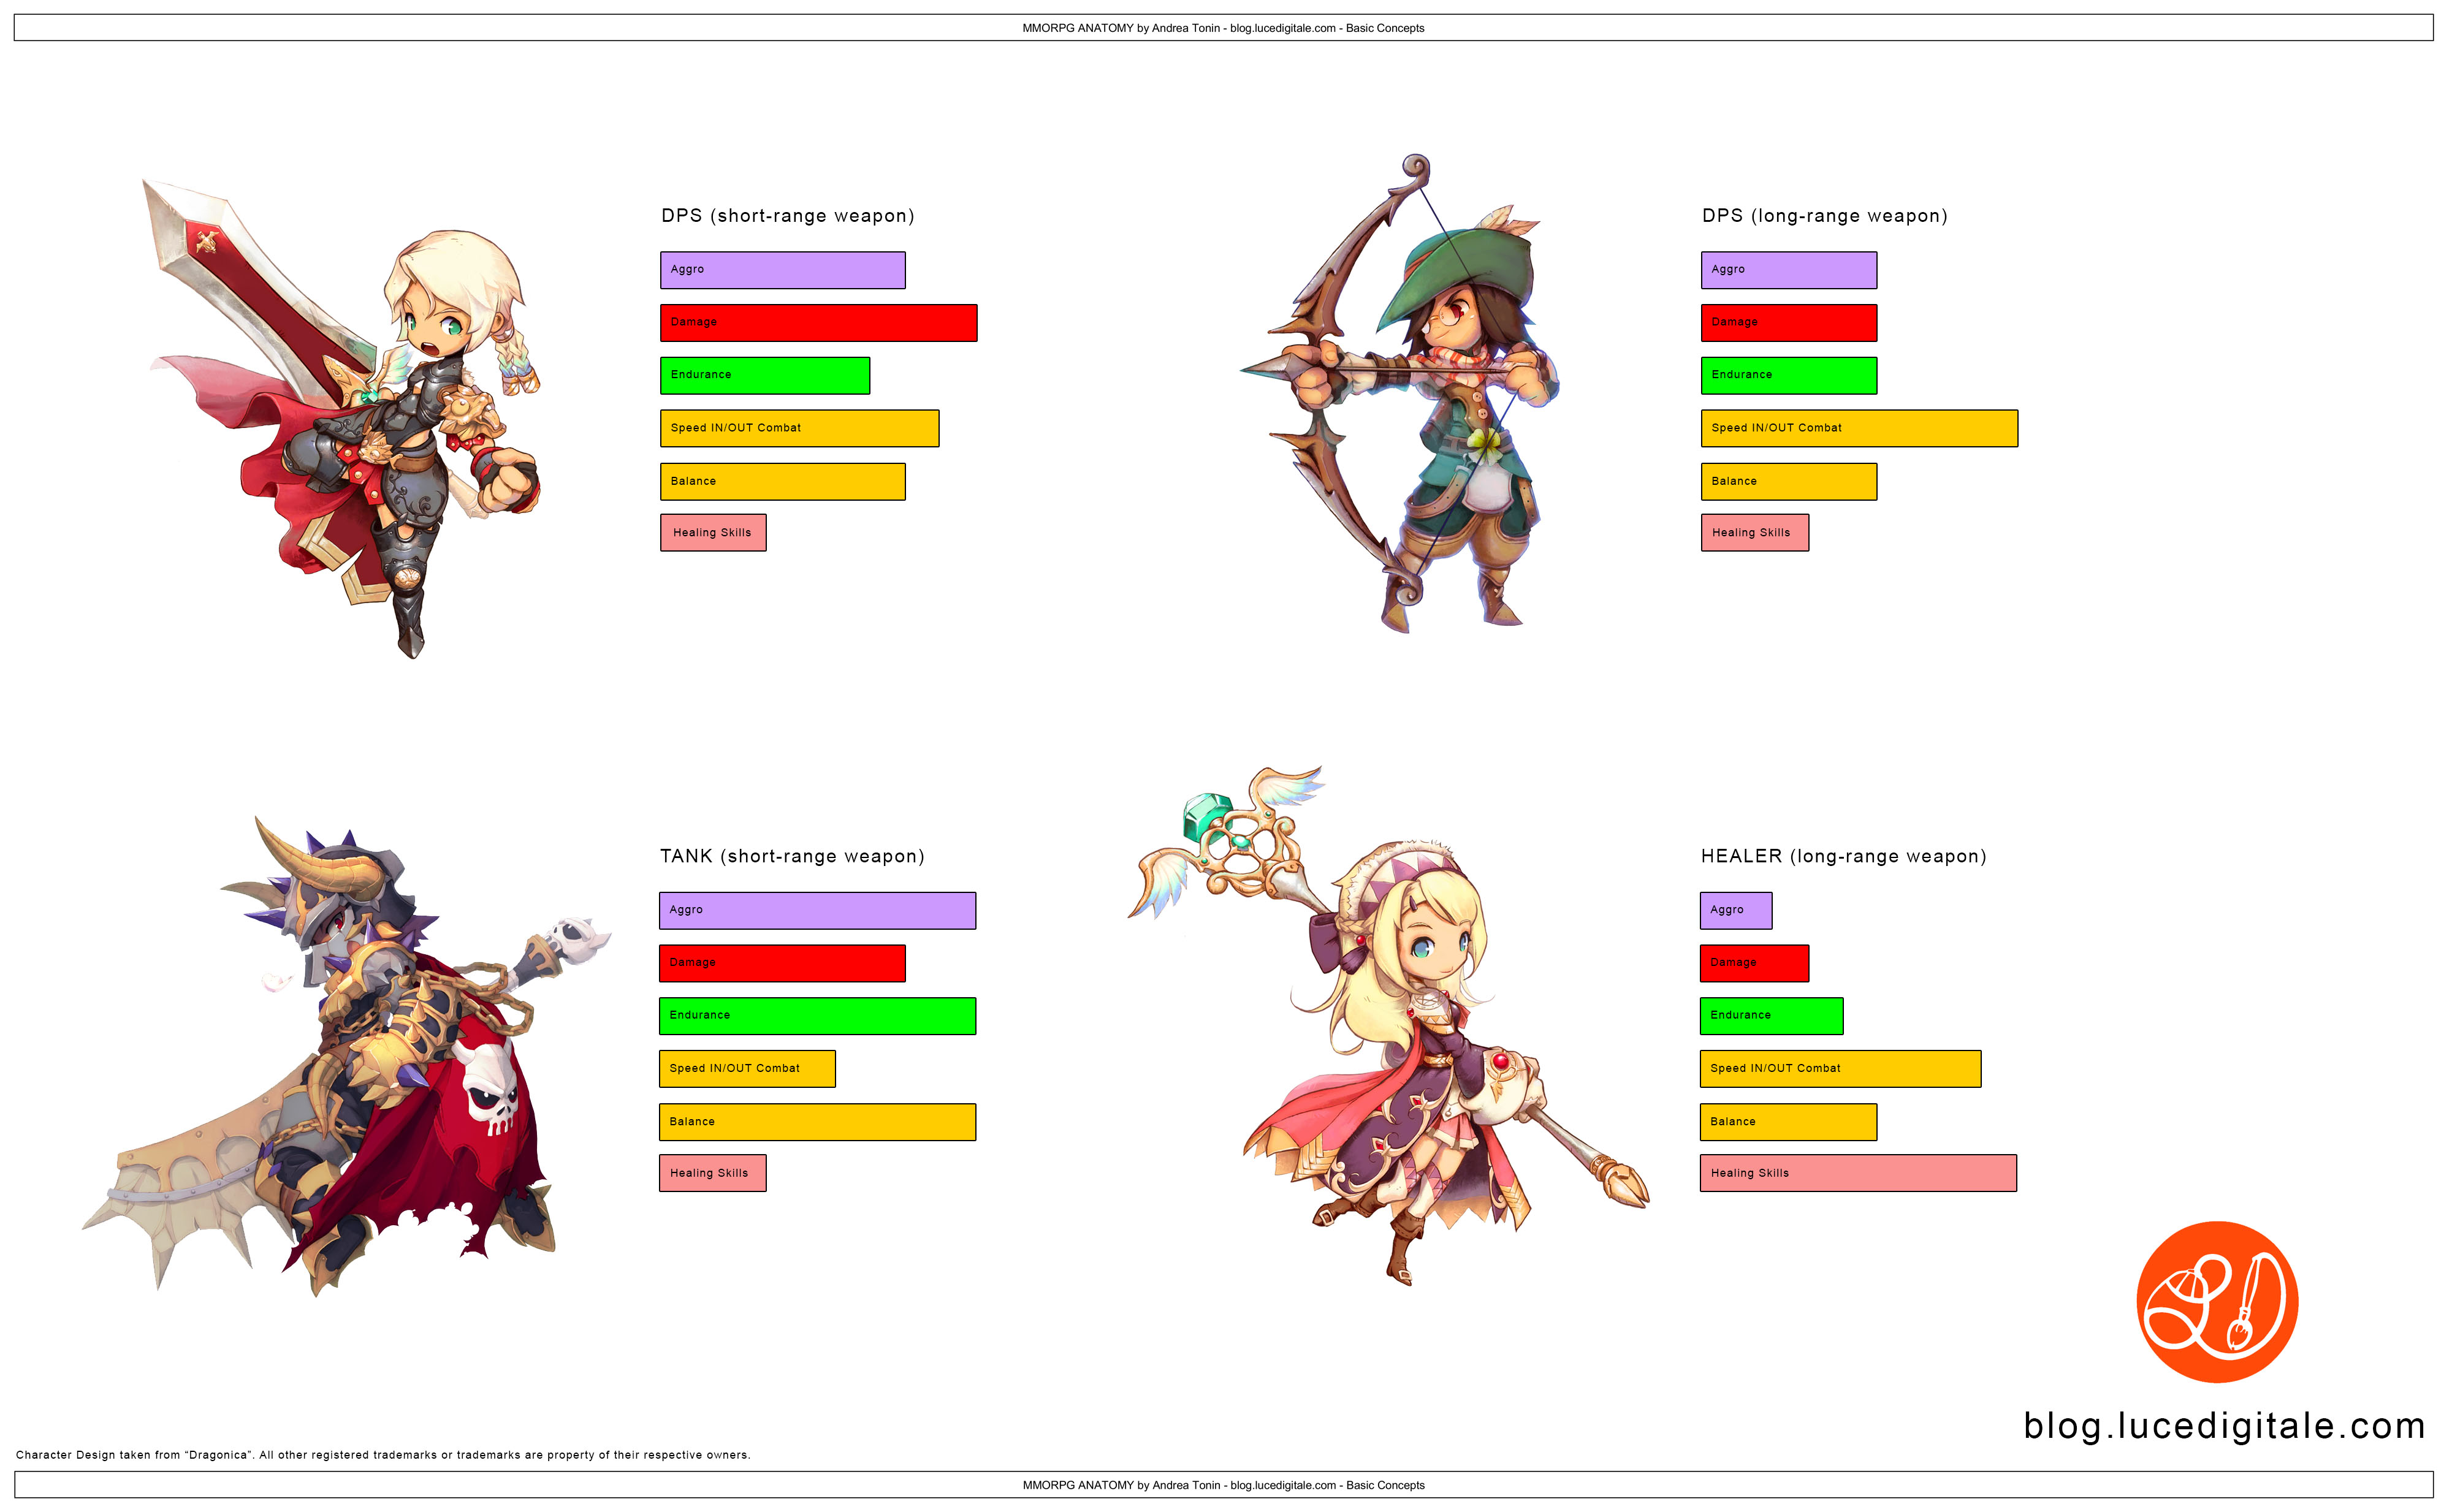
See the table below:

mmorpg-anatomy-by-andrea-tonin-002

I try to explain briefly:

1. DPS with short-range weapon, he deals great damage in a very short time. He has light leather armor, good endurance and good speed.

2. TANK. He wears heavy metal armor, he is slow while in combat but has great endurance. His main task is take aggro from monster and resist to frontal attacks to protect other party members.

3. DPS with long-range weapon, he deals good damage in a very short time. He has light leather armor, less endurance than DPS with melee weapon but he moves faster.

4. (Cute!) HEALER. She wears a cloth tunic, she has low endurance but can heal herself and, very important, others party members. Healer usually has buff and debuff ability.

Ok, these are main classes, after that you can imagine intermediate classes as Bersek, Assasin, Mistic, Gunner, Thief with unique abilities; the only limit is your fantasy! Remember that players like fine tuning and choose between a lot of characters and features!

Cast Time and Cool Down

MMORPG is not a Shoot’em Up, inside the game the player can’t spell 100 fire balls per second! He is not a heavy machine gun :/
We need setup inside our code a Cast Time, a Cool Down and a Skill Energy.
– Every magic/moves use an amount of Skill Energy per second.
– Cast Time is the time you need to spell a magic, or the time you need to lift your heavy sword to blow your foe. Light damage move needs low cast time, hight damage move needs long cast time.
– Cool Down is the wait time you need to repeat a move.

Press the key -> Cast Time counter -> Play Animation / Skill energy consumption -> Cool Down counter -> Press the key … and so on …

When player make a combo of moves he has to discover the better combination considering Damage/Cast Time/Cool Down/Skill Energy needed, it is very funny.
This gameplay rewads at the same time good reflex and tactics, it is like a chess game, but with more action :)

Combat Tactics

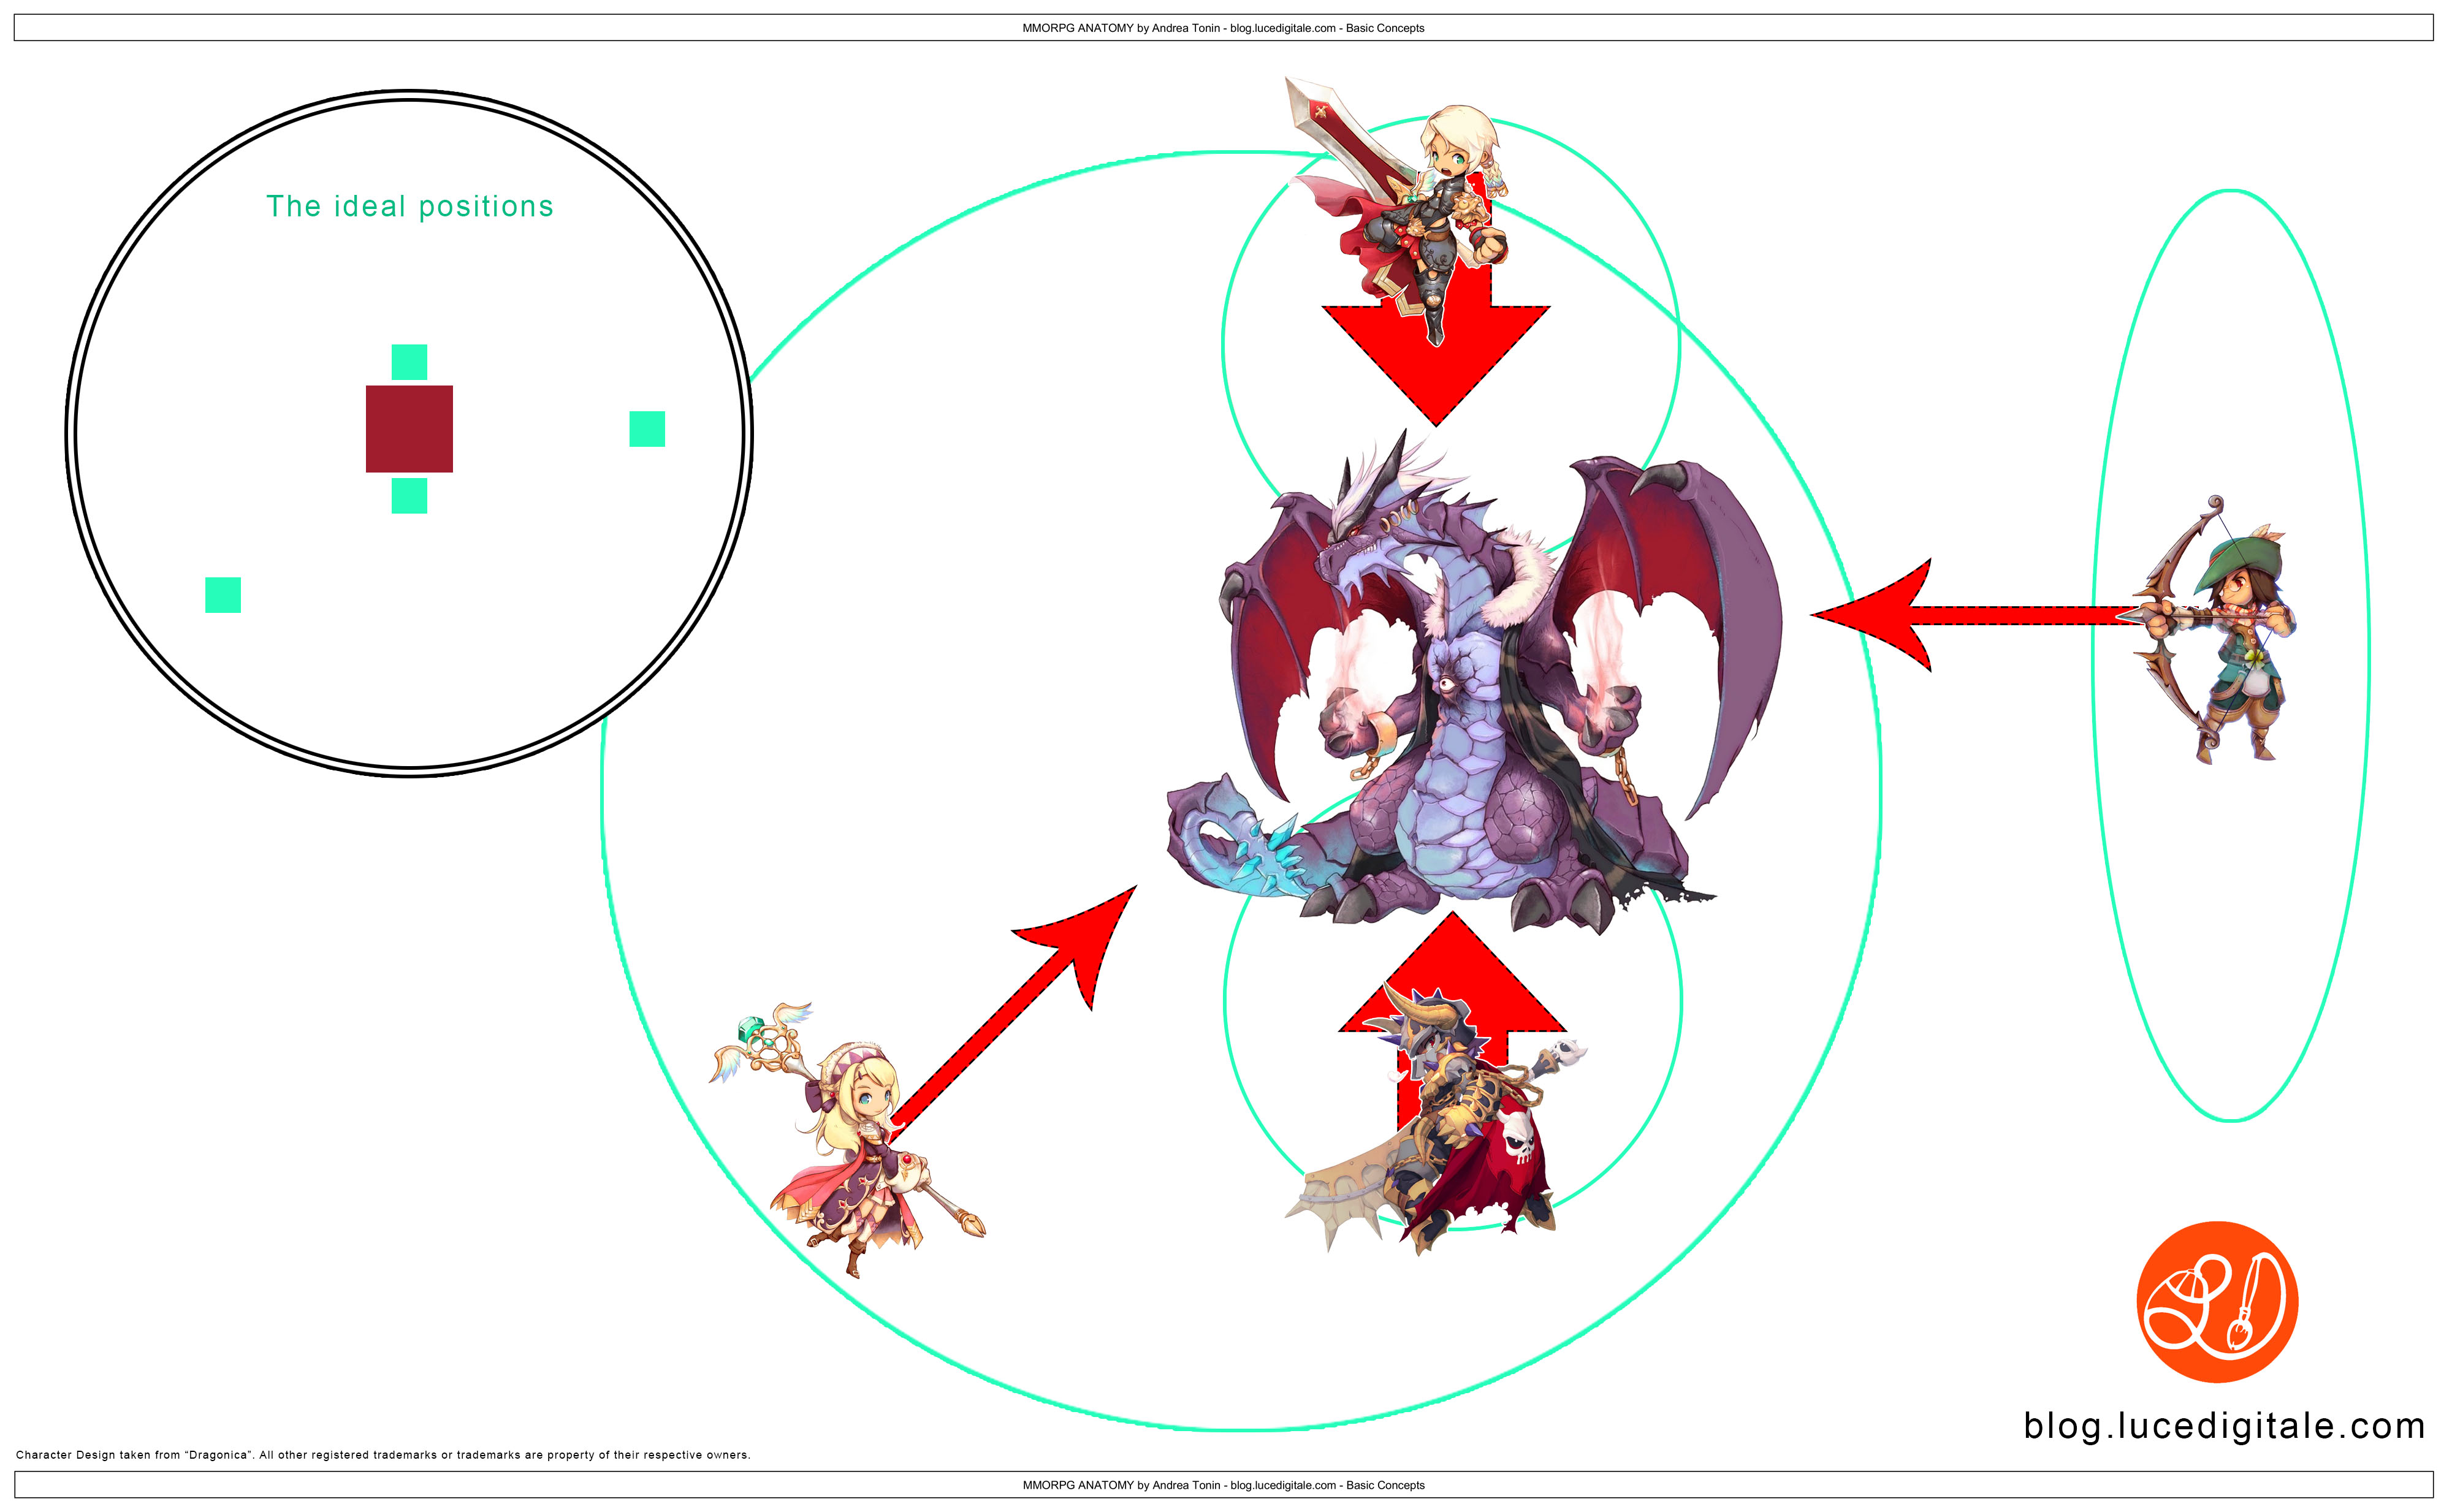
Understand the combact tactics is essential to create the AI for monsters in a MMORPG, you can see a simple example below:

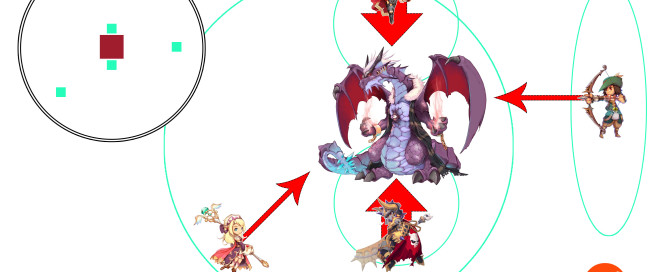
mmorpg-anatomy-by-andrea-tonin-003

1. TANK takes Aggro to protect other party members and deals damage.
2. DPS with short-range weapon deals damage rear of the monster, to avoid frontal attacks.
3. DPS with long-range weapon deals damage far away of the monster, and support HEALER.
4. HEALER run a lot near and far away the monster to support all party members, also in her spare time, deals damage.

It is clear that our monster will need:
– long range attacks
– short range attacks
– global attacks to damage every party member at the same time.
– attacks to damage
– attacks to stun
– attacks to throwdown
– attacks to debuff
– special features

Next Time I will talk about AI for monsters.

Have a nice day

Andrea

Thanks to:
Roberto ‘Drago’ for the useful informations about general mmorpg gameplay
Chicca ‘Coccinella’, my favorite Priest/Healer 😛

By |Video Games Development|Commenti disabilitati su MMORPG Anatomy – Basic Concepts