indiegamedev

Unreal Game Engine – Blueprints – Flashing Light

Unreal Game Engine – Blueprints – Flashing Light

1. LEFT COLUMN> Content Browser> RMB over a Mesh (example Floor_400x400)> Create Blueprint Using…> select your ‘Blueprints’ folder> give it the name (example Floor_400x400_Blueprint)

2. Blueprint window> TOP RIGHT> Components> WHELL MOUSE BUTTON to zoom in/out

3. Blueprint window> MAIN TOP MENU> Window> Components> Add Component> Point Light> move the Point Light over the Mesh

4. Blueprint window> TOP RIGHT> Graph> you can see component on the RIGHT COLUMN: – PointLight1 – StaticMesh1

5. Blueprint window> TOP RIGHT> Graph> RMB over an Empty Area> Add Timeline

6. DOUBLE CLICK Timeline box> Timeline window> Add Float Track

7. Float Track> TOP LEFT> name the track ‘Brightness’

8. Float Track> TOP> Length> 1 second

9. Float Track> RMB over empty area> Add Key: 0 sec->0 / 0.5 sec->5.000 / 1->0

10. Float Track> TOP> check Autoplay and Loop

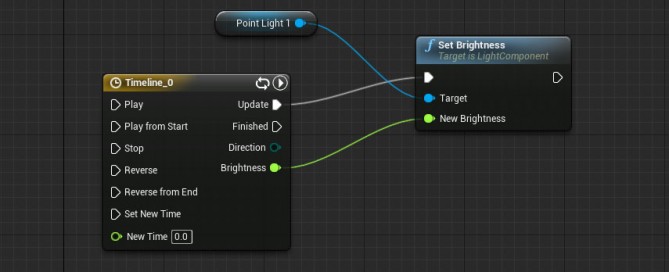
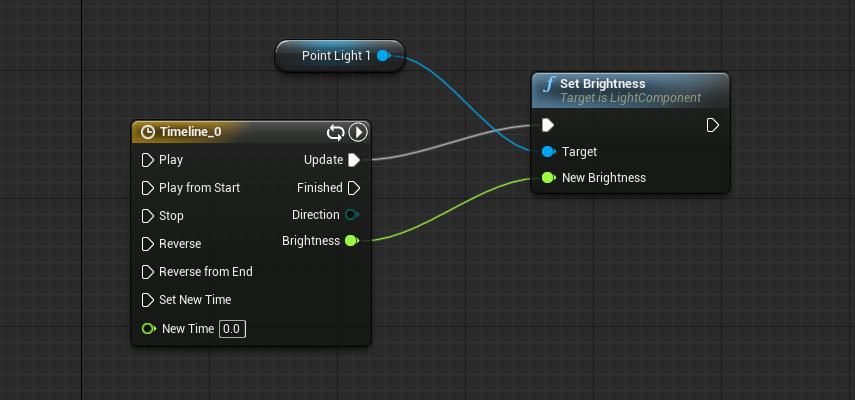
11. Event Graph> RIGHT COLUMN> DRAG AND DROP PointLight1 over an empty area> Get (to add Point Light block)

12. Event Graph> DRAG from Point Light to an empty area> Set Brightness (to add Set Brightness block)

13. Event Graph> DRAG from Timeline>Update to set Brightness>exec

14. Unreal Editor> Content Browser> Blueprint folder> ‘Floor_400x400_Blueprint’ DRAG AND DROP into scene

15. Play
unreal-blueprints-flashing-light

For italian people: come funziona?

1. Timeline>Update —> Set Brighness: esegue un update continuo di Set Brightness ad ogni fotogramma

2. Timeline>Brightness —> New Brighness: fornisce il valore variabile nel tempo Brightness

3. SetBrightness>Target —> Point Light 1: setta la luminosità di Point Light 1

By |Unreal Engine, Video Games Development|Commenti disabilitati su Unreal Game Engine – Blueprints – Flashing Light

Unreal Game Engine – BluePrints – Variables and Datatypes

Unreal Game Engine – BluePrints – Variables and Datatypes

1. LEFT COLUMN> Content Browser> New> Blueprint> Actor> name it ‘MyBlueprint’, double click to open it.

2. MyBlueprint window> LEFT COLUMN> +Variable, nami it ‘MyFirstVar’

3. MyBlueprint window> LEFT COLUMN> Details> Variable Type> select the type between:

– bool : boolean
– byte
– int : integer numbers
– float : floating point numbers
– name
– string : alphanumeric characters
– text
– Vector : XYZ
– Rotator : rotation information
– Transform: translation, rotation, scale

+————-| on the right click over the red ‘Array’ icon to create an array.

4. DRAG AND DROP ‘MyFirstVar’ into EventGraph> Get> now the Variable Type is permanent and it can’t be changed.

By |Unreal Engine, Video Games Development|Commenti disabilitati su Unreal Game Engine – BluePrints – Variables and Datatypes

C++ – For Statement

C++ – For Statement

Working samples:


// countdown using a for loop
#include <iostream>
using namespace std;

int main ()
{
  for (int n=10; n>0; n--) {
    cout << n << ", ";
  }
  cout << "liftoff!\n";
}

The result:

10, 9, 8, 7, 6, 5, 4, 3, 2, 1, liftoff!


// break loop example
#include <iostream>
using namespace std;

int main ()
{
  for (int n=10; n>0; n--)
  {
    cout << n << ", ";
    if (n==3)
    {
      cout << "countdown aborted!";
      break;
    }
  }
}

The result:
10, 9, 8, 7, 6, 5, 4, 3, countdown aborted!


// continue loop example
#include <iostream>
using namespace std;

int main ()
{
  for (int n=10; n>0; n--) {
    if (n==5) continue;
    cout << n << ", ";
  }
  cout << "liftoff!\n";
}

The result:
10, 9, 8, 7, 6, 4, 3, 2, 1, liftoff!

By |C++, Video Games Development|Commenti disabilitati su C++ – For Statement

C++ – If Statement

C++ – If Statement

if (x == 100)
  cout << "x is 100";
...
if (x == 100) { cout << "x is "; cout << x; }
...
if (x == 100)
  cout << "x is 100";
else
  cout << "x is not 100";
...
if (x > 0)
  cout << "x is positive";
else if (x < 0)
  cout << "x is negative";
else
  cout << "x is 0";
...

Working sample:


#include <iostream>
using namespace std;

int main ()
{
int x = 3;

if (x > 0)
  cout << "x is positive";
else if (x < 0)
  cout << "x is negative";
else
  cout << "x is 0";
return 0;
}

By |C++, Video Games Development|Commenti disabilitati su C++ – If Statement

C++ – Basic Input Output

C++ – Basic Input Output

C++ uses a convenient abstraction called streams to perform input and output operations in sequential media such as the screen, the keyboard or a file.
The standard library defines:

cin standard input stream
cout standard output stream

Sample


// i/o example

#include <iostream>
using namespace std;

int main ()
{
  int i;
  // character output
  cout << "Please enter an integer value: ";
  // character input is stored in variable
  cin >> i;
  cout << "The value you entered is " << i;
  cout << " and its double is " << i*2 << ".\n";
  return 0;
}

The result is:
Please enter an integer value: 702
The value you entered is 702 and its double is 1404.

By |C++, Video Games Development|Commenti disabilitati su C++ – Basic Input Output