unity3d

Unity 3D Game Engine – JavaScripts – Statics

Unity 3D Game Engine – JavaScripts – Statics

Solitamente se una stessa variabile si trova all’interno di classi diverse, questa assume valori diversi per ogni classe.
Se una variabile è statica invece ha avrà lo stesso valore anche se appartiene a classi differenti.
Cambiare il valore di una variabile statica all’interno di una classe equivale a cambiarne il valore all’interno di tutte le altre classi.

Vediamo un esempio

Enemy


#pragma strict

public class Enemy
{
    //Static variables are shared across all instances
    //of a class.
    public static var enemyCount : int = 0;
    
    function Enemy()
    {
        //Increment the static variable to know how many
        //objects of this class have been created.
        enemyCount++;
    }
}

Game


#pragma strict

public class Game
{
    function Start () 
    {
        var enemy1 = new Enemy();
        var enemy2 = new Enemy();
        var enemy3 = new Enemy();
        
        //You can access a static variable by using the class name
        //and the dot operator.
        var x : int = Enemy.enemyCount;
    }
}

Player


#pragma strict

public class Player extends MonoBehaviour 
{
    //Static variables are shared across all instances
    //of a class. 
    public static var playerCount : int = 0;
    
    function Start()
    {
        //Increment the static variable to know how many
        //objects of this class have been created.
        playerCount++;
    }
}

PlayerManager


#pragma strict

function Start () 
{
    //You can access a static variable by using the class name
    //and the dot operator.
    var x : int = Player.playerCount;
}

Come funziona?

1. Enemy
– definisco una classe pubblica ‘Enemy’ perchè sia accessibile da qualunque script
– definisco una variabile statica ‘enemyCount’
– incremento di +1 ‘enemyCount’

2. Game
– definisco una classe pubblica ‘Game’
– all’inizio del gioco si avvia la funziona Start(), ogni variabile enemy1-2-3 avvia l’incremento del conteggio
– accedo alla variabile statica semplicemente con var x : int = Enemy.enemyCount; -> nomeclasse.nomevariabilestatica

3. Player
Funziona come Enemy definisce la variabile statica playerCount, poi la incrementa playerCount++

4. PlayerManager
– accedo alla variabile statica semplicemente con var x : int = Player.playerCount; -> nomeclasse.nomevariabilestatica

5. Utilities

Altri esempi

Utilities


#pragma strict

public static class Utilities 
{
    //A static method can be invoked without an object
    //of a class. Note that static methods cannot access
    //non-static member variables
    public static function Add(num1 : int, num2 : int) : int
    {
        return num1 + num2;
    }
}

UtilitiesExample


#pragma strict

function Start () 
{
    //You can access a static method by using the class name
    //and the dot operator.
    var x : int = Utilities.Add (5, 6);
}

Come funziona?

1. Utilities
– definisce una funzione statica

2. tilitiesExample
– spedisce i valori 5,6 alla classe pubblica statica Utilities.funzionepubblicastatica -> ritorna la somma 5+6 -> X = 11


By |Unity3D, Video Games Development|Commenti disabilitati su Unity 3D Game Engine – JavaScripts – Statics

Unity 3D Game Engine – JavaScript – Properties

Unity 3D Game Engine – JavaScript – Properties

Una pratica comune consiste nel poter accedere ad una variabile definita in una classe pubblica esterna.
Per fare questo si può creare una variabile pubblica – public – ed accedervi direttamente, ma c’è un sistema migliore, usare le – Properties –
Incapsulare i dati tramite le Properties fornisce un maggiore controllo sulla struttura del codice.

Vediamo il codice:

Player.js, applicato al Player


#pragma strict

public class Player
{
    //Member variables can be referred to as
    //fields.
    //definisco la variabile
    var experience : int;
    
    //Experience is a basic property
    //Experience è la proprietà di base
    // Chiamo la proprietà con il nome della variabile, con la lettera maiuscola
    public function get Experience() : int
    {
	// altro codice aggiuntivo per fare altre operazioni
        return experience;
    }
    
    public function set Experience(value : int)
    {
	// altro codice aggiuntivo per fare altre operazioni
        experience = value;
    }
    
    //Level is a property that converts experience
    //points into the leve of a player automatically
    public function get Level() : int
    {
        return experience / 1000; // il livello è uguale experience/1000
    }
    
    public function set Level(value : int)
    {
        experience = value * 1000;
    }
    
    //Auto-implemented properties are not a feature of the
    //Javascript language.
}

Game.js, applicato ad un Empty Object


#pragma strict

function Start () 
{
    var myPlayer = new Player();
    
    //Properties can be used just like variables
    myPlayer.Experience = 5;
    var x : int = myPlayer.Experience;
    
    print(x);
}

Come funziona?

Game.js:

1. Al caricamento del gioco si avvia la funziona Start() prima du qualunque altra funzione

2. Uso la classe pubblica Player() come una variabile e la dichiaro – var myPlayer = new Player(); –

3. La Proprietà della classe pubblica Player().Experience ha un valore iniziale di 5, poi varierà il suo valore in base alle operazioni eseguite all’interno di essa

4. Visualizzo – print – in valore della Proprietà .Experience

Player.js

1. Definisco una classe pubblica Player(), pubblica significa che posso accedere ai valori delle sue proprietà da qualsiasi script all’interno del gioco!

Definisco la variabile integer experience, che cambia in base ai bonus raccolti, le ore di gioco etc…, con operazioni che ora non adiamo a definire, ci basti sapere che varia durante il gioco.

2. All’interno della classe Player() c’è la proprietà Experiance() (Notare che per convenzione si utilizza il nome della variabile scritta in minuscolo, e quello della Proprietà con lo stesso nome ma con l’iniziale in Maiuscolo) che restituisce in uscita – return – il valore della variabile experiance:


public function get Experience() : int
    {
        return experience;
    }

3. La proprietà Experiance() setta il valore – value – integer della Proprietà uguale al valore della variabile experience

in:


  public function set Experience(value : int)
    {
        experience = value;
    }

experience = value; -> il valore in uscita della proprietà Experiance (value : int) è uguale alla variabile experiance.
value è una keyword!!!

4. Altre considerazioni:
all’interno delle 2 funzioni che compongono una Proprietà (set + get -> return) si possono applicare delle operazioni matematiche come ad esempio:


 public function get Level() : int
    {
        return experience / 1000;
    }
    
    public function set Level(value : int)
    {
        experience = value * 1000;
    }

se volessi richiamare questi valori da Game.js scriverei:


#pragma strict

function Start () 
{
    var myPlayer = new Player();
    
    //Properties can be used just like variables
    myPlayer.Level = 1;
    var y : int = myPlayer.Level;
    
    print(y);
}

By |Unity3D, Video Games Development|Commenti disabilitati su Unity 3D Game Engine – JavaScript – Properties

Unity 3D Game Engine – JavaScript – Ternary Operator

Unity 3D Game Engine – JavaScript – Ternary Operator

Ternary Operator è una forma condensata di una dichiarazione – if –

Ad esempio:


#pragma strict

function Start () 
{
    var health : int = 10;
    var message : String;
        
    //This is an example Ternary Operation that chooses a message based
    //on the variable "health".
    // variabile = Booleano ? SE VERO : SE FALSO
    message = health > 0 ? "Player is Alive" : "Player is Dead";
}

Notare:


// variabile = Booleano ? SE VERO : SE FALSO
message = health > 0 ? "Player is Alive" : "Player is Dead";

La variabile ‘message’ sarà = Player is Alive se è VERO che health > 0
La variabile ‘message’ sarà = Player is Dead se è FALSO che health > 0

By |Unity3D, Video Games Development|Commenti disabilitati su Unity 3D Game Engine – JavaScript – Ternary Operator

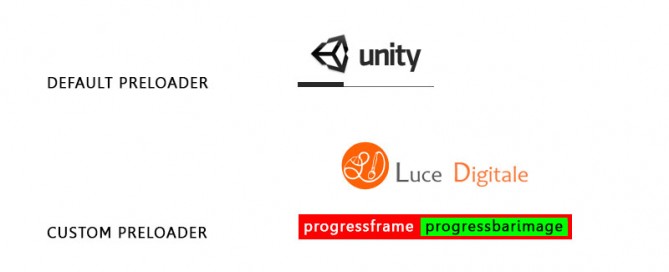
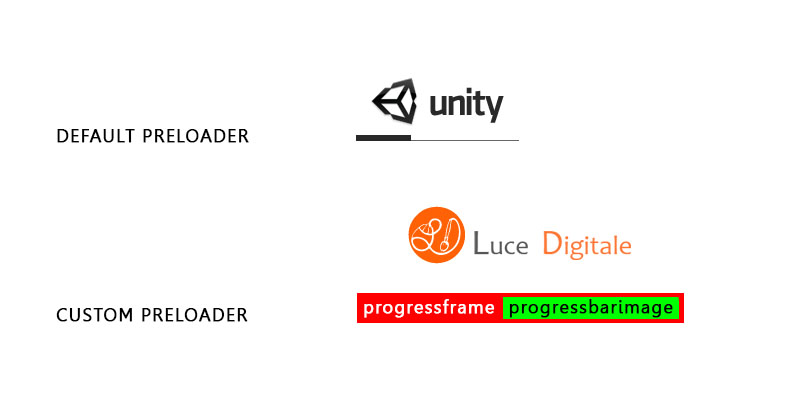
Unity 3D Game Engine 4.x – Custom Web Player Preload

Unity 3D Game Engine 4.x – Custom Web Player Preload

unity3d-custom-preloader

Inside your Build folder you have:

– space_shooter.html
– space_shooter.unity3d

Copy here:

– MyLogo.png
– MyProgressBar.png
– MyProgressFrame.png

MyLogo
MyProgressBar
MyProgressFrame

Open space_shooter.html and add:

// Customizing the Unity Web Player START
// Copy png images in the same folder of this html and .unity3d file
var params = {
        backgroundcolor: "A0A0A0",
        bordercolor: "000000",
	textcolor: "FFFFFF",
	logoimage: "MyLogo.png",
	progressbarimage: "MyProgressBar.png",
	progressframeimage: "MyProgressFrame.png"
	};
// Customizing the Unity Web Player END

Remove…

var u = new UnityObject2(config);

… and replace with:

var u = new UnityObject2({ params: params });			

How does it work?
Easy! It create an array of parameters – var params = … – and pass them to UnityObject2 constructor.

Complete Code sample:

DEFAULT PLAYER:


<!DOCTYPE html PUBLIC "-//W3C//DTD XHTML 1.0 Strict//EN" "http://www.w3.org/TR/xhtml1/DTD/xhtml1-strict.dtd">
<html xmlns="http://www.w3.org/1999/xhtml">
	<head>
		<meta http-equiv="Content-Type" content="text/html; charset=utf-8">
		<title>Luce Digitale | Space Shooter</title>
		<script type='text/javascript' src='https://ssl-webplayer.unity3d.com/download_webplayer-3.x/3.0/uo/jquery.min.js'></script>
		<script type="text/javascript">
		<!--
		var unityObjectUrl = "http://webplayer.unity3d.com/download_webplayer-3.x/3.0/uo/UnityObject2.js";
		if (document.location.protocol == 'https:')
			unityObjectUrl = unityObjectUrl.replace("http://", "https://ssl-");
		document.write('<script type="text\/javascript" src="' + unityObjectUrl + '"><\/script>');
		-->
		</script>
		<script type="text/javascript">
		<!--
			var config = {
				width: 600, 
				height: 900,
				params: { enableDebugging:"0" }
				
			};
			var u = new UnityObject2(config);

			jQuery(function() {

				var $missingScreen = jQuery("#unityPlayer").find(".missing");
				var $brokenScreen = jQuery("#unityPlayer").find(".broken");
				$missingScreen.hide();
				$brokenScreen.hide();
				
				u.observeProgress(function (progress) {
					switch(progress.pluginStatus) {
						case "broken":
							$brokenScreen.find("a").click(function (e) {
								e.stopPropagation();
								e.preventDefault();
								u.installPlugin();
								return false;
							});
							$brokenScreen.show();
						break;
						case "missing":
							$missingScreen.find("a").click(function (e) {
								e.stopPropagation();
								e.preventDefault();
								u.installPlugin();
								return false;
							});
							$missingScreen.show();
						break;
						case "installed":
							$missingScreen.remove();
						break;
						case "first":
						break;
					}
				});
				u.initPlugin(jQuery("#unityPlayer")[0], "space_shooter.unity3d");
			});
		-->
		</script>
		<style type="text/css">
		<!--
		body {
			font-family: Helvetica, Verdana, Arial, sans-serif;
			background-color: white;
			color: black;
			text-align: center;
		}
		a:link, a:visited {
			color: #000;
		}
		a:active, a:hover {
			color: #666;
		}
		p.header {
			font-size: small;
		}
		p.header span {
			font-weight: bold;
		}
		p.footer {
			font-size: x-small;
		}
		div.content {
			margin: auto;
			width: 600px;
		}
		div.broken,
		div.missing {
			margin: auto;
			position: relative;
			top: 50%;
			width: 193px;
		}
		div.broken a,
		div.missing a {
			height: 63px;
			position: relative;
			top: -31px;
		}
		div.broken img,
		div.missing img {
			border-width: 0px;
		}
		div.broken {
			display: none;
		}
		div#unityPlayer {
			cursor: default;
			height: 900px;
			width: 600px;
		}
		-->
		</style>
	</head>
	<body>
		<p class="header"><span>Se è la prima volta che si gioca | </span>Installare il plugin richiesto, chiudere e riavviare il browser</p>
		<div class="content">
			<div id="unityPlayer">
				<div class="missing">
					<a href="http://unity3d.com/webplayer/" title="Unity Web Player. Install now!">
						<img alt="Unity Web Player. Install now!" src="http://webplayer.unity3d.com/installation/getunity.png" width="193" height="63" />
					</a>
				</div>
				<div class="broken">
					<a href="http://unity3d.com/webplayer/" title="Unity Web Player. Install now! Restart your browser after install.">
						<img alt="Unity Web Player. Install now! Restart your browser after install." src="http://webplayer.unity3d.com/installation/getunityrestart.png" width="193" height="63" />
					</a>
				</div>
			</div>
		</div>
		<p class="footer">&laquo; avaiable on <a href="http://www.lucedigitale.com" title="Luce Digitale">www.lucedigitale.com</a> &raquo;</p>
		</body>
</html>

CUSTOM PLAYER:


<!DOCTYPE html PUBLIC "-//W3C//DTD XHTML 1.0 Strict//EN" "http://www.w3.org/TR/xhtml1/DTD/xhtml1-strict.dtd">
<html xmlns="http://www.w3.org/1999/xhtml">
	<head>
		<meta http-equiv="Content-Type" content="text/html; charset=utf-8">
		<title>Luce Digitale | Space Shooter</title>
		<script type='text/javascript' src='https://ssl-webplayer.unity3d.com/download_webplayer-3.x/3.0/uo/jquery.min.js'></script>
		<script type="text/javascript">
		<!--
		var unityObjectUrl = "http://webplayer.unity3d.com/download_webplayer-3.x/3.0/uo/UnityObject2.js";
		if (document.location.protocol == 'https:')
			unityObjectUrl = unityObjectUrl.replace("http://", "https://ssl-");
		document.write('<script type="text\/javascript" src="' + unityObjectUrl + '"><\/script>');
		-->
		</script>
		<script type="text/javascript">
		// Customizing the Unity Web Player START
		// Copy png images in the same folder of this html and .unity3d file
		var params = {
			backgroundcolor: "A0A0A0",
			bordercolor: "000000",
			textcolor: "FFFFFF",
			logoimage: "MyLogo.png",
			progressbarimage: "MyProgressBar.png",
			progressframeimage: "MyProgressFrame.png"
		};
		// Customizing the Unity Web Player END
		<!--
			var config = {
				width: 600, 
				height: 900,
				params: { enableDebugging:"0" }
				
			};
			// Remove default settings -> var u = new UnityObject2(config);
			// Replace with custom settings START
			var u = new UnityObject2({ params: params });
			// Replace with custom settings END

			jQuery(function() {

				var $missingScreen = jQuery("#unityPlayer").find(".missing");
				var $brokenScreen = jQuery("#unityPlayer").find(".broken");
				$missingScreen.hide();
				$brokenScreen.hide();
				
				u.observeProgress(function (progress) {
					switch(progress.pluginStatus) {
						case "broken":
							$brokenScreen.find("a").click(function (e) {
								e.stopPropagation();
								e.preventDefault();
								u.installPlugin();
								return false;
							});
							$brokenScreen.show();
						break;
						case "missing":
							$missingScreen.find("a").click(function (e) {
								e.stopPropagation();
								e.preventDefault();
								u.installPlugin();
								return false;
							});
							$missingScreen.show();
						break;
						case "installed":
							$missingScreen.remove();
						break;
						case "first":
						break;
					}
				});
				u.initPlugin(jQuery("#unityPlayer")[0], "space_shooter.unity3d");
			});
		-->
		</script>
		<style type="text/css">
		<!--
		body {
			font-family: Helvetica, Verdana, Arial, sans-serif;
			background-color: white;
			color: black;
			text-align: center;
		}
		a:link, a:visited {
			color: #000;
		}
		a:active, a:hover {
			color: #666;
		}
		p.header {
			font-size: small;
		}
		p.header span {
			font-weight: bold;
		}
		p.footer {
			font-size: x-small;
		}
		div.content {
			margin: auto;
			width: 600px;
		}
		div.broken,
		div.missing {
			margin: auto;
			position: relative;
			top: 50%;
			width: 193px;
		}
		div.broken a,
		div.missing a {
			height: 63px;
			position: relative;
			top: -31px;
		}
		div.broken img,
		div.missing img {
			border-width: 0px;
		}
		div.broken {
			display: none;
		}
		div#unityPlayer {
			cursor: default;
			height: 900px;
			width: 600px;
		}
		-->
		</style>
	</head>
	<body>
		<p class="header"><span>Se è la prima volta che si gioca | </span>Installare il plugin richiesto, chiudere e riavviare il browser</p>
		<div class="content">
			<div id="unityPlayer">
				<div class="missing">
					<a href="http://unity3d.com/webplayer/" title="Unity Web Player. Install now!">
						<img alt="Unity Web Player. Install now!" src="http://webplayer.unity3d.com/installation/getunity.png" width="193" height="63" />
					</a>
				</div>
				<div class="broken">
					<a href="http://unity3d.com/webplayer/" title="Unity Web Player. Install now! Restart your browser after install.">
						<img alt="Unity Web Player. Install now! Restart your browser after install." src="http://webplayer.unity3d.com/installation/getunityrestart.png" width="193" height="63" />
					</a>
				</div>
			</div>
		</div>
		<p class="footer">&laquo; avaiable on <a href="http://www.lucedigitale.com" title="Luce Digitale">www.lucedigitale.com</a> &raquo;</p>
		</body>
</html>

By |Unity3D, Video Games Development|Commenti disabilitati su Unity 3D Game Engine 4.x – Custom Web Player Preload

Unity 3D – Game Engine – Responsive and Adaptive Apps

Unity 3D – Game Engine – Responsive and Adaptive Apps

Responsive Web Design (RWD) is a Apps design approach aimed at crafting sites to provide an optimal viewing experience—easy reading and navigation with a minimum of resizing, panning, and scrolling—across a wide range of devices (from mobile phones to desktop computer monitors)

Basics Screen.width and Screen.height

Inside Hierarchy create:

– Main Camera
– GUI Text
– GUI Texture> Inspector> W=200(width pix) H=200(height pix), attach ‘Adaptive.js’

Adaptive.js


#pragma strict

// Hierarchy DRAG E DROP over var GUI Text in Inspector
var scoreTextX : GUIText;
private var screenres  : String;

function Update () {   
        // it will check resolution every frame 
        screenres = Screen.width + " " + Screen.height;                            
        scoreTextX.text = "Screen width & height (pix) "+ screenres;
        }

Hierarchy> GUI Texture> Adaptive.js DRAG AND DROP over public var ‘scoreTextX’ the ‘GUI Text’ game object.

The result on my Samsung SmartPhone (Landscape) is: Screen width & height (pix) 800 480

GUI Texture – Full Screen

Adaptive.js


#pragma strict

// Hierarchy DRAG E DROP over var GUI Text in Inspector
var scoreTextX : GUIText;
private var screenres  : String;

function Update () {   
        // it will check resolution every frame 
        screenres = Screen.width + " " + Screen.height;                            
        scoreTextX.text = "Screen width & height (pix) "+ screenres;
        // Move the object to (0, 0, 0)
	transform.position = Vector3(0, 0, 0); // equal than Inspector> Position X=0 Y=0 Z=0
        guiTexture.pixelInset = new Rect(0f, 0f, Screen.width, Screen.height); // equal than Inspector> W=800 H=480
        }

Notice:
Position X=0 Y=0 Z=0
Inspector> W=800 H=480

GUI Texture – Half Left Screen

Adaptive.js


#pragma strict

// Hierarchy DRAG E DROP over var GUI Text in Inspector
var scoreTextX : GUIText;
private var screenres  : String;

function Update () {   
        // it will check resolution every frame 
        screenres = Screen.width + " " + Screen.height;                            
        scoreTextX.text = "Screen width & height (pix) "+ screenres;
        // Move the object to (0, 0, 0)
	transform.position = Vector3(0, 0, 0);
        guiTexture.pixelInset = new Rect(0f, 0f, Screen.width*0.5, Screen.height);
        }


GUI Texture – Half Right Screen

Adaptive.js


#pragma strict

// Hierarchy DRAG E DROP over var GUI Text in Inspector
var scoreTextX : GUIText;
private var screenres  : String;

function Update () {   
        // it will check resolution every frame 
        screenres = Screen.width + " " + Screen.height;                            
        scoreTextX.text = "Screen width & height (pix) "+ screenres;
        // Move the object 
	transform.position = Vector3(0.5, 0, 0);
        guiTexture.pixelInset = new Rect(0f, 0f, Screen.width*0.5, Screen.height);
        }


GUI Texture – Square – bottom left


#pragma strict

// Hierarchy DRAG E DROP over var GUI Text in Inspector
var scoreTextX : GUIText;
private var screenres  : String;

function Update () {   
        // it will check resolution every frame 
        screenres = Screen.width + " " + Screen.height;                            
        scoreTextX.text = "Screen width & height (pix) "+ screenres;
        // Move the object, these values are fronm 0 to 1 
	transform.position = Vector3(0, 0, 0);
	// Create a square based on Screen.height*0.5 (half of screen height)
        guiTexture.pixelInset = new Rect(0f, 0f, Screen.height*0.5, Screen.height*0.5);
        }

GUI Texture – Square – top left


#pragma strict

// Hierarchy DRAG E DROP over var GUI Text in Inspector
var scoreTextX : GUIText;
private var screenres  : String;

function Update () {   
        // it will check resolution every frame 
        screenres = Screen.width + " " + Screen.height;                            
        scoreTextX.text = "Screen width & height (pix) "+ screenres;
        // Move the object, these values are fronm 0 to 1 
	transform.position = Vector3(0, 0.5, 0);
	// Create a square based on Screen.height*0.5 (half of screen height)
        guiTexture.pixelInset = new Rect(0f, 0f, Screen.height*0.5, Screen.height*0.5);
        }


GUI Texture – Square – center


#pragma strict

// Hierarchy DRAG E DROP over var GUI Text in Inspector
var scoreTextX : GUIText;
private var screenres  : String;

private var btnWidth : int;
private var btnHeight : int;
private var insetX : int;
private var insetY : int;

function Update () {   
        // debug code - it will check resolution every frame 
        screenres = Screen.width + " " + Screen.height;                            
        scoreTextX.text = "Screen width & height(pix) "+ screenres;
        
        // texture size is based on display resolution (pixel)
        btnWidth  = Screen.height*0.5;
        btnHeight = Screen.height*0.5; // if you want change aspect ratio here
        
        // calcolate inset (pixel)
        insetX = -1*(btnWidth/2); // we need negative value (pixel)
        insetY = -1*(btnHeight/2);
        
        // center position X Y (Z is used to create layers of textures (values from 0 to 1)
	transform.position = Vector3(0.5, 0.5, 0);
	// GUI Texture responsive size and position
        guiTexture.pixelInset = new Rect(insetX, insetY, btnWidth, btnHeight);
        }

By |Unity3D, Video Games Development|Commenti disabilitati su Unity 3D – Game Engine – Responsive and Adaptive Apps